
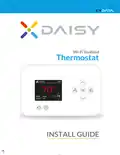
CYDATA DAISY Wi-Fi Enabled Thermostat Installation Guide


®
TherWmi-Foi Esntabaletd
3:37 PM
30%
Set
Heat Auto
Mode Fan
78
INSTALL GUIDE


| General | Details |
|---|---|
| Name | CYDATA DAISY Wi-Fi Enabled Thermostat Installation Guide |
| Make | CYDATA |
| Language | English |
| Filetype | PDF (Download) |
| File size | 0.37 MB |
 (1 votes, average: 5.00 out of 5)
 Loading...

CYDATA CY917B Daisy Wi-Fi Thermostat User Guide

Cydata DAISY Manual: Questions and Answers
Can Cydata DAISY work with 120/240 volt baseboard electric heat systems?
No. Cydata DAISY works only with common 24 volt systems, not millivolt or 120/240 volt systems like baseboard electric heat. Installation Guide, p. 2
What do the C, Y, W and R terminals on Cydata DAISY connect to?
Match wire tags to terminal labels on the thermostat.
| Terminal | Purpose |
|---|---|
| C | Common wire |
| Y | Air conditioning |
| W | Heat |
| R | Power |
What's the minimum outside temperature for running Cydata DAISY air conditioning?
50˚F (10˚C). Running the air conditioner below this temperature risks compressor damage. Installation Guide, p. 2
How do I wire Cydata DAISY to the terminals?
Use the included tags to label wires, then connect them to matching terminal labels.
- Start with the C wire and match its tag to the C terminal label.
- Loosen the terminal screw.
- Insert the wire on the inside edge of the terminal.
- Tighten the screw.
- Give the wire a gentle tug to confirm it's secure.
- Repeat for all remaining wires, then push excess wire back into the wall opening. Installation Guide, p. 4
How do I set up Cydata DAISY after wiring?
After attaching the thermostat to the wallplate and switching the HVAC system on, refer to the User Guide for setup instructions. Installation Guide, p. 3

industrie technik TF Frost Protection Thermostat Instruction Manual

THE HEATING COMPANY Slim and Compact WiFi Thermostat User Manual

Schneider SpaceLogic Thermostat Installation Guide
ring Homeowner’s Pro Smart Thermostat User Manual

EPH CONTROLS CMF Room Frost Thermostat Instruction Manual

ENSTO ECO10BTW-J Heat Control Thermostat Instruction Manual

BHT-001Series Round Thermostat User Guide

QH Basic Quality Heating CV Clock Thermostat Instruction Manual

VIMAR 30810.x-02973 Smart Home View Wireless Connected Dial Thermostat Instruction Manual

Amber DT-two Programmable Thermostat User Guide