
Home > EUROTRONIC > EUROTRONIC Programmable Energy-Saving Radiator Thermostat User Manual
EUROTRONIC Programmable Energy-Saving Radiator Thermostat User Manual
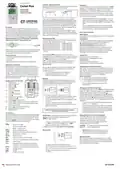


User manual
Inserting / replacing batteries
Remove the battery lid by pressing the battery lid upwards (1) at
the highlighted point and then taking it out (2).
Adaptation
Comet Plus
OK
Initial installation: Press the button
and wait until
appears on the display so that Comet Plus will be able to start
its adaptation. The device will adapt itself to the stroke of
your valve body. To do this the valve will now be opened and
closed several times to store the end points. In some cases
this process can take a few minutes. After successful adapta-
tion it returns to normal mode.
programmable
energy-saving
(1)
(2)
radiator thermostat
-
Should adaptation become necessary again, e.g. if your
Then insert the batteries as represented in the appliance.
Do not use accumulators! Ensure that the polarity is cor-
rect! Attention: Never recharge batteries, danger of explosion!
Do not short circuit batteries! Do not disassemble batteries!
Take low batteries out of the device immediately. Keep batte-
ries away from extreme warming – danger of leakage! Do not
apply used and new batteries together.
radiator does not cool down in the
press in the menu the button
again.
-Position, please
until adaptation starts
-
If the mistake
is shown on the display place Comet
By the way…
Plus onto the radiator valve and then take the batteries
out for a short time in order to execute a reset.
Do you already know about PROGmatic programming sticks?
You can programme Comet Plus by hand or you can use, for ex-
ample, the comfortable PROGmatic-Bluetooth programming stick
to copy your personally specified heating and economy times onto
all your Eurotronic energy-saving radiator thermostats at your
home which have a programming port in a matter of seconds.
Detailed information and the *PROGmatic Programming
If needed, clean the battery and the contacts before using
them. Keep the batteries away from children. When getting in
touch with battery acid instantly irrigate the affected parts with
clear water and call a doctor.
Basic operating modes
MANU-Modus
In the MANU-mode Comet Plus adjusts to the manually specifi
ed temperature.
AUTO-Modus
Setting date and time
After inserting the batteries for the first time the date will flash on
In the AUTO-mode Comet Plus changes between to temperatu-
res according to the time programme that has been set:
comfort temperature (factory preset 21°C)
economy temperature (factory preset 16°C)
The heating and economy times can be specifi ed via the
adjustable time programme. It is possible to set 8 switch
points (4 heating and 4 economy times) per day at the most.
SPARmatic comet has the following factory preset:
the display. Now, date and time can be set.
OK
Set date with the selector wheel.
Confirm with
OK
OK
OK
OK
Set month with the selector wheel. Confirm with
Set day with the selector wheel.
Set hour with the selector wheel.
Confirm with
Confirm with
Set minute with the selector wheel. Confirm with
– That´s it.
Please read the user manual before you place the thermostat.
Keep the documents for later questions and provide them if
you pass the thermostat on to other persons.
On the display PREP will be shown. Now, the motor will
completely move to the installation position in order to make the
installation easier. As soon as Comet Plus is ready for installati-
Scope of delivery
Heating time:
1 Comet Plus energy saving radiator thermostat
1 User manual
Heating with comfort temperature
(factory preset: 1st heating time at 07:00)
Economy time:
on „
„ will be shown on the display.
1 Connector
(
- any time selected in the menu). Now please do not
3 Adapters (Danfoss RA, Danfoss RAV, Danfoss RAVL)
lowering to economy temperature
(factory preset: 1st economy time at 22:00)
press any other buttons! Plug device for coupling ring.
see mounting.
Application as directed
By purchasing the Comet Plus energysaving radiator ther-
mostat you own a programmable radiator thermostat which
can be used for temperature regulations in enclosed rooms
and therefore, it can contribute to the reduction of heating
energy. – Please use the thermostat only for this purpose.
The Eurotronic programming port is intended ONLY for our
Eurotronic programming stick. Never connect other devices
with the programming port!
Setting heating and economy times
You can also set date and time via the menu item
later
With Comet Plus it is possible to set 4 heating and 4 economy
times per day – one for each day or one for a block of several
days. TAG1 to TAG7 represent the weekdays from Monday to
Sunday. Additionally, the corresponding days are shown as
abbreviation below the menu bar on the display.
Block construction:
on. But in case of that, Comet Plus does not move to the
installation position.
-
In case of replacing batteries, the stored time
programme will remain active. You should
check the specified time to ensure that.
T 1–5 = same programme from Monday to Friday
T 1–6 = same programme from Monday to Saturday
T 1–7 = same programme from Monday to Sunday
Mounting
Comet Plus can be quickly and easily mounted on all common
valves (see adapter table). It can be installed without grime and
water spots because the heating circuit is not interrupted.
Display and control elements
1
2
3
Heating times
Child lock active
Battery low
0
6
12
18
24
So
1
2
-
For non-programmed days the factory preset
remains active.
Mo
Di
Mi
Do
Fr
Sa
:
3
4
5
6
AUTO
MANU
4.a Travel function
active
Setting of an individual programme:
MENU
Press
Press
. Select the menu item
with the selector wheel.
4.b Comfort temperature
active
OK
.
for Monday is shown on the display. Select
OK
day/block with the selector wheel. Confirm with
Set the beginning of the 1st heating time (symbol
.
COMET
7
4.c Economy temperature
active
)with the
OK
selector wheel. Confirm with
. Set the beginning of the 1st
1.
2.
Turn the manual thermostat head up completely, loosen
the fastening and pull the thermostat off of the valve.
Use an appropriate adapter, if required, and push it onto
the valve.
4.d Window/freeze protection
function active
economy time (symbol ) with the selector wheel. Confirm with
. Now, if desired, a 2nd, 3rd or 4th heating/economy time can
OK
5
AUTO or MANU mode active
be entered.
MENU
6.a Button
– leads to the main menu (starting from
-
If you do not want to set a further heating/economy time
3.
4.
Screw the connector on the valve or the adapter.
Now, you put Comet Plus on the connector until it notice-
ably clicks into place.
regular display); within the menu one keypress leads
OK
confirm „
“ with
.
to the previous level
The next day for programming is shown on the display.
If you do not want to enter a further day, leave the menu
MENU
OK
6.b Button
6.c Button
– confirmation of setting
– timer function
-
with
. If the temperature is shown on the display the
7
Selector wheel
Additional information about the different adapters
programming is fi nished. Within the blocks you can also
overwrite single days with differing times.
Set up menu
MENU
By pressing
you will arrive at the set up menu. Please
Setting comfort and economy temperature
ATTENTION: It must be possible to insert Comet Plus without
OK
choose one of the items with the selector wheel. With
MENU
Press
. Select the menu item
with the
applying force, ensure that the appliance is in the
you can select one menu item and with the selection wheel
they can be adjusted. The button
OK
selector wheel. Confirm with
. Set comfort
„
“ or „
“ position.
OK
confirms the setting.
temperature with the selector wheel. Confi rm
MENU
The button
leads to the previous level.
OK
with
. Set the economy temperature with the
-
In case of a later installation, please switch in the menu
to „ “ and wait until the display shows „
before you install the device. Herewith the
OK
selector wheel. Confirm with
.
“
to select the mode
Area
Area
:
8°C, freeze protection function is active
valve is completely open
AUTO = automatic mode
MANU = manual mode
setting of time programme
installation is facilitated. Only mount it in this position.
:
Dismounting
-
By the way: Maximum energy saving can be
obtained with an economy temperature which
is about 5 °C below the comfort temperature.
setting of comfort and economy temperature
setting of date and time
window function
Manual operation
reset of the device to factory preset
starting of a new adaptation to adjust the valve
travel function
With the selector wheel an adaptation of the room tempe-
rature is possible at any time. In the AUTO mode it remains
active until the next switch point is reached. Now, the usual
programme becomes active again.
installation function (Please only attach the
controller to the coupling ring in this position)
-
To remove Comet Plus remove this at the
(with the wheel turn on the highest temperature of over
adaptation of temperature to the room situation
28 C° to
position), wait for a short period and unscrew
standby function
version
the cap nut and remove the Comet Plus from
the valve.
Daylight saving time


| General | Details |
|---|---|
| Name | EUROTRONIC Programmable Energy-Saving Radiator Thermostat User Manual |
| Make | EUROTRONIC |
| Language | English |
| Filetype | PDF (Download) |
| File size | 0.36 MB |
 (1 votes, average: 5.00 out of 5)
 Loading...

EUROTRONIC Sparmatic COMET Programmable Energy-Saving Radiator Thermostat User Manual

eurotronic Comet Zigbee Energy Saving Radiator Thermostat Instruction Manual

EUROTRONIC SPIRIT ZigBee Energy Saving Thermostat User Guide

EUROTRONIC COMET Programmable Energy Saving Radiator Thermostat User Manual

EUROTRONIC Spirit ZigBee Energy Saving Radiator Thermostat User Guide

Eurotronic Energy-Saving Manual: Questions and Answers
How do I insert batteries into the Eurotronic Energy-Saving Comet Plus?
Remove the battery lid and insert batteries with correct polarity.
- Press the battery lid upwards at the highlighted point
- Take the lid out
- Insert the batteries as shown inside the appliance
- Ensure polarity is correct
- Replace the battery lid User Manual, p. 1
How do I replace batteries in the Eurotronic Energy-Saving and will my settings be lost?
In case of replacing batteries, the stored time programme will remain active. Check the specified time to ensure it is correct. User Manual, p. 1
Can I use rechargeable batteries with the Eurotronic Energy-Saving Comet Plus?
Do not use accumulators. Never recharge batteries; there is a danger of explosion. User Manual, p. 1
More Eurotronic thermostat manuals

NOBO NCU-2Te High Precision Thermostat Instruction Manual

Moes WHT-PJ01 Smart WiFi Thermostat User Manual

Beca BAC-1000 Series WiFi Thermostat User Guide

Danfoss RAS-D2 Radiator Thermostat Installation Guide

DEVIreg 316 Electronic Thermostat Installation Guide

ROLBIT C124W Under Floor Thermostat Instructions

Wengart TP808 Low Voltage Thermostat User Guide

Beca BAC-006 Zigbee Thermostat User Guide

Garza 401267C-401267G Smart Home Wi-fi Smart Thermostat Instruction Manual

SIEMENS M3182 Room Thermostat Instruction Manual