BUDDERFLY BTS-U2 Thermostat User Manual
| General | Details |
|---|---|
| Name | BUDDERFLY BTS-U2 Thermostat User Manual |
| Make | BUDDERFLY |
| Language | English |
| Filetype | PDF (Download) |
| File size | 0.35 MB |

BUDDERFLY BTS-U1 Thermostat User Manual

BUDDERFLY BTS-U2 Thermostat User Manual Overview
Summary of Contents
- Page 1: Budderfly Thermostat – BTS-U2 User Manual
- Page 2: Introduction Systems compatibility Specifications Terminal description Wiring diagrams Getting started Existing thermostat replacement LCD display functions Main screen operations Operation of feature settings
- Page 3: Reset factory settings Regulatory
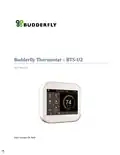
- Page 4: Introduction Budderfly thermostat regulates temperature in a heating or cooling system by measuring the current temperature and comparing it to a set temperature, called the setpoint. The thermostat has internal temperature and humidity sensors and can connect to an external temperature sensor. When the current temperature deviates from the setpoint, the thermostat sends a signal to adjust the heating or cooling system. It is powered by 24 VAC and can control 2 cooling and 3 heating stages. The thermostat is smart, capable of connecting to the internet via Wi-Fi, and can be locked with a pin. It allows for remote temperature control and monitoring through Budderfly apps. The thermostat can be programmed with different setpoints for different times of the day and for 7 days. It has manual override options for immediate temperature adjustments. The thermostat displays the indoor air quality index and can adjust accordingly. Systems Compatibility The Budderfly Thermostat BTS-U2 is designed for low-voltage heating and cooling systems and should not be used with line-voltage systems. It supports multiple system types including gas heating, oil heating, electric heating, traditional AC, heat pumps, dual fuel systems, boilers, floor heating systems, and fan coil units.
- Page 5: Specifications Dimensions: H 96 mm x W 86 mm x D 31 mm Display Resolution: 480 x 320 Display Size: 73.4 mm Height 489 mm Width WI-FI: 802.11 b/g/n (2.4G) TOUCH Capacitive Input Voltage: 24VAC, 50/60 Hz Relay Rating: 24VAC@ 1Amp maximum per relay Operating Temperature: 32 F to 150 F Operating: RH 0% -90% (non-condensing) Storage Temperature: 32 F to 150 F Temperature Sensors: Thermistor 10K NTC type 2 Control Range: 41 °F to 122 °F Terminal Description R: 24 VAC Heat/Cool Supply C: 24 VAC Common Y/Y1: First stage of cooling or first stage heat pump Y2: Second stage of cooling or second stage heat pump W/O.B: First stage of conventional heating or first stage auxiliary heat W2/Aux: Second stage of conventional heating or second stage of auxiliary heat for heat pump systems Fan: Auxiliary humidifier, dehumidifier, or ventilator G: Outside air sensor T: Ground Gnd: Occupy input Ocp: No-Connect
- Page 6: BTS-U2 user manual Wiring diagrams for different system types configurations Wire colors are for reference only. Contact a licensed electrician or professional HVAC installer for installation assistance. Maximum wire length allowed varies by wire gauge. Acceptable maximum lengths for different wire gauges are provided.
- Page 7: Page 7
- Page 8: Getting started Existing thermostat replacement Power off HVAC equipment before disconnecting the existing thermostat or installing the BTS-U2. Remove the existing thermostat by disconnecting the wires and taking it off the wall. The ideal location for the thermostat is approximately 5 ft (1.5 m) above floor level in the main living area. Do not install the thermostat close to heat sources, in direct sunlight, or in areas of high heat and humidity. Gently separate the backplate from the thermostat and place it on the wall. Mark the location of the mounting holes on the wall using the backplate as a template. Use the included drywall plugs or suitable anchors to ensure secure mounting of the thermostat. Fasten the backplate to the wall using the provided screws. Use low-voltage cable to connect the thermostat to the HVAC equipment, referring to the wiring diagrams for details.
- Page 9: Connect the wires as shown in the wiring diagrams. Attach the BTS-U2 to the backplate. Ensure that the pins on the thermostat align with the terminal block on the backplate. After you've completed the wiring, you can apply power to the heating and air conditioning equipment. The EMS Si receives power from the equipment and will automatically power on. Entering the Installer setup menu involves pressing the icon on the main screen and selecting 'Installation Settings.' On the Installation Settings page, press the Re-Install icon and input the password 1234. Select which system and settings this thermostat will work with and press the Next key to finish all settings. The LCD display functions include a Wi-Fi indicator, history data, and adjusting optional settings. The system mode can be set to Heat, Cool Auto, or Off. If humidity value is less than 30%, the pointer will be in the Red area.
- Page 10: User manual for BTS-U2. If humidity value is between 30% and 60%, the pointer will be in the Green area. If humidity value is more than 60%, the pointer will be in the Gray area. Power ON/OFF. Holiday: Displayed when thermostat is in holiday mode. Schedule: Programmable operation. The temperature hold function allows you to manually override the current operating program. The MC6 will maintain this temperature for the duration of the holiday. Click the “Fan” on the main display to change the fan mode to Auto or High.
- Page 11: Schedule Select the “Schedule” on the Main Display, and enter the “Edit” interface. On the Edit Page, from Monday to Sunday can be selected to edit. Click “Monday” and enter Monday’s setting interface. There are four time periods that can be selected: Morning/Day/Evening/Night. Click the First Column of “Time” to set desired “Hour” and the Second Column to set desired Minute. For example, the setting time is 04:00 am. For example, the setting temperature is 80.6 ℉. Operation of feature settings To set the clock, follow these steps. Select the “gear” icon and enter Feature Settings. Select the “Clock Setting” to enter Setting Interface.
- Page 12: User manual for BTS-U2 includes various settings and configurations. Select the column of Year/Month/Day to set the values using arrow icons. Select the column of “Time” to set Hours/Minutes. Backlight settings can be adjusted by clicking the gear icon and selecting Backlight. Choose between automatic and manual dimming preferences for backlight. Standby screen settings allow for control over standby time with four options. Screen lock can be enabled or disabled using the slider in the settings. Temperature format can be set to either °C or °F in the settings interface. Temperature limit settings allow adjustment of minimum temperature between specified values.
- Page 13: Maximum temperature is 42.8°F to 95°F. Switch Diff function allows you to increase the switching differential of the thermostat. The system defaults to 32.9°F for heating start and stop temperatures. Output delay can be set from 0-15 minutes to prevent rapid switching. Daylight saving time settings can be accessed through the gear icon. There are three options for daylight saving time: European Union, US & Canada, Australia & New Zealand. System information can be accessed through feature settings to view the version number. Resetting factory settings will erase current settings and return to factory defaults. Click the back icon to save and return to the main screen. Document version is 1.
- Page 14: FCC warning states that the device complies with Part 15 of the FCC Rules. Operation is subject to conditions that the device may not cause harmful interference and must accept any interference received. The device has been tested and complies with Class B digital device limits for reasonable protection against harmful interference. It generates and can radiate radio frequency energy, which may cause harmful interference if not installed and used properly. There is no guarantee that interference will not occur in a particular installation. Users are encouraged to correct interference by reorienting or relocating the receiving antenna, increasing separation between equipment and receiver, or consulting a technician. The grantee is not responsible for unauthorized changes or modifications that could void the user's authority to operate the equipment. The device complies with FCC radiation exposure limits for uncontrolled environments. It should be installed and operated with a minimum distance of 20cm between the radiator and the body. Document version is 1.