Home > Warmup > Warmup 3iE Energy Monitoring Thermostat Instruction Manual

Warmup 3iE Energy Monitoring Thermostat Instruction Manual

INSTALLATION AND  
OPERATION MANUAL  
MANUEL D’INSTALLATION ET DE  
PROGRAMMATION  
Warmup® 3iE™  
Energy-Monitoring  
Thermostat  
Thermostat  
Ecoénergétique  
24/7 Technical Hotline  
GeneralDetails
NameWarmup 3iE Energy Monitoring Thermostat Instruction Manual
MakeWarmup
LanguageEnglish
FiletypePDF (Download)
File size1.85 MB
Download PDF
1 Star2 Stars3 Stars4 Stars5 Stars (1 votes, average: 5.00 out of 5)
Loading...
Warmup 6iE mini WiFi Thermostat User Guide
warmup RFT-P Programmable Radiant Floor Thermostat User Manual

Warmup 3iE Energy Monitoring Thermostat Instruction Manual
Get the free PDF manual for the Warmup 3iE Energy Monitoring Thermostat Instruction Manual and access setup steps, usage instructions, and troubleshooting tips. 👉 View online or download now to keep your thermostat running smoothly!

Warmup 3iE Energy Monitoring Thermostat Instruction Manual Overview

Summary of Contents

  • Page 1: Installation and operation manual Warmup 3iE energy-monitoring thermostat Thermostat écoénergétique
  • Page 2: Introduction Getting started Setting your programs View and edit a schedule Holiday mode Energy monitor Settings Setting heating target Advanced settings Setting your heating system
  • Page 3: Introduction Your thermostat’s default screen is the Home Screen, displaying important information such as time, current floor and air temperature, and target set temperature. From the Home Screen, you can access the “MENU” page or override the current program. Pressing “confirm” allows you to confirm your selection. Pressing “back” takes you back to a previous page in the menu sequence. Pressing the “up” and “down” buttons allows you to change the highlighted setting. When illuminated, a specific light indicates that power is being directed to the heating systems. If no button is pressed for 1 minute, the thermostat will go to standby mode. To exit standby mode, press “wake.” The power button on the bottom of the 3IE allows you to turn off the thermostat and the Warmup floor heating system. The GFCI feature detects any leakage of current from your heating system.
  • Page 4: Ground fault circuit interrupter If the thermostat detects a relay failure, the control fault screen will appear and the test LED will illuminate. Isolate the power supply and contact customer service if the test button does not display ground fault or cut power to the load. The thermostat shows the ground fault screen during normal operation. The thermostat shows the control fault screen. The GFCI test should be carried out monthly. Getting started On initial power up, the thermostat will guide you through the setup procedure. The energy monitoring menu will be skipped if a preset program is selected. Access the main menu by pressing menu on the main screen.
  • Page 5: Setting your program involves pressing menu and then set program. You may need to press wake if the thermostat is in standby mode. You can choose from several programming options: - Set each day separately for different programs. - Set weekday and weekend programs for different days. - Set all days the same with one program for the week. - Set a fixed temperature to be held constantly. - Select a pre-set temperature. To set the start time for the first period of the day, press the appropriate buttons. Holding a button will allow it to scroll continuously. To change the target floor temperature, press floor temp and adjust using up and down. If you prefer to target air temperature, refer to page 12. You can add up to 10 periods in each day by pressing add another period.
  • Page 6: Setting your program is recommended to finish on a low target temperature to save energy overnight. If heating is not needed to protect against frost, set the target temperature to OFF. Once all desired periods are set, press OK to go to the summary page. The summary page allows you to see the program set for the day. To change something, press edit which takes you back to the first period of the day. If you want to set the same program for the following day, press copy to …. To set a different program for the following day, press OK. Press back to return to the preceding day. After setting a program for all days, pressing OK will enter the schedule and return to the home screen. The set temperature for the time before the first period of the day comes from the night before.
  • Page 7: Setting your program If you are using your 3IE thermostat in the bathroom, bedroom, kitchen, or living room then the pre-set schedules might help you set a program appropriate for you. If you have used a pre-set schedule but want to make some changes just use the edit schedule function explained in the “View and Edit a Schedule” section. Pre-set programs table includes specific times and floor temperatures for different rooms such as bathroom, kitchen, bedroom, and living room.
  • Page 8: View and edit a schedule If you would like to view or edit the time and temperature settings of each day then press “view / edit program”. If you want to change the settings of multiple days it might be easier to set a new program using the “set program” option. Press “up” and “down” until the day that you would like to view is highlighted, then press “OK” to view that day. To exit the “VIEW / EDIT PROGRAM” menu, press “back”. Note that if you have edited any days these changes will be saved. Here you can see review the heating schedule for the selected day. If you would like to change any of the heating periods press “edit”. You can view the schedule for the following day by pressing “view …”. To return to the day selection, press “OK”.
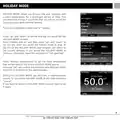
  • Page 9: Holiday mode allows you to override your schedule with a fixed temperature for a prolonged period of time. This can help save energy if you know that you will be out of the house and only want minimal heating. Press the highlighted button next to “holiday” to activate. Set the start and end dates for holiday mode using the “up” and “down” buttons. At the end of holiday mode, your program will return to the current settings. To continue holiday mode indefinitely, leave the end date on “not specified.” Press “holiday temperature” to set the fixed temperature for the holiday mode period. Pressing “OK” will confirm the selection and holiday mode will start at 12:00 pm on the specified date. During holiday mode, you will have a modified home screen. To cancel holiday mode at any time, just press “cancel.” If you want to return to holiday mode, you will need to set it again.
  • Page 10: Energy monitor Your thermostat monitors the amount of energy your floor heating system is using. You can view the amount of energy used and set parameters to estimate the cost of that energy. Select “view energy use” to see how much energy you have used. If you see the “load settings” option, you will need to enter the total power in watts of the floor heating system connected to the thermostat. Alter your heating program to see how much energy you can save. After pressing “view energy use,” select the length of time you are interested in. Each red bar on the graph indicates a time period, with the height representing the amount of energy in KWH used. The total amount of energy used in the entire time span is displayed in the bottom bar. Press “OK” to return to the energy monitor menu.
  • Page 11: Energy monitor To view the estimated cost of energy usage, set the cost parameters in “energy settings.” The cost estimate will only be accurate for the time period after you set the heating costs. Single energy tariff means a single cost of electricity all day long. Standard/low energy tariff means a discounted cost of electricity during part of the day. Select the appropriate structure that applies to your electricity tariff plan. For both standard and low energy tariffs, set a cost per kilowatt hour (KWH). Set the relevant currency by pressing “up” and “down.” If your energy cost is 11.6 cents per KWH, set it to $0.116. If setting a standard/low energy tariff, set the time of day for the low energy tariff and the cost per KWH during that period. After setting parameters, view the cost of energy used in “view cost estimate.” In standard/low energy tariff, the amount/cost used in the standard period will be displayed in red and the low period in white.
  • Page 12: Settings Your 3IE is a very flexible device and can be configured in many different ways to meet your requirements. Functions that can be accessed in the “settings” menu include: Time - Set time and date - Set time format preference (12Hr clock or 24Hr clock) and date format preference (MM/DD/YYYY or DD/MM/YYYY) - Turn on automatic day-light savings for your region Language - Select the language of operations Temperature preferences - Select temperature unit preference (°C or °F) Display / audio - Choose home screen theme and set screen brightness - Turn on/off heating LED and audio feedback - Turn on/off child lock Set heating target - Select if your thermostat uses floor temperature sensor or air temperature sensor for thermal regulation Advanced settings WARNING!! The options in this section can affect the performance of your thermostat and should only be modified by an experienced floor heating installer or under the instruction of Warmup technical support.
  • Page 13: Settings allow you to customize various features of the device. You can change the content and style of the home screen and standby screen. Standby brightness can be set between 0 (dimmest) and 5 (brightest). When set to 0, the LCD screen will turn off and the “wake” LED will not illuminate. Display brightness can be adjusted between 1 (dimmest) and 6 (brightest) during normal operation. You can turn off the heating indication LED while maintaining normal thermostat operation. Audio feedback can be disabled to turn off the beep sound when a button is pressed. Child lock creates a delay between pressing “wake” and exiting standby mode. When child lock is on, you must hold “wake” continuously for 10 seconds to exit standby mode.
  • Page 14: Setting heating target Your thermostat is capable of using a floor temperature sensor, air temperature sensor, or both for thermal regulation. If you are using your floor heating as a secondary heating source, you might prefer to use the floor temperature. If the floor heating is the primary heating source in your home, you might prefer to use the air temperature. Set floor temperature: The thermostat will use the temperature reading from the floor sensor to decide whether heating is required to achieve the target set temperature. Set floor temperature with air limit: The thermostat will use the temperature reading from the floor sensor, but if the air temperature goes above the set limit, heating will be suspended until the air temperature falls below the limit. Set air temperature: The thermostat will use the temperature reading from the air sensor to decide whether heating is required to achieve the target set temperature. Hint: If you change the heating target settings, it is advisable to re-program your thermostat to ensure that the program still meets your needs.
  • Page 15: Advanced settings The options in this section can affect the performance of your thermostat and should only be modified by an experienced floor heating installer or under the instruction of Warmup technical support. Programmable limit Overheat limit Air floor min/max Tile min/max User defined settings for stone, laminate, wood, carpet, and vinyl.
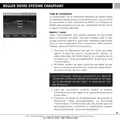
  • Page 16: Setting your heating system involves understanding the floor type and the master/relay feature. The master/relay setting affects the upper and lower limits of programmable set temperatures and the overheat limit. It is advised to check safe temperature limits with the flooring manufacturer if a user-defined limit is set. The master/relay feature allows one thermostat to control another, useful for managing multiple floor heating elements with one program. To set up the master/relay feature, choose which thermostat will be the master and which will be the relay. Connect terminal 3 on the master to terminal 3 on the relay using low voltage electric cable. Connect terminal 2 on the master to terminal 2 on the relay with low voltage electric cable. Switch the master thermostat to master mode and the relay thermostat to relay mode in the advanced settings. The relay thermostat will operate in tandem with the master thermostat and will not use its sensors for thermal regulation. Program the desired schedule into the master thermostat.
  • Page 17: External sensor You are able to attach a second sensor to terminals 2 and 3. External sensor: This is to be used when you can locate the external sensor outside of the heated environment. Weather compensation saves energy by delaying the start of heating period by 10 minutes if the difference between internal and external temperature is less than 41°F. 2nd floor sensor: This is to be used if the floor surface area is very large and delicate to overheating. Probe specification: If you have already installed a sensor which was not supplied by Warmup then you can use this setting to allow your thermostat to function. The possible options are NTC 10K, NTC 12K, and NTC 15K. Offset: This feature allows you to bias each sensor’s temperature reading up or down by 41°F. Reset will restore all software settings to the factory specified defaults. If you are experiencing problems with your thermostat then you can perform a system reset by holding the button on the rear of the front module for 10 seconds.
  • Page 18: Warranty Warmup Inc warrants this product to be free from defects in workmanship or materials for a period of three years from the date of purchase. If the product is determined to be defective during the warranty period, Warmup shall repair or replace it. This warranty does not cover removal or reinstallation costs. Warmup’s sole responsibility shall be to repair or replace the product within the stated terms. Warmup shall not be liable for any loss or damage of any kind resulting from any breach of warranty. This warranty is the only express warranty Warmup makes on this product. The duration of any implied warranties is limited to the three-year duration of this warranty. This warranty does not affect your statutory rights.
  • Page 19: Introduction Premiers pas Configuration des programmes Programmes pré-définis Voir et éditer un programme Mode vacances Contrôle de l’énergie Réglages Configurer la température cible Paramètres avancés
  • Page 20: Introduction Familiarisez-vous avec les six zones tactiles et l'indicateur LED du thermostat 3iE™. Les contrôles de base incluent une touche pour valider une sélection et une autre pour retourner à l'écran précédent. Les touches permettent d'augmenter ou de diminuer les valeurs et/ou données. Les touches luminescentes permettent de sélectionner l'option ou le paramètre à éditer. La diode s'allume lorsque le système est en marche ou actif. Le bouton d'alimentation permet de mettre en marche ou éteindre le thermostat en le pressant pendant 3 secondes. L'écran du thermostat s'assombrit après une minute d'inactivité mais continue de fonctionner normalement. L'écran d'accueil affiche des informations importantes telles que la date, l'heure, et les températures. Vous pouvez accéder au menu ou passer outre le programme en cours depuis l'écran d'accueil. L'option aide dans plusieurs menus fournit des explications détaillées sur certaines fonctionnalités.
  • Page 21: Premiers pas Lors de la première mise en fonctionnement du thermostat, vous serez guidés pas-à-pas pour effectuer les premiers paramétrages. La section “Gestion d’énergie” sera automatiquement sautée si un programme pré-défini est choisi lors de la mise en route initiale. Choix de la langue Réglage de l’heure Réglage de la date Réglage des horaires d’été et d’hiver Affichage de la température Choix d’un thème Réglage de la luminosité A partir du menu principal, vous pouvez programmer directement votre thermostat ou changer de paramètres.
  • Page 22: Configuration des programmes Pour accéder à l’écran de configuration du programme, appuyez sur “MENU” puis sur “configurer programme”. Cinq options s’offrent alors à vous, sélectionnez celle qui correspond le mieux à vos besoins. Configurer les jours séparément : vous définirez un programme différent pour chaque jour de la semaine. Configurer semaine et week-end : un programme est défini pour les 5 jours de la semaine et un autre pour le week-end. Configurer tous les jours : un programme unique est configuré pour tous les jours de la semaine. Configurer une température fixe : choisissez une température fixe pour tous les jours de la semaine. Sélectionner un programme : vous aurez le choix entre plusieurs programmes pré-enregistrés. Appuyez sur “haut” et “bas” pour choisir l’heure à laquelle le programme sera lancé le premier jour. Si vous voulez modifier la température désirée, appuyez sur “temp.sol” puis sur “haut” et “bas”. Si vous voulez que la température cible change à un moment de la journée, sélectionnez [période suiv.] et entrez l’heure à laquelle vous voulez qu’elle commence.
  • Page 23: Configuration des programmes Il est recommandé de définir une température plus faible pour les fins de journée afin d’économiser de l’énergie durant la nuit. Si vous n’avez pas besoin de protéger votre système contre le gel, vous pouvez diminuer votre température au plus bas jusqu’à obtenir “inactif”. Une fois que toutes les périodes du jour ont été programmées, appuyez sur “valide” pour aller à l’écran du schéma de programmation. Ce graphe vous permet de voir le programme paramétré pour le jour en question. Si vous désirez le changer appuyez sur “éditer”. Lorsque vous aurez fini la configuration du programme, si vous désirez le garder pour le jour suivant, appuyez sur “copier à ...”. Si vous souhaitez paramétrer le jour suivant différemment, pressez “valide”. A la fin de votre programmation, en appuyant sur “valide”, vous enregistrerez les paramètres et l’écran d’accueil apparaîtra. La température définie avant la première période de la journée que vous avez configuré correspond à la température de la veille.
  • Page 24: programmes pré-définis Les programmations pré-définies peuvent vous aider à choisir un mode approprié à vos besoins. Si vous utilisez une programmation pré-définie mais vous voulez changer certains paramètres, suivez les explications situées dans le chapitre ci-dessous : “Voir et éditer un schéma de programmation”. tableau des programmes pré-définis : Salle de bains Cuisine Chambre Salon Heure et température pour chaque pièce à différents moments de la journée.
  • Page 25: Voir et éditer un programme Si vous désirez voir ou éditer les paramètres du programme alloué à chaque jour, appuyez sur “voir/éditer programme”. Si vous souhaitez changer les paramètres de plusieurs jours, il sera peut-être plus facile de paramétrer un nouveau programme en utilisant l’option [configurer programme]. Pressez les touches “haut” et “bas” jusqu’à ce que le jour que vous souhaitez voir soit surligné et appuyez sur “valide” pour le visualiser. Pour sortir du menu “voir/éditer programmation”, appuyez sur <. Notez bien que si, entre temps, vous avez édité un ou plusieurs jours, ces changements seront sauvegardés. Vous obtiendrez alors le schéma de programmation pour la journée en question. Si vous désirez changer une des périodes de chauffage, appuyez sur “éditer”. Rappelez-vous que vous aurez à reconfigurer toutes les périodes du programme. Pour retourner à l’écran de la sélection du jour, appuyez sur “valide”.
  • Page 26: Mode vacances Le mode vacances vous permet de maintenir une température constante pendant une période prolongée. Il outrepassera votre programmation habituelle et vous aidera à économiser de l’énergie durant votre absence. A partir du menu, appuyez sur la touche “mode vacances” pour accéder au paramétrage de ce mode. Sélectionnez “fin des vacances à” et utilisez les touches “haut” et “bas” pour configurer le jour de la fin des vacances. A la fin du mode vacances, votre programme rétablira vos paramètres habituels. Appuyez sur “température vacances” pour fixer la température qui sera appliquée pour toute la période du mode vacances. Ensuite, pressez la touche “valide” pour confirmer votre sélection et le mode vacances sera lancé à 12h00 le jour spécifié. Durant la durée du mode vacances, l’écran d’accueil sera modifié. Pour annuler ce mode à n’importe quel moment, appuyez sur “annul”. Si vous voulez retourner au mode vacances, vous aurez besoin de le configurer de nouveau.
  • Page 27: Contrôle de l’énergie Votre thermostat mesure la quantité d’énergie utilisée par votre système de plancher chauffant. Vous pourrez voir quelle est votre consommation d’énergie et configurer vos programmes pour déterminer vos dépenses énergétiques. Pour accéder à cette fonction à partir du menu, appuyez sur “consommation estimative”. Si vous voulez voir la quantité d’énergie que vous utilisez, sélectionnez “voir consommation” et sélectionnez la période qui vous intéresse. Dans le cas où l’option “télécharger paramètres” s’afficherait, vous aurez à entrer la puissance totale en watts du plancher chauffant électrique connecté au thermostat. En cliquant sur “voir consommation”, vous pourrez choisir de visualiser l’énergie consommée sur une période définie. Chaque barre indique la quantité d’énergie consommée par période. Vous pourrez lire la consommation totale d’énergie sur la barre du bas. Appuyez sur “valide” pour retourner à l’écran “consommation d’énergie”.
  • Page 28: Contrôle de l’énergie Pour voir une estimation de vos dépenses d’énergie, vous aurez besoin de paramétrer les coûts d’électricité en sélectionnant la touche “paramètres”. Paramètres d’énergie L’estimation des dépenses ne sera pertinente qu’à partir du moment où vous aurez paramétré ces coûts. Le “tarif standard” représente le tarif électrique normal ou tarif journée, et le “tarif réduit” représente le tarif réduit qui peut s’appliquer à certaines périodes de la journée. Sélectionner et entrer les données qui s’appliquent à votre tarif électrique. Pour les deux tarifs, vous aurez besoin de paramétrer un coût par kilowatt heure (KWh). Si votre coût énergétique est de 11.6 cents par KWh, entrez $0.116. Si vous paramétrez un tarif réduit, vous aurez aussi besoin de définir l’heure de la journée à laquelle le tarif réduit commence et s’arrête. Une fois les paramètres de coûts enregistrés, vous pourrez consulter vos dépenses énergétiques en pressant la touche “voir coût”. Le coût de l’énergie utilisé en période de tarif normal sera indiqué en rouge et celui de la période à tarif réduit le sera en blanc.
  • Page 29: Réglages Votre thermostat 3iE est très flexible et intuitif. Le menu “réglages” vous donne accès aux fonctions suivantes. Réglage de l’heure et la date. Choix du format de l’heure et de la date. Définition du changement d’horaire d’été/hiver. Sélection de la langue. Sélection de l’unité de température. Choix du thème d’affichage et réglage de la luminosité de l’écran. Activation ou non de l’indicateur lumineux de chauffe et du son. Ces paramètres ne doivent être modifiés que par un électricien qualifié.
  • Page 30: Réglages Affichage/audio Choix du contenu et du style d’affichage des écrans. Luminosité en mode veille Réglage de la luminosité de l’écran en choisissant une valeur entre 1 et 6. Réglage de la luminosité de l’écran lorsque le thermostat est en mode veille: définition d’une valeur entre 0 et 5. Ces paramètres ne doivent être modifiés que par un électricien qualifié. Indication de chauffe Cette fonctionnalité vous permet de désactiver l’indicateur lumineux de chauffe situé en haut et à droite de votre écran. Activation ou non de la tonalité des touches. Le verrouillage enfant crée un délai supplémentaire pour sortir du mode veille.
  • Page 31: Configurer la température cible Pour réguler votre température de confort, vous pouvez utiliser une sonde au sol, une sonde air ou les deux. Dans le menu [configurer temp. ciblée], vous aurez le choix entre les 3 options. Le thermostat utilisera la lecture de température obtenue à partir de la sonde de sol pour atteindre la température voulue. Le thermostat utilisera la lecture de température obtenue avec la sonde de sol. Toutefois, si la température de l’air va au-delà de la limite indiquée, le chauffage sera suspendu jusqu’à ce que la température tombe sous cette limite. Le thermostat utilisera la lecture de la sonde air pour atteindre la température ciblée. Si vous changez les paramètres de la température ciblée, il vous est recommandé de reprogrammer votre thermostat afin qu’il réponde toujours à vos besoins.
  • Page 32: Les options du menu “paramètres avancés” peuvent affecter les performances de votre thermostat. Ces paramètres ne doivent être modifiés qu’avec l’aide d’un installateur ou un électricien qualifié. Limite de température programmable. Limite de surchauffe. Min et Max pour différents types de revêtements de sol. Carrelage, pierre, bois lamellé, bois naturel, moquette, vinyle. Défini par l’utilisateur. Les températures minimales et maximales varient selon le type de sol. Les températures programmables sont indiquées en degrés Fahrenheit et Celsius. Article 35.2 de l’arrêté du 23/06/78.
  • Page 33: Regler votre systeme chauffant La modification de ce paramètre affectera les limites haute et basse des températures programmées ainsi que la limite de surchauffe. Il vous est conseillé de vérifier celles-ci auprès de votre fabricant. Cette fonctionnalité vous permet d’utiliser un thermostat pour en contrôler un autre. Cela peut s’avérer utile si vous voulez contrôler plusieurs planchers chauffants électriques avec un seul programme. Choisissez le thermostat qui sera le “relais principal/maître” et celui qui sera le “second relais”. Utilisez un câble électrique de faible tension pour connecter les thermostats. Dans les paramètres avancés, mettre le premier thermostat en mode maître et le second thermostat en mode relais. Le thermostat “second relais” n’utilisera alors plus ses sondes pour lire les températures. Il s’allumera et s’éteindra en tandem avec le thermostat “relais principal/maître”.
  • Page 34: Le menu “sondes” permet de configurer l’usage des sondes du thermostat. Vous avez la possibilité de connecter une deuxième sonde aux terminaux 2 et 3 du thermostat. La fonction sonde externe affiche la température externe sur la page d’accueil et entraîne une compensation de température. Cette compensation permet d’économiser de l’énergie en retardant le démarrage de la période de chauffage de 10 minutes si la différence entre température externe et interne est inférieure à 5°C. La lecture de la sonde supplémentaire sera utilisée pour surveiller la limite de surchauffe. Les options disponibles pour les sondes sont NTC10K, NTC12K et NTC15K. Warmup ne peut valider la performance du thermostat que lorsqu’il est utilisé avec la sonde Warmup fournie avec le 3iE. Cette option vous permet de créer une plage de tolérance de + ou - 5°C. La réinitialisation restaurera tous les paramètres par défaut du système. Vous pouvez lancer une réinitialisation en pressant le bouton situé à l’arrière de l’appareil pendant 10 secondes.
  • Page 35: Garantie Warmup Inc garantit ce produit d'être exempt de défauts matériels ou de fabrication, en utilisation et fonctionnement normal, pour une période de trois (3) ans à compter de la date d'achat. A tout moment au cours de la période de garantie si le produit est jugé défectueux, Warmup le réparera ou le remplacera, à sa propre discrétion. Cette garantie ne couvre pas les frais de déménagement ou de réinstallation, et ne s'appliquera pas s'il est démontré par Warmup que le défaut de fonctionnement a été causé par détérioration. La seule responsabilité de Warmup est de réparer ou de remplacer le produit dans les conditions énoncées. Warmup ne sera tenu responsable pour tout dommage ou perte de quelque nature que ce soit, y compris les dommages directs ou indirects. Cette garantie est la seule garantie expresse Warmup sur ce produit. La durée de toute garantie implicite, y compris les garanties de qualité marchande et d'adaptation à un usage particulier, est limitée à la période de trois ans de la présente garantie. Cette garantie n'affecte pas vos droits statutaires.
  • Page 36: Page 36