
Honeywell RTH9600WF Touchscreen Programmable Thermostat User Guide
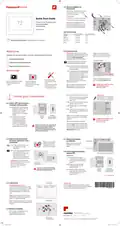


1.5 Mount wallplate for
thermostat
Mount your new wallplate using
screws and anchors included
with the thermostat.
If necessary:
Wallplate
LEVEL
HERE
• Drill 3/16-in holes for drywall
• Drill 7/32-in holes for plaster
Quick Start Guide
W-
O/B
C
K
Y
G
Rc
R
Smart Color Touchscreen
Programmable
Thermostat
Note: You may be able to use
your existing wall anchors. Hold
the wallplate up to the existing
anchors to check for alignment.
W2-
Aux/E
Y2
L
72
Y
W
RTH9600WF
R
C
G
Electrical Ratings
Terminal
W-O/B
Voltage (50/60Hz)
20-30 Vac
Max. Current Rating
1.0 A
1.0 A
1.0 A
1.0 A
0.5 A
W2 (Aux/E)
Y Cooling
Y2 Cooling
G Fan
20-30 Vac
20-30 Vac
Search for local rebates: HoneywellHome.com/Rebates
20-30 Vac
20-30 Vac
1.6 Connect wires
Welcome
Getting set up and ready is simple. Read before installing.
Important! C wire is required and
is the power source. Without a C wire,
your thermostat will not power up.
See the C Wire Addendum
Note: The wiring for your
application might be different
than the wiring shown below.
document for more information.
Install your thermostat.
1
2
Terminal release
View the Alternate Wiring videos
at wifithermostat.com/videos
Connect your home Wi-Fi network.
C
W-
O/B
W
C
Y
Y
G
K
Rc
R
1.6a Starting with the C Wire, match
the sticky tag on the wire to the
terminal labels.
Register online for remote access.
G
3
R
W2-
Aux/E
Y2
L
Before you begin
1.6b Straighten wire and gently slide
into terminal hole until it clicks
into place. (If you need to
EXAMPLE WIRING
Yours may look different
remove a wire, use a pen tip to
press the terminal release and
then pull the wire out.)
Remove jumper loop ONLY if
you have both R and Rc wires.
You will also need:
• Small screw driver
• Pen
Note: Refer to the wiring picture
you took in Step 1.2.
View the installation video
at wifithermostat.com/
support
You will need your
camera to take a
picture of your old wire
connections.
Labels don’t match or have
heat pump system?
See User Guide.
• Thermostat ID card
• Your home Wi-Fi
network password
Tip: To make it easier to slide the
wire into place, use a pen tip to
hold down the terminal release.
1.6c In the image on the right, check
Important!
Check the box for each wire
you connect. You will need
this information in Step 1.9.
Install your thermostat
the box next to each connection.
You will use this checklist in
Step 1.9.
1
1.6d Verify wire is firmly secured by
gently pulling on wire.
W-O/B
C
1.1 Switch OFF power to your
heating/cooling system
K
Rc
R
Y
1.6e Repeat steps a–d for all other
wires.
G
1.1a Important! To protect your
equipment, switch OFF the
power to your heating/
cooling system at the
breaker box or the system
switch.
or
W2-Aux/E
1.6f Push any excess wire back into
the wall opening after all wires
are installed.
Y2
L
Circuit
breaker
box
Heating/
cooling system
power switch
Note: The L terminal on the lower
right is used only for Heat Pump
systems.
1.1b Confirm power is OFF.
Try to turn on heating/
cooling equipment by
Labels don’t match or have
heat pump system?
See User Guide.
Note: If the old thermostat for
changing temperature
on your old thermostat.
Your power is OFF if your
system does not turn ON.
Heat Pump System has separate
wires on Aux and E, use a wire nut
to attach both wires to a separate
wire. Slide this third wire into the
W2-Aux/E terminal.
This thermostat works with common 24 volt
systems such as forced air, hydronic, heat
pump, oil, gas, and electric. It will not
work with millivolt systems, such as a gas
fireplace, or with 120/240 volt systems such
as baseboard electric heat.
1.2 Remove old thermostat
faceplate and leave wires
connected
LEVEL
HERE
1.7 Attach thermostat
to wallplate
Wallplate
Note: You will need a
picture of your wire
connections to wire
the new thermostat.
Align the thermostat with
wallplate and snap into
place.
1.2a Take a picture of the wire
connections for later
reference.
Thermostat
1.2b If no wire is connected to a
terminal labeled C or no C
terminal exists on the old
thermostat, view the
1.8 Switch heating/cooling
system ON
Important!
Alternate Wiring videos at
wifithermostat.com/videos
1.8a Verify that the C wire is
connected at the thermostat
and at the heating/cooling
system.
C
Important! C wire is required
and is the power source for your
thermostat. Without a C
wire, your thermostat will
not power up.
or
M33823A
Terminal
designation
1.8b Make sure the heating/
cooling system door is
firmly secured.
If you have an older thermostat with a
sealed mercury tube, see warning page
for proper disposal instructions.
Circuit
breaker
box
Heating/
cooling system
power switch
1.8c Switch power back ON for
your heating/cooling system
at the breaker box or its
power switch.
Turn over
Sticky tag
1.3 Label wires
Need help?
Visit honeywellhome.com/wifi-thermostat
or call 1-855-733-5465 for assistance before
returning the thermostat to the store.
Do not label by wire color.
Use the supplied sticky tags to label
each wire as you disconnect it. Label
wires according to old thermostat
terminal designations, not by wire
color.
33-00595-02
Note: If no tag matches a terminal
designation, write the appropriate
letter on a blank sticky tag.
Blank tags
Note: Wrap the wires around a pencil
to prevent them from falling back into
the wall.
1.4 Remove wallplate
Remove the old wallplate from
the wall after all wires are
labeled and disconnected.
Resideo Technologies, Inc.
1985 Douglas Drive North, Golden Valley, MN 55422
C
33-00595—02 M.S. 09-21 | Printed in Mexico
Terminal
designation
© 2021 Resideo Technologies, Inc. All rights reserved. The Honeywell Home trademark is used under license from
Honeywell International, Inc. This product is manufactured by Resideo Technologies, Inc. and its affiliates.
33-00595_A.indd
1
9/8/2021 12:33:20 PM


| General | Details |
|---|---|
| Name | Honeywell RTH9600WF Touchscreen Programmable Thermostat User Guide |
| Make | Honeywell |
| Language | English |
| Filetype | PDF (Download) |
| File size | 0.25 MB |
 (1 votes, average: 5.00 out of 5)
 Loading...

Honeywell T6 Pro Programmable Thermostat User Manual

Honeywell D1-528 Direct Thermostat Installation Guide

Honeywell FocusPRO P200 Programmable Thermostat User Guide

Honeywell RCHT8610WF Series Smart Thermostat Installation Guide

Honeywell T9 Smart Thermostat Installation Guide

Honeywell TH2320WF4011 FocusPRO Smart S200 Series Thermostat User Guide

Honeywell TL116A Thermostat Installation Guide

T10 Pro Smart Thermostat with Redlink Room Sensor

Honeywell TH6320WF2003 Lyric T6 Pro Wi-Fi Programmable Thermostat User Guide

Honeywell RTH9580 Wi-Fi Color Touchscreen Programmable Thermostat User Guide


degrii THM Edge Cutting Smart Thermostat User Guide

BEOK TDS75 Touch Screen Thermostat User Manual
NINGBO TC200 Smart WI-FI Thermostat Owner’s Manual

MOES BRT-100 Radiator TRV Thermostat Instruction Manual

AVATTO WT598 Smart Thermostat Instruction Manual

LUX PSP511A Series Programmable 5-2 Thermostat Instruction Manual

MAPEI 2855201 Dual-voltage Radiant Mapeheat Programmable Thermostat Owner’s Manual

VIMAR 02913 Surface LTE Thermostat Installation Guide

PBU 2 Degrees 2 Save Thermostat User Manual

resideo T3 Programmable Thermostat Installation Guide