VEVOR ET-72G Programmable Thermostat Instruction Manual


there is no need to replace the floor sensor for easy installation.
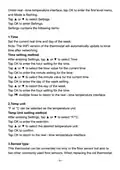
Sensor Type setting method:
After entering Settings, tap ▲ or ▼ to select Sensor Type.
Tap OK to enter the selection.
Tap ▲ or ▼ to select the type of floor sensor you are currently using.
Tap OK to confirm.
Tap OK to return to the real - time temperature interface.
4. Sensor selection
In addition to the floor sensor, this thermostat has built-in sensors to detect
room temperature. Therefore, three sensor applications are available:
Room: Controls room temperature based solely on built-in sensors.
Floor: Controls the floor temperature based solely on the floor sensor.
Room.Limit: Controls the room temperature based on the built-in sensor
while monitoring the floor temperature not to exceed the upper limit. This
application, like Floor, can be used in places such as wood floors where
floor temperature is critical.
Sensor Selection setting method:
After entering Settings, tap ▲ or ▼ to select Sensor Selection.
Tap OK to enter the selection.
Tap ▲ or ▼ to select the sensor application type.
Tap OK to confirm.
Tap OK to return to the real - time temperature interface.
Note: If Room.Limit is selected, you need to set the maximum temperature
that the floor can accept.
5. Calibration
This thermostat has built-in probe and floor sensor calibration function. In
- 9 -
| General | Details |
|---|---|
| Name | VEVOR ET-72G Programmable Thermostat Instruction Manual |
| Make | VEVOR |
| Language | English |
| Filetype | PDF (Download) |
| File size | 0.19 MB |


Honeywell Home DT4 Channel Wired Room Thermostat Instruction Manual

Wiser CCTFR6400 Room Thermostat User Manual

STELPRO STE402NP Smart Electronic Thermostat User Guide

HYSEN HY510 WiFi Heating Thermostat Instruction Manual

Google Cloud 2024 Nest Learning Thermostat Instructions

Carrier ecobee3 Lite Smart Thermostat User Manual

GROHE 26984001 Vitalio Comfort 250 Shower System with Bath Thermostat Installation Guide

Goodman GTST Connected Thermostat User Guide

GENERAL LIFE FH105S Underfloor Heating Thermostat User Manual

Danfoss M30 React Radiator Thermostat Installation Guide