Home > QuietWarmth > QUIETWarmth Type UCG Thermostat User Manual
QUIETWarmth Type UCG Thermostat User Manual


U S E R M A N U A L
THERMPRO
Type UCG/UDG
English.................. 1
Français................ 7
Español............... 14
Type UCG/UDG
English
Contents
Introduction....................................................................................... 1
First Time Settings ........................................................................... 1
Ground Fault Circuit Interrupter (GFCI).......................................... 1
Active Display ................................................................................... 2
Exit Menu .......................................................................................... 2
4-Event Program............................................................................... 2
Quick Set Temperature ................................................................... 3
Adaptive Function............................................................................. 3
Manual Mode .................................................................................... 3
Temporary Override.......................................................................... 4
Child Lock ......................................................................................... 4
Temperature Unit.............................................................................. 4
Setting Time...................................................................................... 4
Setting Day........................................................................................ 5
Read Out ........................................................................................... 5
Offset Temperature........................................................................... 5
Application ........................................................................................ 5
Display............................................................................................... 6
Factory Reset.................................................................................... 6
Error Messages ................................................................................ 6
GFCI test button
Introduction
The thermostat can switch on your heating system at predetermined
times on different days of the week. For each day of the week, you can
set individual temperatures for 4 periods, called events. The thermostat
comes with a default schedule suitable for most installations. Unless you
change the settings, the thermostat will operate in compliance with the
default schedule. Lowering the temperature when the home is unoccu-
pied will reduce your energy costs without reducing comfort.
Furthermore, the thermostat features an adaptive function that automati-
cally changes heating period start times so as to ensure that the required
temperature is reached at the required time. After three days the adaptive
function has learned when the heating must be switched on.
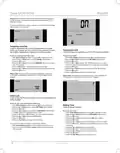
AUTO
ROOM
SET TEMP
First Time Settings
The first time you turn on the thermostat, time and day must be set. The
time flashes. Set the current time using the Up or Down buttons. Then
press the OK button to confirm the time. The day of the week will then
flash. Select the current day using the Up and Down buttons. Press the
OK button. The thermostat is now ready for use and will control your
heating according to the pre-programmed 4-event schedule (see Factory
Settings for Automatic 5:2 Program).
MON
Up button
OK button
Ground Fault Circuit Interrupter (GFCI)
The thermostat has a built-in GFCI that ensures personal safety in case of
ground faults.
It is important that the GFCI is checked monthly.
Down button
Checking the GFCI
Testing can only be performed while the thermostat is calling for heat.
Standby button
Reset GFCI
© 2012 OJ Electronics A/S · ® The OJ trademark is a registred trademark belonging to OJ Electronics A/S
1

| General | Details |
|---|---|
| Name | QUIETWarmth Type UCG Thermostat User Manual |
| Make | QuietWarmth |
| Language | English |
| Filetype | PDF (Download) |
| File size | 0.35 MB |


QuietWarmth THERMAEGH-ET72 Thermaegh Wifi Programmable Touchscreen Thermostat User Manual

QUIETWarmth Type UCG Thermostat User Manual Overview
Summary of Contents
- Page 1: Introduction The thermostat can switch on your heating system at predetermined times on different days of the week. For each day of the week, you can set individual temperatures for 4 periods, called events. Lowering the temperature when the home is unoccupied will reduce your energy costs without reducing comfort. The thermostat features an adaptive function that automatically changes heating period start times to ensure the required temperature is reached at the required time. First Time Settings The first time you turn on the thermostat, time and day must be set. The time flashes. Set the current time using the Up or Down buttons. The thermostat is now ready for use and will control your heating according to the pre-programmed 4-event schedule. Ground Fault Circuit Interrupter (GFCI) The thermostat has a built-in GFCI that ensures personal safety in case of ground faults. It is important that the GFCI is checked monthly. Testing can only be performed while the thermostat is calling for heat.
- Page 2: Adjust the setpoint until the heating symbol appears. Wait 10 seconds to allow the thermostat to adjust to the new setpoint. The test is successful if the red light in the TEST button lights up and GROUND FAULT is shown on the display. Press the Standby/Reset button to reset the GFCI. If the test fails, check the heating cable and thermostat. If during normal operation the GFCI trips without the TEST button being pressed, there could be a ground fault. Step 2: Choosing the weekly schedule for your program. 5:2 will give you 5 days with the same four events and 2 days with the same two events. 7:0 will give you individual settings for each day from Monday to Sunday. Step 3: Select the time and temperature settings for each event in the program of days selected in the previous step.
- Page 3: The new temperature setting will then be saved and used for this event in the future. If you change the temperature on a Tuesday morning while the thermostat is running a 5:2 program, the new temperature will apply to all mornings from Monday to Friday. To ensure that the required temperature has already been reached when you get up in the morning or come home from work, you must activate the adaptive function. The adaptive function is only related to the 4-event program and only works in connection with going from one event to another where the temperature is going to be raised. The adaptive function calculates when the thermostat must start the heating system to ensure that the required temperature is reached at the set time. Once time and temperature have been set for the two events applicable for the 2-day period Saturday and Sunday, the setup will return to the main menu with PROGRAM flashing. I want to temporarily cancel the automatic 4-event program and manually select temperature. I want to permanently change the temperature for the event currently active in the automatic program. To use manual mode, you must activate the menu and select the required temperature for the event currently active. The temperature will begin to flash when you select manual mode.
- Page 4: Type UCG/UDG Factory setting: OFF This feature can be useful for instance if you are going on holiday and want to maintain a frost protection temperature. To return to the automatic 4-event program, you must select Auto. Temporary Override allows you to set a comfort temperature for a single event. To change the temperature unit (°C/°F) used in the display, you must use override mode. Override mode is a temporary temperature setting that is cancelled automatically by the next event in the scheduled 4-event program. Temperatures are displayed in Celsius with a resolution of 0.5 degree and in Fahrenheit with a resolution of 1 degree. Factory setting: Celsius Child Lock prevents the thermostat menus from being changed. To change the time, you must follow specific steps in the settings menu.
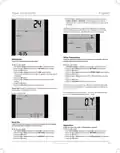
- Page 5: Type UCG/UDG Factory setting: 24 hour clock Press the Up or Down buttons to select the period of interest: 2 DAYS, 30 DAYS or 365 DAYS. The percentage of time that the heating has been turned on will then be indicated in the upper part of the display. The Readout submenu also contains information about the Software version and the type of control selected for the Application. I want to adjust the difference in temperature between the thermostat and my room thermometer. I want to change the day of the week. Offset is used to compensate for any difference between the thermostat and the actual room temperature. Factory setting: MON I want to know the amount of time (in percent) that the heating has been turned on within a certain period. I want to select the type of temperature control.
- Page 6: Press the Up or Down buttons to select one of the four types of control: ROOM: The built-in room sensor is used. Only room temperature is controlled. FLOOR: A floor sensor is used. Only floor temperature is controlled. REGULATOR: The thermostat functions as a simple regulator and no sensors are used. ROOM LIMIT: The thermostat controls room temperature while using the external temperature sensor as a limit sensor. If FLOOR or ROOM LIMIT is chosen, maximum and minimum floor temperatures can now be set. To return to the factory settings, follow the Exit Menu procedure. Error Messages: E0 = Internal failure. Replace thermostat. I want to choose the information to be shown on the thermostat display. You can decide whether the temperature displayed is the Room temperature, the Floor temperature, or the Regulator temperature. Factory settings: TIME: ON; SET TEMP.: ON; TEMP.: FLOOR.
- Page 7: Introduction Le thermostat peut démarrer votre système de chauffage à des heures prédéterminées pour différents jours de la semaine. Pour chaque jour, vous pouvez régler des températures individuelles pour 4 périodes nommées événements. Le thermostat est fourni avec un programme par défaut qui est adéquat pour la plupart des installations. Abaisser la température quand le domicile est inoccupé réduira vos coûts d’énergie sans diminuer le confort. Le thermostat possède une fonction d’adaptation qui change automatiquement l’heure de démarrage de la période de chauffage afin que la température souhaitée soit atteinte à l’heure que vous avez réglée. Premiers réglages La première fois que vous mettez en marche le thermostat, l’heure et le jour doivent être réglés. Le thermostat est maintenant prêt et il contrôlera votre chauffage en suivant le programme 4-événements par défaut. Disjoncteur de fuite à la terre intégré (GFCI) Le thermostat possède un disjoncteur de fuite à la terre intégré pour assurer votre sécurité au cas où une faute à la terre se produirait. Il est important de vérifier chaque mois le disjoncteur de fuite à la terre intégré.
- Page 8: Type UCG/UDG Vérification du disjoncteur de fuite à la terre intégré La vérification ne peut s’effectuer que si le thermostat active le chauffage. Étape 1 : Sélectionnez le contrôle automatique de la température. Le test aura réussi si la lumière rouge dans le bouton TEST s’allume et que GROUND FAULT s’affiche à l’écran. Si la vérification échoue, vérifiez le câble chauffant et le thermostat. Étape 2 : Sélection de la programmation hebdomadaire pour votre programme. 5:2 vous donnera 5 jours avec les mêmes quatre événements et 2 jours avec les mêmes deux événements. Les divers menus et sous-menus possèdent une option Exit. Réglage d’usine : 5:2 Programmation de 4 événements pour contrôler la température automatiquement.
- Page 9: Étape 3 : Choisissez l’heure et la température pour chaque événement du programme des jours que vous avez choisi à l’étape précédente. Appuyez sur les boutons Up (hausse) ou Down (baisse) jusqu’à ce que l’option Program (programmation) clignote. Appuyez sur le bouton OK. Appuyez sur les boutons Up (hausse) ou Down (baisse) jusqu’à ce que les jours que vous voulez programmer clignotent. Appuyez sur le bouton OK. Maintenant, le symbole pour le premier événement (par ex. le matin) clignotera. Je veux changer de façon permanente la température de l’événement courant dans le programme automatique. Pour le faire, vous devez appuyer sur les boutons Up (hausse) ou Down (baisse) pour régler la température requise pour l’événement activé. La description qui suit est un exemple dans lequel les réglages sont faits pour les événements journaliers dans un programme 5:2. Vous devez alors activer la fonction d’adaptation. La fonction d’adaptation calcule le moment où le thermostat doit démarrer le système de chauffage pour assurer que la température requise est atteinte à l’heure réglée.
- Page 10: Type UCG/UDG Réglage d’usine : ON (marche) Veuillez noter : Le mode de dérivation est un réglage temporaire de température qui sera automatiquement annulé par le prochain événement du programme à 4-événements. Je veux temporairement annuler le programme automatique à 4-événements et régler manuellement la température. Sécurité enfants (Séc. enfants) : Je veux bloquer les menus du thermostat afin d’interdire que les réglages soient changés. Pour retourner au programme automatique à 4-événements, vous devez sélectionner Auto. Veuillez noter : Cette fonction peut être utile par exemple si vous vous absentez pour les vacances et que vous souhaitez maintenir une température de protection contre le gel. Dérivation temporaire : Je veux régler temporairement une température de confort, pour un seul événement. Pour le faire, vous devez utiliser le mode de dérivation.
- Page 11: Type UCG/UDG Unité de température Je veux changer l’unité de température (°C/°F) qui est utilisée sur l’afficheur. Réglage d’usine : Horloge 24 heures Veuillez noter : Les températures sont affichées en Celsius avec une résolution de 0,5 degré et en Fahrenheit avec une résolution de 1 degré. Réglage du jour Je veux changer le jour de la semaine. Réglage de l’heure Je veux changer l’heure. Veuillez noter : Habituellement, l’électricien qui fait l’installation du thermostat aura réglé la bonne heure et le bon jour de la semaine. Lecture Je veux savoir combien de temps (en pour cent) le chauffage a été énergisé pendant une certaine période de temps.
- Page 12: Type UCG/UDG Je veux choisir le type de contrôle de la température. Appuyer sur les boutons Up (hausse) ou Down (baisse) jusqu’à ce que l’option Readout (lecture) clignote. Le sous-menu de lecture contient également de l’information à propos de la version du logiciel et du type de contrôle. Pièce : La sonde de pièce intégrée est utilisée. Limite de pièce : Le thermostat contrôle la température de la pièce et utilise une sonde de température externe. Je veux ajuster la différence de température entre le thermostat et mon thermomètre de pièce. Le décalage est utilisé pour compenser toute différence entre le thermostat et la température réelle de la pièce. Il est possible de régler le décalage jusqu’à +/- 10 °C ou +/- 18 °F. Je veux choisir l’information qui sera affichée sur l’afficheur du thermostat.
- Page 13: Type UCG/UDG Messages d’erreur E0 = Panne interne. Remplacer le thermostat. E1 = Sonde interne défectueuse ou court-circuitée. Remplacer le thermostat. E2 = Sonde externe défectueuse ou court-circuitée. Vérifiez la sonde externe. Réglage d’usine pour le programme automatique 5:2 Réglages d’usine: - HEURE: ON (marche) - Réglage temp. : ON (marche) - La température du sol est montrée. Réinitialisation valeurs usine Pour le faire, vous devez : 1. Avec l’écran actif, appuyez sur OK pour activer le menu. 2. Appuyer sur les boutons Up ou Down jusqu’à ce que l’option Settings clignote. Appuyer sur le bouton OK. Appuyer sur les boutons Up ou Down jusqu’à ce que l’option Factory Reset clignote.
- Page 14: Introducción El termostato puede encender su sistema de calefacción a horas predeterminadas en diferentes días de la semana. Para cada día de la semana, puede ajustar temperaturas individuales para 4 períodos, llamados eventos. El termostato viene con un programa predeterminado y adecuado para la mayoría de instalaciones. Bajar la temperatura cuando la vivienda no esté habitada reducirá sus costos de energía sin reducir el confort. El termostato incluye una función adaptativa que cambia automáticamente las horas de inicio del período de calefacción. Después de tres días, la función adaptativa habrá registrado la hora en que deberá encenderse la calefacción. Ajustes iniciales La primera vez que encienda el termostato, será necesario ajustar la hora y el día. Ajuste la hora actual con los botones Up o Down y confirme con el botón OK. Seleccione el día actual con los botones Up o Down y pulse el botón OK. El termostato ya está listo para el uso y controlará su calefacción de acuerdo con el programa de 4 eventos establecido previamente. Interruptor de circuito de fallo a tierra (GFCI) El termostato tiene un GFCI incorporado que garantiza la seguridad personal si ocurren fallos a tierra. Es importante verificar mensualmente el GFCI.
- Page 15: Verificación del GFCI Para hacerlo, será necesario realizar los 3 pasos siguientes: La prueba se puede realizar únicamente cuando el termostato activa la calefacción. Paso 1: Seleccione el control de temperatura automático. La prueba tiene éxito si se ilumina la luz roja en el botón TEST y en la pantalla aparece GROUND FAULT. Si falla la prueba, verifique el cable calefactor y el termostato. Si el GFCI se dispara durante el funcionamiento normal, podría haber un fallo a tierra. Paso 2: Elija el programa semanal para su termostato. Usted dispone de las opciones siguientes: 5:2, 6:1, 7:0. Este principio también se aplica a los ajustes actuales de hora y temperatura. Programa de 4 eventos.
- Page 16: Tipo UCG/UDG Paso 3: Seleccione los ajustes de hora y temperatura para cada evento en el programa de días seleccionado. Pulse los botones Up o Down hasta que parpadee la opción PROGRAM. Pulse el botón OK. Pulse los botones Up o Down hasta que parpadeen el día o los días que desee programar. Pulse el botón OK. Ahora parpadeará el símbolo para el primer evento. Pulse el botón OK. El reloj parpadeará, para permitirle ajustar la hora. La temperatura actual aparecerá en la parte superior de la pantalla. Ajuste rápido de temperatura. Para hacerlo, es necesario lo siguiente: Pulse los botones Up o Down para ajustar la temperatura deseada. Una vez que se haya ajustado la hora y la temperatura para los cuatro eventos aplicables, la configuración regresará al menú principal.
- Page 17: Tipo UCG/UDG Ajuste de fábrica: ON (ENCENDIDO) La modalidad de anulación es un ajuste temporal de la temperatura que se cancela automáticamente al ocurrir el próximo evento en el programa definido de 4 eventos. La función adaptativa calcula cuándo el termostato deberá activar el sistema de calefacción para asegurar que se alcance la temperatura requerida a la hora establecida. Bloqueo para niños: deseo bloquear los menús del termostato para impedir que se cambien los ajustes. Modo manual: deseo cancelar temporalmente el programa automático de 4 eventos y seleccionar manualmente la temperatura. Para regresar al programa automático de 4 eventos, deberá seleccionar AUTO. Anulación temporal: deseo establecer temporalmente una temperatura de confort para un solo evento.
- Page 18: Tipo UCG/UDG Unidades de temperatura Deseo cambiar las unidades de temperatura (°C/°F) utilizadas en la pantalla. Ajuste de fábrica: Hora militar (24 horas) Para hacerlo, es necesario lo siguiente: Pulse OK (ACEPTAR) para activar el menú. Pulse los botones Up o Down hasta que parpadee la opción SETTINGS. Pulse el botón OK. Pulse los botones Up o Down hasta que parpadee °C/°F en el área de menú. Las temperaturas aparecen en grados Celsius con una exactitud de 0,5 grados y en grados Fahrenheit con una exactitud de 1 grado. Ajuste de fábrica: Celsius Cómo ajustar el día Deseo cambiar el día de la semana. Pulse los botones Up o Down hasta que parpadee la opción DAY (Día). Cómo ajustar la hora Deseo cambiar la hora. Usualmente, el electricista que instaló el termostato habrá ajustado la hora y el día de la semana correctos.
- Page 19: Tipo UCG/UDG Para hacerlo, es necesario lo siguiente: Cuando se active la pantalla (se enciende la luz de fondo) pulse OK (ACEPTAR) para activar el menú. Deseo seleccionar el tipo de control de temperatura. Pulse los botones Up o Down hasta que parpadee la opción SETTINGS. Pulse el botón OK. Pulse los botones Up o Down hasta que parpadee la opción READOUT (Valor de lectura). El porcentaje de tiempo que la calefacción ha estado encendida aparecerá en la parte superior de la pantalla. El submenú Readout contiene también información sobre la versión del Software y sobre el tipo de control. Compensación de temperatura Deseo ajustar la diferencia en temperatura entre el termostato y mi termómetro ambiental. Offset (Compensación) se utiliza para compensar cualquier diferencia entre el termostato y la temperatura ambiente real.
- Page 20: Pulse el botón OK. Aparecerá un submenú. Pulse los botones Up o Down hasta que parpadee la opción DISPLAY (Pantalla). Pulse los botones Up o Down hasta que parpadee la opción RESET (Reajuste). Para salir del menú siga el procedimiento indicado en Exit Menu (Salir del menú). Ajustes de fábrica: HORA: ENCENDIDO, Temperatura establecida: ENCENDIDO, Se muestra la temperatura de SUELO. Mensajes de error: E0 = Error interno. Cambie el termostato. E1 = El sensor interno está defectuoso o en cortocircuito. Cambie el termostato. E2 = El sensor externo está defectuoso o en cortocircuito. Inspeccione el sensor externo. Reajuste de fábrica: Deseo restablecer los ajustes de fábrica. Cuando se active la pantalla, pulse OK (ACEPTAR) para activar el menú.

telethings teleRelays-2L Device Thermostat User Manual

Marley TA1A Single Pole Thermostat Instruction Manual

Network Thermostat X7-Series Thermostat Installation Guide
Danfoss VICUQ24M Icon Programmable II Room Thermostat Installation Guide

SKYTECH 5320P Programmable Thermostat Fireplace Remote Control Instruction Manual

GENERAL LIFE HT330S RF Room Thermostat User Manual

SunTouch SunStat CommandPlus Programmable Thermostat Instruction Manual

GENERAL LIFE MITRA 260S Wired Room Thermostat User Manual

Roth Touchline SL Standard Room Thermostat Installation Guide

SALUS iT500 Internet Thermostat Installation Guide