
Home > ESi Controls > ESi Controls ESRTERFW Wireless Digital Room Thermostat Installation Guide
ESi Controls ESRTERFW Wireless Digital Room Thermostat Installation Guide
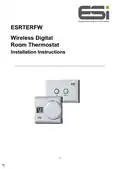






ESRTERFW
Wireless Digital
Room Thermostat
Installation Instructions
1


| General | Details |
|---|---|
| Name | ESi Controls ESRTERFW Wireless Digital Room Thermostat Installation Guide |
| Make | ESi Controls |
| Language | English |
| Filetype | PDF (Download) |
| File size | 0.17 MB |
 (1 votes, average: 5.00 out of 5)
 Loading...

ESi Controls ESRTP4TOUCH Programmable Room Thermostat Instruction Manual

ESi ESRTERFW Manual: Questions and Answers
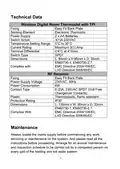
ESi ESRTERFW specifications
| Power supply | 2 x AA Batteries |
| Maximum load | Maximum 3(1) Amp |
| Sensor | Electronic Thermistor |
| IP rating | IP30 |
| Power consumption | 6W |
What is the temperature setting range for the ESi ESRTERFW?
5°C to 30°C. Installation Guide, p. 4
Can the ESi ESRTERFW be installed on an outside wall?
No. Do not install the thermostat on an outside wall, near radiators, lights, TVs, or in direct sunlight. Installation Guide, p. 5
Where is the reset button on the ESi ESRTERFW thermostat?
Remove the dial by firmly pulling it away from the thermostat. A small black button sits in the space underneath. Installation Guide, p. 6
ESi ESRTERFW compared with other ESi thermostats
| Specification | ESi ESRTERFW | ESi ESRTP4RFW |
|---|---|---|
| Power supply | 2 x AA Batteries | 2 x 1.5V LR6 (type: AA size) |
| IP rating | IP30 | IP30 |
| Power consumption | 6W | 6W |
More ESi thermostat manuals

hansgrohe 10717000 AXOR STARCK X Highflow Concealed Thermostat Instruction Manual

Arcoaire TSTATIIEWF-01 Gray Smart Thermostat Owner’s Manual

SECURE ThermoPlus PRT1 Programmable Room Thermostat Instruction Manual

ENGO CONTROLS EFAN-230W Fan Coil Thermostat User Guide

HVAC Controls UT32 Titan Touchscreen Thermostat User Manual

BEOK TGR85-EP Underfloor Heating Thermostat User Guide

telethings 2D Smart LoRaWAN Thermostat User Manual
Stelpro STE362RNP Electronic Thermostat User Guide

DEVI AN420938619179 Touch Electronic Intelligent Timer Thermostat Installation Guide

COPELAND ST55 Sensi Smart Thermostat Instruction Manual