
Home > ENGO CONTROLS > ENGO CONTROLS E901RF Series Programmable Thermostat User Guide
ENGO CONTROLS E901RF Series Programmable Thermostat User Guide


2
3
5
6
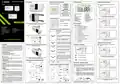
AUTO mode - work according to the schedule
In the automatic mode, the thermostat maintains the set
temperature according to the schedule selected by the user. You
can choose from 2 types of schedule to manage the temperature
during the week.
The first type of schedule (factory set with a time line)
and its programming is described below:
You are in the installer mode. Use
parameters. Enter the parameter by button. Edit the parameter using
or button. Confirm the new parameter value with the button.
or
buttons to move between
Confirm by button.
Using
or
buttons choose program number (4-9).
Select the week period using
Confirm by
or
button.
buttons.
7
4
6
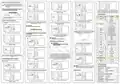
Installer parameters
- economic temperature
- comfort temperature
Default
value
Pxx
Function
Value
Description
There are 9 programs available. Programs 0-3 are factory programs.
Programs 4-9 can be defined by user.
Cooling
Heating
Heating/Cooling
Selection
P01
P02
Selection of factory (0-3) programs
Using
or
buttons choose YES and start the pairing process on a
new frequency by pressing the button.
1
2
SPAN 0,25°C
SPAN 0,5°C
Then - each time you press the sun - button or moon button - you
move the timeline one hour and assign a comfortable ( ) or economic (
temperature. Confirm by button.
Press any button to highlight the screen, then follow the
steps below:
)
8
Using
or
buttons set the program start and then after confirmation
by button, set the minutes.
Confirm by button.
Control method
temperature
3
TPI for Underfloor Heating
TPI for Radiators
1
1
4
PLEASE NOTE!
Programs should be set for each week days.
7
5
TPI for Electrical Heating
Display
P03 temperature
resolution
This parameter specifies the
accuracy of the displayed
(measured) temperature.
0,5°C
0,1°C
0,5°C
0°C
If the thermostat indicates
wrong temperature, you
can correct it by 3.5°C
The thermostat started to send a signal to find the receiver (the symbol
of the blinking antenna) and started the countdown with the number 10
(min). The pairing process may take up to 10 minutes.
Offset -3.5°C
P04
temperature to + 3.5°C
Press
button to enter the programming mode.
The second type of schedule and the programming method
is described below:
PROG
NO
Relay type
NC
Normally Open type of relay
9
Use
or
The thermostat will proceed to set the next program
(a maximum of 6 programs can be set).
buttons to set the temperature. Confirm by
button.
P05
NO
24h
°C
2
Normally Closed type of relay
Press any button to highlight the screen, then follow the
steps below:
24h
24 hour
12 hour
Celsius
P06 Clock format
12h
°C
PLEASE NOTE!
Programs should be set for each week days.
1
Temperature
Scale
P07
°F
Fahrenheit
Minimum
P08
Minimum heating / cooling
temperature that can be set
E901RF pairing process with the receiver
PLEASE NOTE!
5°C - 34,5°C
5,5°C - 35°C
5°C
setpoint
When the green diode on the receiver lights up continuously,
the devices have been paired on a new frequency.
5 sec.
Select the week period using
Confirm by
or
button.
buttons.
Maximum
P09
Maximum heating / cooling
temperature that can be set
E901RF THERMOSTAT IS ALREADY PAIRED
WITH THE RECEIVER!
35°C
YES
NO
setpoint
10
3
NO
YES
NO
Off
On
1
2
3
P10
P11
Key sound
Press
button for 5 seconds to enter to the schedule programming
selection mode.
PROG
Disabled
PIN Code
2
PIN
NO
Enabled
Require a PIN to
P12 unlock the keys
every time
Function disabled
YES
NO
YES
NO
Function enabled
No action
If you want to re-pair the devices with each other, make sure that the
receiver is disconnected from the power supply, and the switches on it
are in the ON and AUTO positions. Then connect the receiver to the power
supply and wait for the green diode to glow continuously. Next, move the
left switch to the OFF position and back to the ON position with a quick
motion. After all, the green diode will start blinking, which will confirm
that the receiver has entered the pairing mode.
The thermostat will display the message„good”, which means
that the devices are successfully paired with each other.
Using
or
buttons choose program number (0-3). Confirm by
Clear settings
CLR
11
button. The thermostat will proceed to program selection for the next time
period.
factory reset
YES
Factory Reset
*Only for E901RF thermostat
Using
or
buttons choose the second type of schedule
programming.
Choosing and programming (4-9) user programs
NO
YES
Function disabled
Function enabled
Pairing function
SYNC with receiver
(SYNC)
Press any button to highlight the screen, then follow the
steps below:
NO
3
4
1
The thermostat will return to the main screen.
Technical specification
Wired thermostat E901
WARNING! If the green diode on the receiver has not stopped
blinking after 10 minutes, repeat the pairing process taking into
account the distance between devices, obstacles and interference.
5 sec.
Thermostat supply
Rating max
2 x AA batteries
5 (3) A
Press button for 5 seconds.
Confirm by button. Thermostat will return to the main screen saving
the second type of schedule programming. The timeline will also disappear.
Installer settings
Outputs
Voltage-free NO/COM relay
5 - 35°C
Press
button to enter the programming mode.
PROG
5
1
Temperature range
4
2
Wireless thermostat E901RF (868 MHz)
Thermostat supply
Receiver supply
2 x AA batteries
230 V AC 50 Hz
16 (5) A
Receiver rating max
Receiver outputs
Temperature range
5 sec.
Voltage-free NO/COM relay
5 - 35°C
Use
or
buttons to select SYNC parameter.
To enter installer parameters press and hold button for 5 seconds.
Select the week period using
Confirm by
or
button.
buttons.
Press
button to enter the programming mode.
PROG

| General | Details |
|---|---|
| Name | ENGO CONTROLS E901RF Series Programmable Thermostat User Guide |
| Make | ENGO CONTROLS |
| Language | English |
| Filetype | PDF (Download) |
| File size | 0.64 MB |
 (1 votes, average: 5.00 out of 5)
 Loading...

ENGO Controls EONE230W Internet Controlled Thermostat User Guide

ENGO CONTROLS FAN-24W 24V Fan Coil Thermostat User Guide

ENGO CONTROLS EFAN-230W Fan Coil Thermostat User Guide

ENGO CONTROLS EASY230W Non-Programmable Wired Thermostat User Guide

ENGO CONTROLS EONE230 Internet Controlled Thermostat User Guide

ENGO CONTROLS EONEBATW, EONEBATB Internet Controlled Thermostat User Manual

ENGO Controls E901WIFI Internet Wireless Thermostat User Guide

ENGO CONTROLS EONE-BATW, EONE-BATB Internet Controlled Thermostat User Guide

ENGO CONTROLS EFAN-24W Fan Coil Thermostat User Guide

ENGO CONTROLS EFAN-230W WIFI 230V Fan Coil Thermostat User Guide


BEOK TGR86 Smart Underfloor Heating Thermostat User Guide

FRICO TPT16, TPT16WF Thermostat Instruction Manual

shadow-caster SCM-Series Thermostat Instruction Manual
Drayton 22902 Programmable 2 Channel Room Thermostat Installation Guide

nVent RAYCHEM AT-TS-13 Surface Sensing Thermostat Instruction Manual

Orbegozo FDR 65 Litres Adjustable Thermostat Instruction Manual

Livn 147 Thermostat User Guide

VIMAR 02913 Surface LTE Thermostat Installation Guide

meross MTS200HK Smart Wi-Fi Thermostat User Manual

Honeywell Lyric T5 Wi-Fi Thermostat Installation Guide