DAIKIN TRC-11 One Lite Connected Thermostat Instruction Manual


Daikin One Lite
Connected Thermostat
Installation & Commissioning
Technical Training Module TRC-11
© 2023 Daikin Comfort Technologies North America, Inc.

| General | Details |
|---|---|
| Name | DAIKIN TRC-11 One Lite Connected Thermostat Instruction Manual |
| Make | Daikin |
| Language | English |
| Filetype | PDF (Download) |
| File size | 1.01 MB |

DAIKIN One Lite Smart Thermostat User Guide

Daikin One Lite Smart Thermostat Instruction Manual

DAIKIN DTST-ONE-ADA-A One Touch Smart Thermostat Installation Guide

DAIKIN IM 1368 Vertical Stack WSHP Thermostat Instruction Manual
DAIKIN IM 1366 Remote Integrated Thermostat Instruction Manual
DAIKIN ONE Smart Thermostat Instructions

DAIKIN DKN509 Wireless Communicating Thermostat Instruction Manual
DAIKIN SQNSQ22 One Touch Smart Thermostat User Manual

EMSQ22 Daikin ONE Lite Smart Thermostat User Manual

DAIKIN S21 One Lite Smart Thermostat User Guide
DAIKIN TRC-11 One Lite Connected Thermostat Instruction Manual Overview
Summary of Contents
- Page 1: Daikin One Lite connected thermostat Installation & commissioning Technical training module TRC-11
- Page 2: Disclaimer This material provides technical information for trained and certified HVAC-R installers and technicians. Users must agree to the terms and conditions to view or use this material. The material cannot cover everything necessary for proper installation or repair of HVAC-R equipment. It does not address every possible scenario or environment a technician may encounter. This material should not be considered recommendations for best practices. It will not be considered installation or repair instructions if there is a conflict with Daikin- or Goodman-issued manuals. Each installer or technician is responsible for ensuring proper installation or repair. Users assume responsibility for any injury or damage resulting from their installation. Recording, copying, or distribution of this material is prohibited without permission from Daikin.
- Page 3: Daikin One Lite System configurations Installing Daikin One Lite Daikin One Cloud Services Commissioning Daikin One Lite Daikin One Home Agenda
- Page 4: Daikin One Lite is an affordable solution for ductless products. It features a small footprint design. Commissioning and setup can be accomplished with the Daikin One Cloud Services app. The end user can control the system remotely through the Daikin One Home app. An additional option for commissioning is through the Daikin One Lite user interface. It has limited features. The system is compatible with Amazon Alexa and Google Home. There is an open API for integration into most home control systems, such as Crestron and Control4.
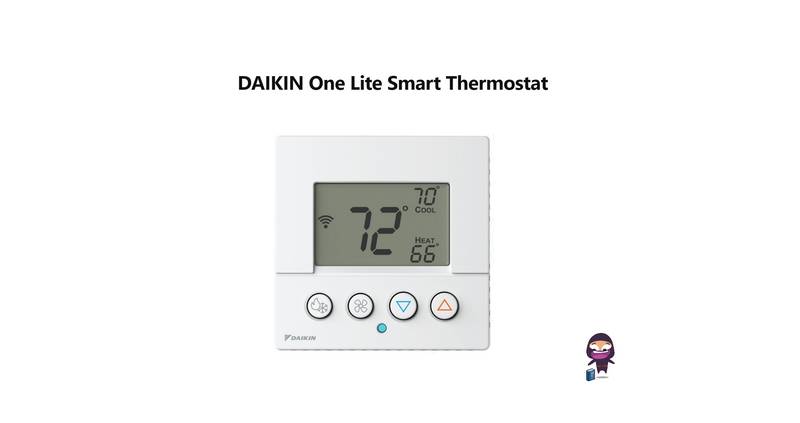
- Page 5: Daikin One Lite Connected Thermostat Daikin One Lite interface Pressing or holding down a button or combination of buttons navigates the user through menus to view/adjust settings. Navigation through menus and adjusting can also be made using tactile gestures on the Daikin One Cloud Services and Daikin One Home applications from your mobile device.
- Page 6: Daikin One’s messaging updates, confirms, and informs about selections you make during set-up and operation. There are four types of messages: Status Blue - cooling Red - heating Alerts A critical alert should be displayed as a message until resolved by the dealer and dismissed by putting the unit in “OFF” mode and then back into an operation mode. Reminders and prompts Learn more/tips (App only)
- Page 7: Daikin One Lite Connected Thermostat Quick reference cards are packaged with the thermostat to help answer questions during the installation and commissioning. Scanning the bar code on the bottom left corner will link you to a website related to the title of the card.
- Page 8: Daikin One Lite System configurations Installing Daikin One Lite Daikin One Cloud Services Commissioning Daikin One Lite Daikin One Home Agenda
- Page 9: Daikin One Lite thermostat for S21 indoor units. Indoor units that have S21 interface. Indoor units that do not have S21 interface. Indoor unit models required. Interface adaptor needed. Specific model numbers for compatible indoor units. Notes on compatibility with handheld IR remote controller. The Daikin One Lite is not compatible with certain models.
- Page 10: Daikin One Lite System configurations Installing Daikin One Lite Daikin One Cloud Services Commissioning Daikin One Lite Daikin One Home App
- Page 11: Installing Daikin Lite Thermostat Do not install the thermostat where it can be affected by drafts or dead spots behind doors and in corners. Avoid locations with hot or cold air from ducts or ceiling fans. Do not place it where it is exposed to radiant heat from the sun or appliances. Keep it away from concealed pipes and chimneys. Do not install in unheated or uncooled areas such as an outside wall.
- Page 12: Installing Daikin Lite Thermostat involves mounting the thermostat to be leveled. It should be approximately 5 feet from the floor and placed on an interior wall using the included screws. An optional trim plate is available.
- Page 13: Installing Daikin One Lite Thermostat Maximum wire distance between the Daikin One Lite and the translation adaptor should not exceed 125 feet using four conductor 18-gauge field supplied wire. Seal the hole made for routing the wiring to the thermostat’s terminal subbase. Check for proper voltage before and after wiring is installed. 0.6VDC between Data 1 and 2. 24VAC between R and C. Line voltage 230VAC. If wired incorrectly, you will receive an error. If power wires are reversed the PWR LED will flash green. Aux to Aux C is a 24V AC Dry contact.
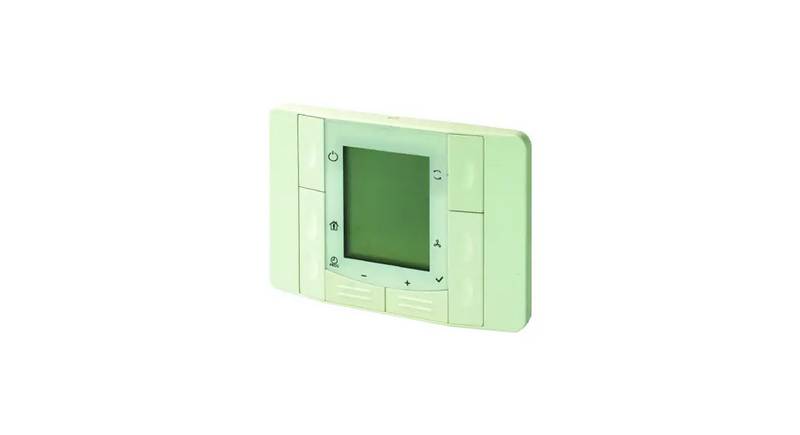
- Page 14: Installing Daikin Lite Thermostat Wiring the thermostat to a translation adaptor S21 wire harness to indoor unit PCB Indoor Unit 230VAC Translation adaptor Max 5-½ ft. LED Description 4 wires removable connector Max 125 ft. field supplied 18AWG 4 conductor, Solid, non shielded
- Page 15: Installing translation adaptor involves mounting it using screws. It is important to never use screws to mount to an indoor unit. The adaptor features two channels on the backside that allow the S21 and thermostat cables to exit from the same side.
- Page 16: Installing translation adaptor involves options for mounting based on spacing. The adaptor can be placed inside the piping chase or on the outside of the indoor unit. For ducted indoor units, it can be mounted on the side, top, or above the ceiling using double-sided adhesive tape.
- Page 17: Daikin One Lite System configurations Installing Daikin One Lite Daikin One Cloud Services Commissioning Daikin One Lite Daikin One Home Agenda
- Page 18: Inviting employees to Daikin One Cloud Services is essential for saving profiles created with the cloud service tool. Membership in an active Cloud Services account is required. An email invitation to join Cloud Services must be accepted. Daikin One Lite can be commissioned using the Daikin One Cloud Services app without an activated account.
- Page 19: Create Daikin One Cloud Services Account (Dealer Employee) When the employee clicks “Accept Invite” in the email they will be directed to dealer.daikinone.com, where they will click “Sign in with Daikin”. They will be directed to a login page, where they will click “Sign up now” below the ”Sign In” button.
- Page 20: Create Daikin One Cloud Services Account (Dealer Employee) The employee will be prompted to create a user login tied to the email used to invite them. Complete all fields and ensure password meets criteria. Employee will accept the Terms of Use and Privacy Policy, and then click “Register”.
- Page 21: Create Daikin One Cloud Services Account (Dealer Employee) The employee will receive confirmation that their account was created successfully and needs to check their email for the verification email. The employee will open the email with the subject “Daikin One Cloud Services: Verify your email” and click “Verify your account.”
- Page 22: Create Daikin One Cloud Services Account (Dealer Employee) The web page will provide confirmation that the email has been verified and the employee account has been created. Employee will then return to the dealer website and enter their newly created account credentials.
- Page 23: Upon your login, new users are directed to the “What’s New!” page which highlights recent feature releases, news, and updates. The employee can navigate into Cloud Service by clicking on the Dashboard, Customers, or Map navigation icons on the left-hand navigation menu.
- Page 24: Daikin One Lite System configurations Installing Daikin One Lite Daikin One Cloud Services Commissioning Daikin One Lite Daikin One Home Agenda
- Page 25: Creating system profiles involves downloading the Daikin One Cloud Services app from your respective app store. You need to create an account to use the app. Opening the app and selecting the tools icon at the bottom of the screen will access the system profile creation process. System profiles enable the technician to modify settings from the app and then upload those settings to the thermostat. You must be part of an organization to save profiles.
- Page 26: Create profile allows users to manage their settings. Selecting View Profiles shows a list of all created profiles. To create a new profile, select the plus. Saving a newly created profile will allow it to appear on the system profile screen. If not part of an organization, you will not have access to view or save profiles. You will proceed through Cloud Commissioning.
- Page 27: Setup thermostat involves selecting One Lite Connected Thermostat to complete several steps. These steps include connecting to the thermostat, selecting equipment, making adjustments, uploading the system profile, configuring home Wi-Fi, and finishing the setup.
- Page 28: Connect app to thermostat Wi-Fi. Press and hold the fan button for 5 seconds. Release the fan button and press the down button to continue. Approximately 10 seconds to enter AP mode. On your mobile device, tap “Discover Device.” When connecting to the thermostat's access point, the mobile device must be within two feet. Tap “Join” to pair the device with the thermostat's network.
- Page 29: Selecting equipment allows you to select the outdoor and indoor units. Connecting to the thermostat hotspot.
- Page 30: Applying system profile Tap “Continue” once compatible units have been selected. If part of an organization, created profiles will be listed. You can select and or modify any profile to send to the thermostat. If not part of an organization, “standard” will be the only profile option. Modifying the profile does not affect the saved profile.
- Page 31: Connect to Wi-Fi. Once the profile is sent to the thermostat, you will have the option to set up Wi-Fi through the homeowners' network.
- Page 32: Daikin One Lite System configurations Installing Daikin One Lite Daikin One Cloud Services Commissioning Daikin One Lite Daikin One Home Agenda
- Page 33: Mobile apps Account set-up Setting up an account is a four-step process. Downloading the application from your IOS or Android application store. Creating the account. Confirming your account. Adding the thermostats' location. Connecting the app to the thermostat. A mobile device, the Daikin One Lite connected to Wi-Fi that is wired to an S21 system and a valid email address is needed to create a mobile account.
- Page 34: Mobile apps Step 1 - Create the account Tapping create account will start the process. Before agreeing, read the terms and service, privacy statement, and other notices. Fill in your name, valid email address, and password.
- Page 35: Mobile apps Step 2 - Confirming the account You will be prompted to access the email address you provided when creating the account. A welcome email will appear in your inbox providing a six-digit code. Entering the six-digit code on your phone app will allow you to continue.
- Page 36: Mobile apps Step 3 - Adding the thermostat's location Tap the login button and enter the email and password associated with your mobile account. If you have forgotten your password, tap the forgot password link to recover information via email. Type the address of where the thermostat is located to gather accurate information.
- Page 37: Mobile apps Step 4 - Connecting the app to the thermostat Tap the added location and select “add thermostat”. Once the thermostat has been selected in the app, press and hold the fan button until the words “wireless setup” appear. Select next on the mobile app after “wireless setup” appears.
- Page 38: Mobile apps Step 4 - Connecting the app to the thermostat On the thermostat, press the warmer button to reveal the six-digit code. Select next on the mobile app after the code appears.
- Page 39: Mobile apps Step 4 - Connecting the app to the thermostat In the mobile app, enter the code displayed on the thermostat and select add.
- Page 40: Mobile apps are available for additional information.

WATTS WTC-ES Contact Thermostat User Manual

technoswitch TE315 Recessed Touch Thermostat User Guide

GENERAL LIFE HT250S Smart Room Thermostat User Manual

HELTUN Fan Coil Thermostat HE-FT01 User Manual

VILPE WIVE 100 Intake Vent Plus Thermostat

GENERAL LIFE MITRA 250 RF Digital Room Thermostat User Manual

Beca BHT-6000 Series Round Thermostat User Guide

hansgrohe Ecostat 1001 SL Shower Thermostat Instruction Manual

Homematic IP HmIP-WTH-B Wireless Wall Thermostat Instruction Manual

EUROTRONIC SPIRIT ZigBee Energy Saving Thermostat User Guide