
Braemar BRA639659 Manual Digital Thermostat Instruction Manual


641150b.pdf
1
25/11/2021 3:45:11 PM
INSTALLATION INSTRUCTIONS
Braemar Manual Digital Thermostat
Rated to 24VAC Maximum
1. SELECT THERMOSTAT LOCATION
Thermostat should be located central to the main
living area approximately 1.5m above the floor. The
main living area should be confirmed with the
occupants.
TEMP
°C
Avoid direct sunlight.
Avoid mounting on an external wall.
Avoid mounting near heat sources such as stoves,
televisions, etc.
Do not locate in air stream from an outlet register.
Do not locate in draughty areas.
Do not locate in hallways.
Do not locate adjacent to the return air grille.
Always fill cable entry hole in wall.
2. PREPARE WALL AND WIRING
Drill a suitably-sized hole in wall at centre of selected
thermostat location - this is to feed the thermostat
cable through the wall for connection to the
thermostat.
Run twin-core cable between heater and thermostat
location, and feed thermostat cable through the
pre-drilled hole in the wall.
3. FIT THERMOSTAT TO WALL AND
CONNECT WIRING TO
THERMOSTAT
Remove thermostat from wall bracket.
Place wall bracket on wall allowing cables to feed
through the middle of the bracket. Secure bracket to
the wall with screws.
Secure twin-core cables into terminal block located
on wall bracket.
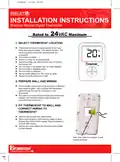
Twin core cable from heater to wall
bracket teminals


| General | Details |
|---|---|
| Name | Braemar BRA639659 Manual Digital Thermostat Instruction Manual |
| Make | Braemar |
| Language | English |
| Filetype | PDF (Download) |
| File size | 0.24 MB |
 (1 votes, average: 5.00 out of 5)
 Loading...

Braemar BRA639659 Manual Manual: Questions and Answers
Where do I connect the twin-core cable on the Braemar BRA639659?
Connect twin-core cables into the terminal block located on the wall bracket. Instruction Manual, p. 1
How do I install the Braemar BRA639659 Manual on my wall?
Drill a hole at the thermostat location, secure the wall bracket with screws, connect cables to terminals, install batteries, then mount the thermostat.
- Drill a suitably-sized hole in the wall at the centre of the selected location.
- Place the wall bracket on the wall allowing cables to feed through the middle.
- Secure the bracket to the wall with screws.
- Connect twin-core cables into the terminal block on the wall bracket.
- Remove the battery compartment cover on the rear and fit two AAA batteries.
- Mount the thermostat to the wall bracket. Instruction Manual, p. 1

Roth SL Car Air Conditioner Thermostat Instructions

QuietWarmth THERMAEGH-ET72 Thermaegh Wifi Programmable Touchscreen Thermostat User Manual

SALUS Fan Coil thermostat FC600 User Guide

AIRZONE AZX6AIQSNSB-AZX6AC1VALR Think Wireless Monochrome Thermostat User Manual

Honeywell TH6320U2008 Pro Programmable Thermostat Installation Guide

Honeywell Home X8S Smart Thermostat User Guide

Honeywell T8131A Programmable Thermostat Owner’s Manual

Danfoss 015G3090 React Radiator Thermostat Installation Guide

Milesight WT101 Smart Radiator Thermostat User Guide

Danfoss KPU 19 Thermostat Installation Guide