
Beca BHT-006 Series Thermostat User Manual
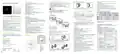


Press the icon
hour by
Press the icon
temperature by
This completes the seꢂng of periods1.
In the same way, complete the seꢂngs of periods2, 3, 4 and 5
(display periods1,2), 5 (display periods3, 4).
Press the icon
again, the hour of the ꢀme will flash, set the
Step 6. Installaꢀon complete. See Fig 6.
TECHNICAL DATA
BEFORE WIRING AND INSTALLING
;
Power Supply:95 ~240 VAC, 50~60Hz
Current Load: 5A (water heating, gas boiler), 16A (electric heating)
Sensor: NTC3950, 10K
1. Read these instructions carefully. Failure to follow them could damage the
product or cause a hazardous condition.
2. Check the rathings given in the instructions and on the product to make
sure the product is suitable for your application.
3. Installer must be a trained, experienced service technician.
4. After installation is complete, check out product operation as provided in
these instructions.
again, the temperature seꢂng will flash, set the
;
BHT-006 Series Thermostat
Accuracy: ±1°C
Set Temp. Range: 5-35°C
Room Temp. Range: 5-99°C
Display Temp. Range: 5 ~ 99°C
once more to enter the Saturday schedule
Ambient Temp.: 0~ 45°C
seꢂngs (you will see the SAT in the upper leſt corner of the screen).
Repeat the above process to set the period and temp. and Sunday
schedule.
Ambient Humidity: 5 ~ 95 % RH (Non Condensing)
Storage Temp.:-10~ 45°C
CAUTION
HOME SCREEN QUICK REFERENCE
Power Consumption: <1. 5W
Timing Error: < 1%
Electrical Shock or Equipment Damage Hazard. Can shock
individuals orshort equipment circuitry.
Disconnect power supply before installaꢀon.
Press the icon
once more to confirm and exit.
Weather
Mode
Shell Material: PC +ABS ( Fireproof)
Installation Box: 86 * 86mm Square or European 60mm Round Box
Wire Terminals: Wire 2 x 1.5 mm2 or 1 x 2.5 mm2
Protection Class: IP20
Heating On
Room Temp.
Set Temp.
Underfloor
Heating On
Clock
WIRING
Buttons: Capacitive Touch Buttons
GA
Temp.Display
Energysaving
Power On/off
Sleep mode
Wifi
AC95~240V
N
Manual/
FEATURES
On Appearance
1. LED display, more friendly interface;
2. Touch operation buttons, smoother interaction;
3. The ultra-thin embedded panel perfectly fits all kinds of walls;
4. The borderless small rounded corner design is simple and atmospheric;
5. Compatible with standard 86mm square cassettes and 60mm European
cassettes to meet all installation environments;
L
NTC
For Water Heating/Boiler/Electric Heating
Programmable
IP20
M
Lock
Up
Thank you for purchasing our products, please read
the following terms before installation and use:
5
6
GB
Period
1
3
4
2
Week
AC95~240V
N
L
Down
RH
NTC
IP20
Please confirm that this product is suitable for your heating
equipment before installation;
*Before installation or maintenance, please make sure to keep
the power off;
*Please strictly follow the wiring diagram for wiring installation;
*Installation to the wall, please confirm that the fasteners are
suitable for this product;
*Do not pull the cable too hard, otherwise the product will be
damaged;
*If a hard plastic wire is used in the installation process, it must
be bent to an appropriate angle in advance;
*Please arrange for professionals to install;
*Please contact the after-sales service for equipment failure,
please do not try to repair it yourself;
* After installation, please refer to this manual to check again to
ensure normal and safe use, and keep this manual properly.
Time
LOAD
N1
L1
5
6
GC
1
3
4
2
Note: The weather and humidity will be synchronized within 1 hour after the
device is connected to the Internet for the first time, and the weather
will be synchronized every hour thereafter.
AC95~240V
N
On Funcꢀonality
L
NTC
IP20
Dry Contact
1. Rich function options, Modbus, WIFI, keycard, etc., to meet all your
needs;
2. Strict temperature control accuracy (±1℃) to provide the warmth you
want;
3. Power off protection, save all your settings safely;
4. Provide weather information and humidity display
5. Preset adjustment of 5+1+1 mode in a week, programmable setting of
6 time periods a day, green energy saving,
Less cost, more intelligent and environmental protection;
6. Support the creation of product local groups/shares to achieve
unlimited centralized control of the number of products/
multi-terminal control;
Press the
temperature
/
in the power-on state to display the humidity and set
1
3
4
2
Note:
GA is for water heaꢀng;
GB is for electric heaꢀng;
GC is for water/gas boiler;
OPERATION
During Power On
8.Seꢁng the Funcꢀons and Opꢀons
During Power Off, press and hold
and
for 8 sec. in the
to scroll through
order to reach system function. Then press
the available functions , and use the
1. Power On/off: Press
to turn the thermostat on/off.
NTC and Modbus is opꢀonal.
arrows to change the
2. Funcꢀon & Programmable
Touch to change between manual mode and programmemode.
In manual mode, will show on the display,
available options. All settings are confirmed automatically.
INSTALLATION
Your thermostat is suitable for istallaꢀon within a standard 86mm
paꢁress box or European 60mm paꢁress box.
Code
Funcꢀon
Seꢁng and opꢀons
Default
Temperature
compensaꢀon
1
-9 to 9 ℃ (for internal sensor)
-3
In programmable mode,
will show on the display.
7. Perfect access: Tmall Genie, Amazon echo, Google Home, full
experience new voice control method;
Deadzone
Temperature.
2
3
1-5℃
1
ABOUT YOUR THERMOSTATS
3. Seꢁng Temperature
Step 1. Keep power off. See Fig 1.
Step 2. Remove the mounꢀng plate by pushing the LED assembly. See Fig 2.
00:All buꢁons are locked except power buꢁon.
01:All buꢁons are locked.
Buꢁon Locking
Sensor typer
01
The BHT- 006 range has been developed to control electric
underfloor, water heating or water/ gas boiler systems. These units
are designed for use in commercial, industrial, civil and domestic
properties
In the programming mode, the temperature setting and time setting will be
locked. If the user wants to adjust, he must first adjust the thermostat to
60.0
In:Internal Sensor(to control the temp.)
Ou:External Sensor(to control the temp.)
AL:Internal/External Sensor (Internal sensor to
control the temp., external sensor to limit the temp.)
DIMENSION:(mm)
manual mode by pressing the
In the mode of manual, press
4. Adjusꢀng/Seꢁng the Clock
key.
4
AL
to set the desired temperature.
5
6
Min.Set Temp.
Max.Set Temp.
5-15℃
05
35
Press
Press
to set minute, hour and weekday. By using the
once more to confirm and exit.
.
+0.1
88.0
MODEL DEFINITION
-0.1
15-45℃
00 : Display both set temp. and room temp.
01 : Display set temp. only
7
Display Mode
00
00
45
GA: Water heating, 5A
5. Locking your Thermostat
Step 3. Connect power supply, load into the appropriate terminals.
(see "Wiring your thermostat" for details and Fig 3).
Step 4. Fix the mounꢀng plate into the wall with screws in
the box. See Fig 4.
GB: Electric floor Heating, 16A
GC: Water/Gas Boiler, 5A
L: Backlight
Low temperature
protecꢀon seꢂng.
Press and hold the
In item 3 of high senior options, you can select full lock or half lock.
for 5 seconds to lock/unlock your thermostat
8
9
A
0-10℃
High temperature
protecꢀon seꢂng.
N: Modbus Communication
W: Wifi
S2: Both internal sensor and floor external sensor
25-70℃
6. Adjusꢀng/seꢁng the Program Schedules
11.9
37.5
00: Non-energy saving Mode
01: Energy saving mode
If the thermostat does not establish a Wi-Fi connection, manually set the
schedule see below for detailed instructions: To set the program
schedules throughyour thermostat (NOT via your smartphone/tablet)
simply follow theinstructions as below:
Economy Mode
0
B
C
Economy Temp.
0-30℃
20
For example: BHT-006GA
Dayꢀme display
brightness(6:00-22:00)
Brightness at night
(22:00-6:00)
When set to 0, the device will run
0-8
1
1
for 10 seconds aſter inacꢀvity.
The screen will go completely
off with no display.
Please note: Setting the programme schedule through your
0-8
D
E
F
thermostatcan only be carried out if there is no WiFi
In the box you will find
connection between yourthermostat and smartphone/tablet.
Reset
00: No factory reset; 01: Factory reset
00
Thermostat
User Guide
QC Passed
1pc
1pc
1pc
Screws
2pc
1pc
Press icon
FRI" and
Use
four ꢀmes in a row. You can see "MON TUE WED YHU
, and the minutes of ꢀme are flashing.
to set the minutes;
Version number
U2
Step 5. Fix the thermostat body and the mounꢀng plate by the lower
buꢁon. See Fig 5.
Wall plate
(Floor sensor is Optional)


| General | Details |
|---|---|
| Name | Beca BHT-006 Series Thermostat User Manual |
| Make | BECA |
| Language | English |
| Filetype | PDF (Download) |
| File size | 0.97 MB |
 (1 votes, average: 5.00 out of 5)
 Loading...

Beca BHT-9000 Thermostat User Guide

beca BAC-005 Series Thermostat User Guide

Beca BHT-6000 Series Round Thermostat User Guide

Beca BAC-1000 Series WiFi Thermostat User Guide

Beca BHT-002 Electric Heating Wifi Thermostat User Guide

Beca BHT-008 Heating Thermostat User Guide

Beca BHT-7000 Smart Knob Thermostat User Manual

Beca BAC-006 Zigbee Thermostat User Guide

Beca BHP-8000 C Room Thermostat User Guide

beca BAC-003 Series WiFi Thermostat Fan Coil User Guide

BECA BHT-006 Manual: Questions and Answers
BECA BHT-006 specifications
| Maximum load | 5A (water heating, gas boiler), 16A (electric heating) |
| Display range | 5 ~ 99°C |
| Accuracy | ±1°C |
| Sensor | NTC3950, 10K |
| Operating temperature | 0~ 45°C |
| Storage temperature | -10~ 45°C |
| Humidity | 5 ~ 95 % RH (Non Condensing)CAUTION |
| IP rating | IP20 |
| Power consumption | <1. 5W |
What temperature range can the BECA BHT-006 control?
The set temperature range is 5 to 35°C. Room temperature sensing covers 5 to 99°C. User Manual, p. 1
What is the difference between manual and programmable mode on the BECA BHT-006?
| Mode | Behavior |
|---|---|
| Manual mode | Temperature and time settings are unlocked and adjustable. Press to set desired temperature. |
| Programmable mode | Temperature setting and time setting are locked. Switch to manual mode first to adjust them. |
BECA BHT-006 compared with other BECA thermostats
| Specification | BECA BHT-006 | BECA BHT-7000 | BECA BHP-8000 C | BECA BAC-7000 |
|---|---|---|---|---|
| Sensor | NTC3950, 10K | NTC3950, 10K | NTC3950, 10K | NTC3950, 10K |
| Operating temperature | 0~ 45°C | 0~ 45°C | 32~113 ℉ (0~45℃) | 0~45 ℃ |
| Storage temperature | -10~ 45°C | -10~ 45°C | 23~113℉ (-5~45℃) | 0~ 45℃ |
| Humidity | 5 ~ 95 % RH (Non Condensing)CAUTION | 5 ~ 95 % RH (Non Condensing) | 5~95%RH(Non Condensing) | 5 ~ 95 % RH (Non Condensing) |
| IP rating | IP20 | IP20 | IP20 | IP20 |
| Power consumption | <1. 5W | <1. 5W | <1.5W | <1.5W |
More BECA thermostat manuals

BEOK TDR89 Zigbee Room Thermostat User Guide

Day and Night TSTATIIEWF-01 Gray Smart Thermostat Owner’s Manual

GENERAL ARUNA 300S Smart Room Thermostat User Manual

Danfoss VIMCA20F 24V RT Room Thermostat Installation Guide

ENGO CONTROLS E10-MBUSW Wi-Fi Modbus Thermostat User Guide

aube technologies TH104PLUS Programmable Thermostat Owner’s Manual

SALUS RT310i Smart Phone Controlled Programmable Thermostat Installation Guide

Danfoss RA2000 TRV Thermostat Instructions

MClimate MC-LW-V02 Smart Radiator Thermostat User Manual

Honeywell VisionPRO Series 7 Day Programmable Thermostat User Guide