
ADEPT T6100 Thermostat Instruction Manual
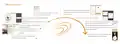
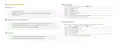
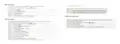

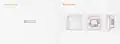


V2.5
01
02
03
INSTALL
04
Thermostat Instruction
Easy touch Easy warm


| General | Details |
|---|---|
| Name | ADEPT T6100 Thermostat Instruction Manual |
| Make | ADEPT |
| Language | English |
| Filetype | PDF (Download) |
| File size | 0.53 MB |
 (1 votes, average: 5.00 out of 5)
 Loading...

Adept T6100 Manual: Questions and Answers
Adept T6100 specifications
| Power supply | 85-265Vac 50/60Hz |
| Floor temperature limit | 30.0°C |
| IP rating | IP21 |
| Power consumption | 1W |
Can the Adept T6100 run on a floor sensor alone?
Yes. In Sensor selection, choose option 01 for Floor sensor to run the thermostat by floor sensor only. Instruction Manual, p. 8
What does the Anti-frozen function on the Adept T6100 do?
It brings warmth to plants and pets at a lower temperature. In hydronic heating systems, it prevents freezing. Instruction Manual, p. 8
How do I connect the Adept T6100 to WiFi?
Use the Warmme app to add your thermostat to a 2.4G WiFi network.
- Download the Warmme app from your app store.
- Register and log in with your mobile number or email address.
- Click Create family to set up your account.
- Click Add Device when the WiFi icon flashes quickly.
- Enter your WiFi password and confirm.
- Set your device name and region when setup completes. Instruction Manual, p. 5
How do I install the Adept T6100 on the wall?
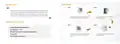
Mount the back panel first, then attach the front panel.
- Loosen the fixing screw at the bottom to remove the front panel.
- Insert the back panel into the wall box with provided screws.
- Align the top part of the front panel with the back panel.
- Fix both parts together with the screw. Instruction Manual, p. 3
Adept T6100 compared with other floor heating thermostats
| Specification | Adept T6100 | Amber DT-two | BEOK TDR89 | BEOK TDS75 |
|---|---|---|---|---|
| Power supply | 85-265Vac 50/60Hz | 85-265Vac 50/60Hz | 100 ~ 240V | 200 ~ 240V 50 ~60Hz |
| Floor temperature limit | 30.0°C | 30°C | 5-60℃ | 2℃ |
| Power consumption | 1W | < 1W | <1W | <0.3W |

GENERAL LIFE 300S Smart Thermostat User Manual

ENGO CONTROLS FAN-24W 24V Fan Coil Thermostat User Guide

FantiniCosmi C820RQ LED Thermostat Instruction Manual

Eurotronic Technology sprit Z-Wave Smart Radiator Thermostat Installation Guide

Honeywell T6 Smart Thermostat User Guide

WARMZONE UWG5 Wi-Fi LED Touch Thermostat User Guide

EONEBATW-B ZigBee Smart Thermostat User Guide

Danfoss BD271136569160en-010102 Electronic Radiator Thermostat Owner’s Manual

Ouellet Canada OTH24-AFR Programmable Low Voltage Electronic Thermostat User Guide

Drayton RF902 Digistat 3rd Generation Wireless 2-Channel Programmable Thermostat Installation Guide