
Lightwave DTS92E Honeywell Home Wireless Room Thermostat User Manual





Product Manual for:
Honeywell Home Wireless Room
Thermostat DTS92E
Installing the DTS92E
The device takes 2x AA batteries. Before mounting DTS92 onto the backplate:
Control Layout


| General | Details |
|---|---|
| Name | Lightwave DTS92E Honeywell Home Wireless Room Thermostat User Manual |
| Make | Lightwave |
| Language | English |
| Filetype | PDF (Download) |
| File size | 0.33 MB |
 (1 votes, average: 5.00 out of 5)
 Loading...

Lightwave DTS92E Honeywell Home Manual: Questions and Answers
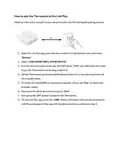
How do I pair the Lightwave DTS92E to the Link Plus app?
Position the thermostat about 1 meter from the Link Plus, then use the app and thermostat controls together to establish the connection.
- Open Link Plus, tap the plus symbol in the bottom menu and select Devices.
- Select LINK HONEYWELL HOME DEVICE and name the device. Do not press LINK yet.
- Press and hold the power button on the thermostat for 2 seconds to enter standby mode.
- Press UP and DOWN arrow buttons together until Inst appears on screen.
- Press the down arrow once to reach C0nt, then press the OFF button.
- In the app, press LINK. The device pairs and appears with the name you entered. User Manual, p. 3
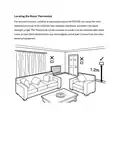
Where should I install the Lightwave DTS92E Honeywell Home for accurate readings?
Position it in an open space away from radiators, fans, windows and doors. Mount on a wall or optional table stand at least 30cm from metal objects and 1 metre from other electrical equipment. User Manual, p. 4
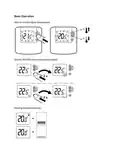
How do I activate ECO mode on the Lightwave DTS92E Honeywell Home?
Press the green ECO button to enter ECO mode for a timed period at a predefined temperature. User Manual, p. 7
What does the battery low warning on the Lightwave DTS92E Honeywell Home mean?
The display indicates battery power is low. The thermostat will continue working for at least 4 weeks after this warning appears. User Manual, p. 8

Danfoss UT 72-UT 73 Universal Thermostat Installation Guide

expert4house BHT-006 Series Thermostat Instruction Manual

Klima SF300 Digital Thermostat Instruction Manual

SMT-2W5 Smart Temp Wifi Thermostat Instruction Manual

Danfoss RET230 Electronic Heat Cool Thermostat Instruction Manual

sensi 1F95U-42WF Series Touch Smart Thermostat User Guide

Honeywell T3 Programmable Thermostat User Guide

Drayton Wiser Smart Room Thermostat Instruction Manual
DAIKIN ONE Smart Thermostat Instructions

DAIKIN EKRRVATR2BA Home Controls Radiator Thermostat User Guide