Home > fastwarm > fastwarm HM-01-16A Digital Programmable Thermostat Instruction Manual

fastwarm HM-01-16A Digital Programmable Thermostat Instruction Manual
Digital Thermostat  
I N S T R U C T I O N M A N U A L  
GeneralDetails
Namefastwarm HM-01-16A Digital Programmable Thermostat Instruction Manual
Makefastwarm
LanguageEnglish
FiletypePDF (Download)
File size0.22 MB
Download PDF
1 Star2 Stars3 Stars4 Stars5 Stars (1 votes, average: 5.00 out of 5)
Loading...
fastwarm 16AMP Touchscreen Thermostat Instruction Manual

fastwarm HM-01-16A Digital Programmable Thermostat Instruction Manual

Get the free PDF manual for the fastwarm HM-01-16A Digital Programmable Thermostat Instruction Manual and access setup steps, usage instructions, and troubleshooting tips. 👉 View online or download now to keep your thermostat running smoothly!

fastwarm HM-01-16A Digital Programmable Thermostat Instruction Manual Overview
Summary of Contents

  • Page 1: Digital thermostat instruction manual.
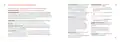
  • Page 2: Mode 1 - Thermostat Locking/Unlocking the thermostat Mode 2 - Time Clock Holiday LCD Display Power On/OFF Optional Settings Explained Setting the Switching Times Temperature Control Error Codes
  • Page 3: What is a programmable room thermostat? A programmable room thermostat is both a programmer and a room thermostat. A programmer allows you to set “On” and “Off” periods to suit your own lifestyle. The way to set and use your programmable room thermostat is to find the lowest temperature settings that you are comfortable with. A room thermostat works by sensing the air temperature, switching on the heating when the air temperature falls below the thermostat setting. The best way to do this is to set the room thermostat to a low temperature – say 18°C, and then turn it up by 1°C each day until you are comfortable. A programmable room thermostat lets you choose what times you want the heating to be on, and what temperature it should reach. You are able to temporarily adjust the heating program by overriding or using the temperature hold feature. Setting a programmable room thermostat to a higher temperature will not make the room heat up any faster. Programmable room thermostats need a free flow of air to sense the temperature, so they must not be covered by curtains or blocked by furniture. Setting a programmable room thermostat to a lower temperature will result in the room being controlled at a lower temperature, and saves energy.
  • Page 4: Installation procedure includes several key steps for proper setup. Mount the thermostat at eye level. Use a small screwdriver to loosen the screw from the bottom face of the thermostat. Carefully separate the front half from the back plate. Terminate the thermostat as shown in the diagram on page 26 of this booklet. Read the instructions fully to get the best from the product. Do not install near a direct heat source as this will affect functionality. Do not push hard on the LCD screen as this may cause irreparable damage. Screw the thermostat's back plate securely into the back box. This thermostat is designed to be flush mounted and requires a back box of 35mm minimum depth. Replace the front of the thermostat onto the back plate by locating the pins in the socket.
  • Page 5: Mode select ProDigital™ can either be used as a thermostat or a time clock. Thermostat mode is the default setting. To change between thermostat and time clock modes, use the ‘Left/Right’ arrow keys to highlight and press and hold the ✓ button for 3 seconds. The screen will go blank showing only ‘SETUP’ and ‘CLOCK’. Tap either of the ‘Up’ or ‘Down’ arrow keys to highlight ‘SETUP’, then hold the ✓ key for 10 seconds. The ProDigital™ will factory reset then provide 2 selectable mode options. Mode 1 = Thermostat. Mode 2 = Time Clock. The selected option will flash. Press the ✓ key to confirm selection. The ProDigital™ will reset all parameters and restart in the selected mode. The Mode Select function will reset all parameters that were entered during the setup operations.
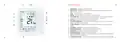
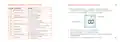
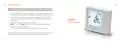
  • Page 6: LCD display features include: - Day indicator shows the day of the week. - Flame symbol indicates when the thermostat is calling for heat. - Clock displays time in 24-hour format. - Holiday mode is indicated when the thermostat is in holiday mode. - 'Until' and 'Hold Left' messages appear during temperature overrides and holds. - Frost icon indicates when frost protection is enabled. - Floor/room temperature and set point changes are displayed. - Program indicators show which period is being altered during programming. - Main menu highlights the selected option. - Keypad lock indicator shows when the keypad is locked.
  • Page 7: Power On/Off Setting the time and date The heating is indicated ON when the flame icon is displayed. When the flame icon is absent, there is no requirement for heating to achieve the set temperature but the thermostat remains active. To set the clock, follow these steps. To turn the thermostat off completely, scroll to the Power Icon and hold the button. To turn the thermostat back ON, press the button once. Use the ‘Up/Down’ arrow keys followed by the button to set the ‘Hours’. Use the ‘Up/Down’ arrow keys followed by the button to set the ‘Minutes’. Repeat the previous two steps to set the date (‘Day, Month & Year’). Press the ‘Down’ arrow key followed by the button to return to the main display.
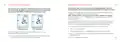
  • Page 8: Temperature display The ProDigital™ offers three program mode options: Weekday/Weekend, 7 Day, and 24 Hour programming. The thermostat can be configured for different sensor options such as built sensor, floor sensor, or both. The display will indicate which sensor is being used by showing either ‘ROOM TEMP’ or ‘FLOOR TEMP’. The thermostat is supplied with comfort levels already factory programmed, but these can be changed easily. The default times and temperature settings are: 07:00 - 21°C Wake, 09:00 - 16°C Leave, 16:00 - 21°C Return, 22:00 - 16°C Sleep. Unused levels must be set to --:-- so that the thermostat will skip these and continue to the next programmed time. For Weekday/Weekend programming, the four comfort levels are the same for Mon-Fri but can be different for Sat-Sun. In 24 Hour mode, all days are programmed with the same comfort levels. To program the ‘Comfort Levels’, use the ‘Left/Right’ keys to scroll to ‘EDIT’. When the ProDigital™ is set to use both the air & the floor sensor, the room temperature will be displayed by default.
  • Page 9: Edit the comfort levels. Temperature control. Use the ‘Up/Down’ arrow keys to adjust the set temperature. When you press either key, you will see the word ‘SET’ and the desired temperature value. Press ✓ to confirm settings and return to the main display. Press the ‘Right’ arrow key. ‘Level 2’ will now flash and the current settings will be displayed. Repeat these steps to set all comfort levels. For any unused periods set time to --:--. You can set up to a maximum of 6 levels by enabling these in the feature menu. This new temperature is maintained only until the next programmed comfort level.
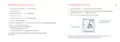
  • Page 10: Temperature hold function allows manual override of the current operating program. Use the ‘Left/Right’ keys to scroll to the ‘Power Icon’. The frost icon toggles ON/OFF each time pressed. Use the ‘Left/Right’ keys to scroll to ‘Hold’ and press. Set the desired ‘Hold’ time (Hours) and press to confirm. In frost mode, heating turns ON only if room temperature drops below the set frost temperature. To cancel frost protect mode, navigate to the ‘Power Icon’ and press. You will see the ‘HOLD LEFT’ indication displayed on screen. Use the ‘Left/Right’ keys to scroll to ‘Hold’ and press to cancel ‘Hold’. To edit ‘Hold’ settings, follow the same procedure as indicated in the steps above.
  • Page 11: Locking the thermostat The ProDigital™ has a keypad lock facility. To activate the lock, follow these steps. In time clock mode, the timed output will be turned off during the holiday period. In thermostat mode, the holiday function reduces the set temperature to the frost mode temperature setting. The ProDigital™ will maintain this temperature for the duration of the holiday. To set a ‘Holiday’, use the ‘Left/Right’ keys to highlight ‘HOLS’ then press to confirm. Enter the return time (hours and minutes) using the ‘Up/Down’ keys. To unlock the ProDigital™, press to confirm and enter the four-digit pin number. The display will indicate ‘Frost Protection Active’. To view or change the ‘Set’ frost temperature while in ‘Holiday’ mode, press the ‘Up/Down’ keys. Press to confirm to unlock and return to the main screen.
  • Page 12: Floor temp limit allows setting a floor limiting temperature between 20-45°C to protect the floor from overheating. Programming mode includes options for 5/2 day programming, 7 day programming, 24 hours programming, and non-programmable mode. Temperature format allows selection between °C and °F. Switching differential can be adjusted to increase the thermostat's switching range, with a default of 1°C. Optimum start delays heating to ensure the desired temperature is reached at the programmed time. Output delay prevents rapid switching and can be set from 00 to 15 minutes. Daylight saving time adjusts the thermostat's clock for summer and autumn. Temperature up/down limit restricts the use of temperature adjustment keys. Sensor selection allows choosing between air temperature, floor temperature, or both. Rate of change indicates the number of minutes to raise the temperature by 1°C.
  • Page 13: Optional settings - feature table Adjusting the optional settings Temperature format: 00 = °C, 01 = °F (00 = Default) Switching differential: 00 - 15 minutes (00 = Default) Up/down temperature limit: 00° - 10°C (00° = Default) Sensor selection: 00 = Built in sensor, 01 = Floor sensor only (Default) Floor temperature limit: 20°C – 45°C (28°C Default) Optimum start: 00 = Disabled (Default), 01 = 1 hour, 02 = 2 hours, 03 = 3 hours, 04 = 4 hours, 05 = 5 hours Program mode: 00 = 5/2, 01 = 7 day, 02 = 24 hour (Default), 03 = None programmable (DST) Daylight saving: 00 = Disabled, 01 = Enabled (Default) Program type: 00 = 4 comfort levels (Default), 01 = 6 comfort levels
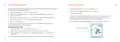
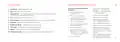
  • Page 14: Re-calibrating the thermostat is not necessary under normal operation. To calibrate, use the ‘Left/Right’ keys to scroll to the Power Icon. Press and hold the ✓ key to turn the display ‘OFF’. Press and hold the ✓ and ‘Down’ keys together for 10 seconds to display the current temperature. Use the ‘Up/Down’ keys to configure the new temperature value. Press the ✓ key to confirm the change and the display will go blank. Press the ✓ key once to turn the thermostat ‘ON’. The ProDigital™ will display an error code if there is a fault with the temperature sensor. Error codes include E0 for an internal sensor fault and E1 for issues with the remote floor probe. This product must only be installed by a qualified electrician and comply with local installation regulations.
  • Page 15: Page 15
  • Page 16: LCD display Setting the switching times involves several steps. To set the ‘OFF’ time, use the ‘Up/Down’ keys to set the hours. The day indicator displays the day of the week. The clock shows time in 24-hour format. Press ✓ to confirm the settings. The program indicator shows which period is being altered. The main menu highlights the selected option. The keypad lock indicator is displayed when the keypad is locked. The timer status displays the current status of the timed output. To set the ‘ON’ time, use the ‘Up/Down’ keys to set the hours.
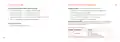
  • Page 17: Timer Override To override the timed output ‘ON/OFF’, follow these steps. Programming Mode: The following program modes are available; 5/2 Day Programming - 4 On/OFF switching times for the weekdays and 4 On/OFF switching times for the weekend. 7 Day Programming - 4 individual On/OFF switching times for each day. 24 Hours - 4 On/OFF switching times over a 24 hour period. Manual - No switching times only countdown timer. Daylight Saving Time (DST): is where the thermostat sets the clocks forward one hour from Standard Time during the summer months, and back again in autumn. To cancel Timer Override, with ‘HOLD’ highlighted, press ✓ twice. Optional Settings - Feature Table.
  • Page 18: Adjusting the optional settings involves using the ‘Left/Right’ arrow keys for 3 seconds to highlight options. The display will go blank showing only ‘Setup’ and ‘Clock’. Press the ‘Up’ key followed by ✓ twice to access the main feature menu. Use the ‘Up/Down’ keys to scroll through features. Use the ‘Left/Right’ keys to change feature settings. When all required changes have been made, press ✓ to confirm settings and return to the blank display. This product must only be installed by a qualified electrician and comply with local installation regulations.
  • Page 19: If any products received within this package are damaged or defective, please feel free to contact us and we’ll be happy to assist.