Home > fastwarm > fastwarm 16AMP Touchscreen Thermostat Instruction Manual

fastwarm 16AMP Touchscreen Thermostat Instruction Manual
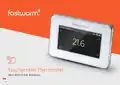
Touchscreen Thermostat  
I N S T R U C T I O N M A N U A L  
1
GeneralDetails
Namefastwarm 16AMP Touchscreen Thermostat Instruction Manual
Makefastwarm
LanguageEnglish
FiletypePDF (Download)
File size0.14 MB
Download PDF
1 Star2 Stars3 Stars4 Stars5 Stars (1 votes, average: 5.00 out of 5)
Loading...
fastwarm HM-01-16A Digital Programmable Thermostat Instruction Manual

fastwarm 16AMP Touchscreen Thermostat Instruction Manual

Get the free PDF manual for the fastwarm 16AMP Touchscreen Thermostat Instruction Manual and access setup steps, usage instructions, and troubleshooting tips. 👉 View online or download now to keep your thermostat running smoothly!
fastwarm 16AMP Touchscreen Thermostat Instruction Manual Overview

Summary of Contents

  • Page 1: Touchscreen thermostat instruction manual
  • Page 2: Introduction The Fastwarm touch smart thermostat series is a smart thermostat used to control your electric floor heating system or water heating system. It will keep your home at a comfortable temperature whilst minimizing energy use. Install the app on your smartphone to control your electric heating system remotely with the WiFi thermostat.
  • Page 3: Installation Separate the panel from the back section: insert the screwdriver into two holes under the thermostat and pry it. Connect the wire as shown in the wiring instruction. Supply voltage: 85-265Vac 50/60Hz. Standby power: <2W. Max load: 16A (electric heating), 3A (water heating). The thermostat should be mounted in a standard 86 type switch box. Main functions include auto mode, hold mode, holiday mode, anti-frozen function, floor temperature limit, open window detection function, and key-lock. IP Rating: IP20. Wire diameter: ≤2.5mm².
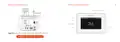
  • Page 4: Wiring instructions are provided for the thermostat. Thermostat symbols include WiFi, heat, event, and floor sensor indicators. The power specifications are 85V-265V at 50/60Hz. The maximum load is 16A, with a suggestion to keep it around 90% to prolong the lifetime. Caution is advised to ensure power is disconnected when wiring. The detected temperature is displayed as 21.6. Menu options include time settings and temperature adjustments. Controls are available for increasing and decreasing settings. The device has an IP rating of 21. The current time is displayed as 07:45 on Saturday.
  • Page 5: Mode selection allows users to choose between different operational modes of the thermostat. Auto mode is the default setting, where the thermostat operates based on predefined event parameters. In ON/OFF mode, the thermostat runs according to the settings in the Edit Setting section. Manual mode maintains a set temperature until it is changed by the user. Temporary override temperature allows users to adjust the current event temperature, reverting to the schedule at the next event's start time in auto mode. Holiday mode enables the thermostat to maintain a set temperature until the designated holiday period ends. Users can confirm their selections by pressing the appropriate buttons on the thermostat. The anti-frozen function ensures the thermostat maintains a minimum temperature during power off. Temperature settings can be adjusted using designated buttons for increasing or decreasing the temperature. Users can confirm settings and return to the home screen by pressing the confirmation button.
  • Page 6: Key lock prevents settings from being changed. There are five parameter settings available. Press the key to enter the menu. The day and clock can be set in the time section. Press time to enter day setting. To unlock, press any key and the indicator will flash three times. Press and hold for three seconds to unlock. Brightness setting allows you to change the display brightness. Press brightness to enter brightness setting. WiFi version updates time automatically after connecting.
  • Page 7: Edit setting can set and change the parameters. If you don’t choose Holiday Mode or Hold Mode, the thermostat runs according to the parameters of Edit. Press Edit Setting to enter days selection. Press the day you want to set. Press ✓ to enter event selection. The thermostat provides advanced settings to suit various special situations. These are normally set by technicians during initial installation. Press Advanced Setting to enter the page of warning. Press ✓ to enter the page of advanced setting. Press ✓ to confirm and enter temperature setting. Press the item to set its parameters.
  • Page 8: Room temperature calibration: Calibrate the temperature detected by room sensor. Schedule: Select a weekly schedule for the event. Each day from Mon to Sun can be set individually. 5+1+1: Mon to Fri have the same events, Sat and Sun can be set individually. Floor temperature calibration: Calibrate the temperature detected by floor sensor. Anti-frozen function: If the Anti-frozen function is opened, it will keep the room and floor at a lower temperature to protect pets, plants, and pipes against freezing. Output delay: This option helps avoid inadvertent operation on heating. Adaptive function: After several days of installation and use, the Adaptive function ensures that the required temperature has already been reached when the next event begins. Floor temperature limit: You can set the maximum floor temperature value; the system will stop heating if the floor temperature exceeds this value. Open window: This function will shut off automatically for 15 minutes when the window opens, as it can detect that the room temperature plummets. Energy use: This option allows you to enter the various data used to calculate energy use.
  • Page 9: Dimensions Troubleshooting Built-in sensor short-circuit or disconnected. Floor sensor short-circuit or disconnected.
  • Page 10: Page 10
  • Page 11: If any products received within this package are damaged or defective, please feel free to contact us and we’ll be happy to assist.