×
- 1. Installation Instructions (User Instructions → Instructies Voor Gebruik → Instructions Dinstallation → Instrucciones De Instalación → Istruzioni Per Luso)
- 2. Installation Instructions (User Instructions → Instructions Dinstallation → Instructions Dutilisateur → Anweisungen Für Installati → Benutzeranweisen → Instrucciones De Instalación)
- 3. Installation (Specification → Thermostat Features → Power Supply → Dimensions (mm) → Design Standard → Temperature Accuracy)
- 4. Product Overview (Important Note → Installation)
- 5. Fixing The Sensor Height (Pipe Sensor Location → Important Note)
- 6. Wiring (Pipe Fan Coil Application → Electronics → Fan)
- 7. Commissioning (Dil Switch Options)
- 8. Dil Switch Descriptions (Switch 4 → Switch 3 → Switch 2 → Switch 1)
- 9. Mounting Thermostat To The Wallplate (Locking & Limiting)
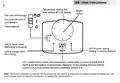
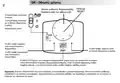
- 10. Temperature Setting Dial (Reset Button → Fan Runs Continuously → Fan Runs With Heat Or Cool Demand → Thermostat Off → Led Indicators → Lcd Display Functionality)
- 11. Instructions Dinstallation (Spécifications → Thermostat Features → Alimentation → Dimensions (mm) → Normes De Fabrication → Précision De La Température)
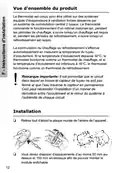
- 12. Vue Densemble Du Produit (Installation)
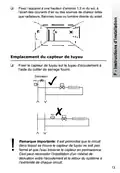
- 13. Emplacement Du Capteur De Tuyau (Dérivation → Remarque Importante)
- 14. Câblage (Application Évaporateur À Ventilation Forcée 2 Tuyaux → Electronique → O/p → Ventilateur → Capteur De Tuyau Ps1)
- 15. Instructions (Options Interrupteurs À Drc)
- 16. Descriptions Des Interrupteurs À Drc (Interrupteur 4 → Interrupteur 3 → Interrupteur 2 → Interrupteur 1)
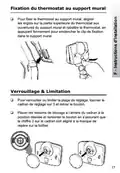
- 17. Fixation Du Thermostat Au Support Mural (Verrouillage & Limitation)
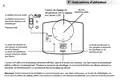
- 18. Instructions Dutilisateur (Cadran De Réglage De Température → Le Ventilateur Tourne En Continu → Le Ventilateur Tourne Avec La Demande De Chauffage Ou De Refroidissement → Thermostat Arrêté → La Diode Est Allumée En Vert Lorsque Le Thermostat Est Sous Tension → Remarque)
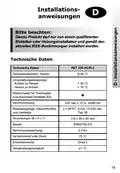
- 19. Installationsanweisungen (Technische Daten → Temperaturbereich, Heizen → Stromversorgung → Relaisausgänge, Heizen/kühlen Und Ventilator → Abmessungen (b X H X T) → Temperaturgenauigkeit)
- 20. Produktübersicht (Wichtiger Hinweis → Installation)
- 21. Befestigen Sie Den Thermostaten In Einer Höhe Von 1,5 M Über Dem Boden, Frei Von Luftzug Oder Wärmequellen, Wie Z. B. Heizkörpern, Offenen F…
- 22. Verdrahtung (Ventilator-luftkühlung Bei 2-rohr-systemen → Elektronik → O/p → Com → Anlegefühler → Hinweis:)
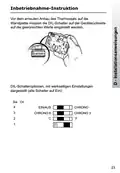
- 23. Inbetriebnahme-instruktion (Dil-schalteroptionen)
- 24. Dil-schalterbeschreibungen (Schalter 4 → Schalter 3 → Schalter 2 → Schalter 1)
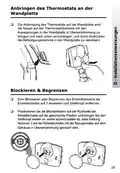
- 25. Anbringen Des Thermostats An Der Wandplatte (Blockieren & Begrenzen)
- 26. D - Benutzeranweisung (Temperatureinstellscheibe → Reset-taste → Ventilator → Automatik → Thermostat → Hinweis)
- 27. Instrucciones De Instalación (Especificaciones → Rango De Temperaturas, Calefacción → Cambio De Temp. - Refrig. A Calef. → Selector De Termostato Desconectado/auto Y Ventilador Conectado → Alimentación → Dimensiones (mm))
- 28. Generalidades Sobre El Producto (Instalación)
- 29. Montarlo A Una Altura De Aproximadamente 1,5 M Desde El Suelo, Lejos De Corrientes De Aire O De Fuentes De Calor Tales Como Radiadores, Fueg…
- 30. Cableado (Aplicación Como Fan-coil De 2 Tuberías → Sistema)
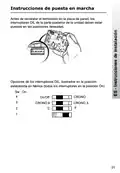
- 31. Instrucciones De Puesta En Marcha (Opciones De Los Interruptores Dil)
- 32. Descripción De Los Interruptores Dil (Interruptor 4 → Interruptor 3 → Interruptor 2 → Interruptor 1)
- 33. Montaje Del Termostato En La Placa De Pared (Bloquear Y Limitar)
- 34. Cuadrante De Ajuste De (Botón → Temperatura → Reset → El Ventilador Funciona Continuamente → El Ventilador Funciona Bajo Demanda De Calor O Frío → Termostato Desconectado)
- 35. Bemærk: Dette Produkt Må Kun Installeres Af En Uddannet Elektriker Eller Kompetent Varmeinstallatør, Og Installation Skal Ske I Henhold Til … (Specifications → Temperaturområde, Varme → Batterier → Mål (mm) → Konstruktionsnorm → Omgivelser → Temperaturnøjagtighed)
- 36. Produktoversigt (Vejledning)
- 37. Montering Af Rørsensor (Vigtigt)
- 38. Ledningsføring (Ventilationskonvektor Med 2 Rør → Elektronik → O/p → Com → Ventilator → Ps1- Rørsensor)
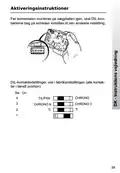
- 39. Aktiveringsinstruktioner (Dil-kontaktindstillinger, Vist I Fabriksindstillingen (alle Kontakter I Tændt Position) → Chrono Til/fra → Chrono 3 → Chrono 6)
- 40. Dil-kontaktbeskrivelser (Kontakt 4 → Kontakt 3 → Kontakt 2 → Kontakt 1)
- 41. Montering Af Termostaten På Vægpladen (Låsning Og Begrænsning)
- 42. Temperaturindstillingshjul (Reset-knap → Ventilatoren Kører Uafbrudt → Ventilatoren Kører Med Både Varme Og Kulde → Lysdioden Lyser Grønt, Når Termostaten Anvendes → Lcd-display, Viser Den Faktiske Rumtemperatur)
- 43. Installatie (Technische Specificaties → Omschrijving → Instelbereik, Verwarming → Omschakeltemperatuur → Voeding → Afmetingen (mm))
- 44. Productoverzicht (Belangrijke Opmerking → Montage)
- 45. Rondom De Thermostaat Dient Een Vrije Ruimte Van Minimaal 140 Mm Te Worden Aangehouden. Locatie Van De Pijpsensor. Belangrijke Opmerking: He…
- 46. Aansluiting (Toepassing Van 2-pijps Fancoil → Elektronica → Fan)
- 47. Inbedrijfstelling (Functies Dip-schakelaars)
- 48. Beschrijvingen Van Dip-schakelaars (Schakelaar 4 → Schakelaar 3 → Schakelaar 2 → Schakelaar 1)
- 49. Monteren Van De Thermostaat Op De Grondplaat (Blokkeren & Begrenzen)
- 50. Instelknop, Lees Instelling (Reset-knop → Ventilator Continu → Thermostaat → Led Indicaties → Lcd-display Functies)
- 51. Εγκατάσταση (Προδιαγραφή → Χαρακτηριστικά → Εύρος Θερμοκρασίας, Θέρμανση → Επιλογέας Αυτόματης Απενεργοποίησης Θερμοστάτη → Mπαταρίες Λειτουργίας → Διαστάσεις (μήκος X Ύψος X Βάθος))
- 52. Γενική Εικόνα Του Προϊόντος (Σημαντική Σημείωση → Εγκατάσταση)
- 53. Τοποθέτηση Αισθητήρα Σωλήνα (Σημαντική Σημείωση)
- 54. Çλεκτρική Σύνδεση (Εφαρμογή Fan Coil 2 Σωλήνων → Σημείωση:)
- 55. Ïδηγία (Πριν Από Την Επανεγκατάσταση Του Θερμοστάτη Στον Πίνακα Τοίχου, Οι Διακόπτες Dil Στο Πίσω Μέρος Της Μονάδας Πρέπει Να Τοποθετούνται Στην Επιθυμητή Ρύθμιση.)
- 56. Περιγραφή Διακοπτών Dil (Διακόπτης 4 → Διακόπτης 3 → Διακόπτης 2 → Διακόπτης 1)
- 57. Εγκατάσταση Θερμοστάτη Σε Πίνακα Ελέγχου (Ασφάλιση Και Περιορισμός)
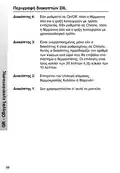
- 58. Gr - Ïδηγίεò Χρήσηò (Πλήκτρο → Δίσκος Ρύθμισης Θερμοκρασίας → Ο Ανεμιστήρας Λειτουργεί → Θερμοστάτης Εκτός → Η Led Ανάβει Πράσινη → Σημείωση)
- 59. Instrukcja Instalacji (Specyfikacja → Zakres Temperatur, Grzanie → Zmiana Temperatury → Stan Pracy Termostatu → Zasilanie → Wymiary (mm))
- 60. Opis Urządzenia (Instalacja)
- 61. Miejsce Umieszczenia Czujnika Rurowego (Przumocuj Czujnik Do Rury Zasilającej → Uwaga)
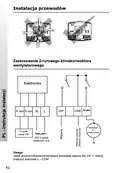
- 62. Instalacja Przewodów (Zastosowanie 2-rurowego Klimakonwektora → Elektronika → Wentylator)
- 63. Instrukcja (Opcje Przełącznika Dil → Sw On → On/off → Chrono)
- 64. Opisy Przełączników Dil (Przełącznik 4 → Przełącznik 3 → Przełącznik 2 → Przełącznik 1)
- 65. Montaż Termostatu Na Płycie Naściennej (Zamknięcie I Ograniczenie Temperatury)
- 66. Instrukcja Użytkownika (Przycisk Resetowania (reset) → Tarcza Nastawiania Temperatury → Wyświetlacz Lcd → Dioda Zielona → Dioda Pomarańczowa → Uwaga)
- 67. Montavimo Instrukcijos (Specifikacija → Temperatūros Diapazonas, Šildymas → Temperatūros Keitimas → Maitinimas → Matmenys (mm) → Atitinka Standartus)
- 68. Gaminio Aprašymas (Montavimo Instrukcijos)
- 69. Pritvirtinkite Prietaisą Apie 1,5 M Aukštyje Nuo Grindų (Vamzdžio Daviklio Tvirtinimas → Papildomas Kanalas → Būtina Įsidėmėti)
- 70. Laidai (Vamzdžių Ventiliatorinio Konvektoriaus Pritaikymas → Pastaba:)
- 71. Paleidimas (Dil Perjungiklio Padėtys, Gamyklinės Reguliavimo Padėtys)
- 72. Dil Jungiklių Aprašymai (Jungiklis → Jungiklis → Jungiklis → Jungiklis)
- 73. Termostato Tvirtinimas Prie Sienos (Blokavimas Ir Ribojimas)
- 74. Lt - Informacija Vartotojui (Temperatūros Nustatymo Skalė → Reset Mygtukas → Ventiliatorius Veikia Nepertraukiamai → Ventiliatorius Veikia Šildymo Ar Vėsinimo Režimu → Šildymo Arba Vėsinimo Metu → Pastaba)
- 75. Istruzioni Per Luso (Specificazioni → Caratteristiche Del Termostato → Intervallo Temperatura, Riscaldamento → Alimentazione → Dimensioni (mm) → Standard Di Progetto)
- 76. Descrizione Prodotto (Installazione)
- 77. Installarlo Ad Unaltezza Di Circa 1,5 M Da Terra, Al Riparo Da Correnti Daria O Fonti Di Calore Quali Ad Esempio Radiatori, Fiamme Libere O …
- 78. Cablaggio (Applicazioni Con Fan-coil A 2 Tubi → Elettronica → O/p → Com → Ventilatore → Sensore)
- 79. Messa In Servizio (Opzioni Interruttori Dil)
- 80. Descrizione Interruttori Dil (Interruttore 4 → Interruttore 3 → Interruttore 2 → Interruttore 1)
- 81. Montaggio Termostato Sulla Staffa A Parete (Bloccaggio E Esclusioni)
- 82. Istruzioni Per Lutente (Pomello Di Regolazione Temperatura → Display Lcd → Pulsante Reset → Funzionamento Continuato Del Ventilatore → Funzionamento Del Ventilatore In Base Alle Richieste Di Riscaldamento O Raffreddamento → Termostato Disinserito)
- 83.
×
Danfoss RET230 HCW-1 Electronic Heat Cool Thermostat User Manual
Productoverzicht
De thermostaat is ontworpen voor systemen met fancoils
en een centrale omschakeling van koelen naar verwarmen.
De thermostaat regelt een afsluiter. De afsluiter opent bij
warmtevraag als de thermostaat in de verwarmingsstand
staat en bij koelvraag als de thermostaat in de koelstand
staat. De overschakeling van verwarmen naar koelen
gaat automatisch m.b.v. een temperatuursensor op
de aanvoerleiding. Wanneer de aanvoertemperatuur
hoger is dan 30 °C werkt de thermostaat als een
verwarmingsthermostaat, wanneer de aanvoertemperatuur
lager is dan 16 °C werkt de thermostaat als koelthermostaat
Belangrijke opmerking: Het is belangrijk dat de
leidingsensor wordt gemonteerd op een plek waar altijd
stroming is. Hierdoor kan het noodzakelijk zijn om een
kortsluitleiding te monteren aan het eind van elke strang.
!
Montage
o
Verwijder eerst de grondplaat aan de achterkant van de
thermostaat..
o
Monteer de grondplaat op een hoogte van ca. 1,5 m
vanaf de vloer, niet op de tocht en uit de buurt van
warmtebronnen zoals radiatoren, open haard of direct
zonlicht.
44
| General | Details |
|---|---|
| Name | Danfoss RET230 HCW-1 Electronic Heat Cool Thermostat User Manual |
| Make | Danfoss |
| Language | English |
| Filetype | PDF (Download) |
| File size | 0.77 MB |

Danfoss RET-MD Electronic Intelligent Dial Setting Thermostat Installation Guide
Danfoss VICUQ24M Icon Programmable II Room Thermostat Installation Guide

Danfoss MBC 8000, MBC 8100 Heavy Duty Thermostat Installation Guide

Danfoss UT 72-UT 73 Universal Thermostat Installation Guide

Danfoss ECtemp 530 Electronic Thermostat Installation Guide

Danfoss 014G0251 Eco Radiator Thermostat User Guide

Danfoss 014G0013 Z Wave Radiator Thermostat Installation Guide

Danfoss RET230P Electronic Thermostat Instruction Manual

Danfoss TP7000 Range Electronic 7 Day Programmable Room Thermostat Installation Guide

Danfoss RET1000 Series Electronic Thermostat User Guide


GENERAL LIFE Therma 300S RF Wireless Room Thermostat User Manual
Danfoss AN325057 Icon Wireless Room Thermostat Installation Guide

ENSTO ECO16BT-EX Floor Heating Thermostat User Guide

HIVE 81351 Thermostat Mini for Heating Installation Guide

Drayton Wiser Smart Room Thermostat Instruction Manual

Honeywell D1-528 Thermostat User Guide
VICONICS VTR8350A5500B Fan Coil Unit Thermostat User Manual
momit Bevel Smart Thermostat Installation Guide

Danfoss CET B-RF ATC Cylinder Thermostat Installation Guide

WILLIAMS P322016 Millivolt Wall Thermostat Instructions
Table of Contents
- 1. Installation Instructions - User Instructions →
- 2. Installation Instructions - User Instructions →
- 3. Installation - Specification →
- 4. Product Overview - Important Note →
- 5. Fixing The Sensor Height - Pipe Sensor Location →
- 6. Wiring - Pipe Fan Coil Application →
- 7. Commissioning - Dil Switch Options →
- 8. Dil Switch Descriptions - Switch 4 →
- 9. Mounting Thermostat To The Wallplate - Locking & Limiting →
- 10. Temperature Setting Dial - Reset Button →
- 11. Instructions Dinstallation - Spécifications →
- 12. Vue Densemble Du Produit - Installation →
- 13. Emplacement Du Capteur De Tuyau - Dérivation →
- 14. Câblage - Application Évaporateur À Ventilation Forcée 2 Tuy... →
- 15. Instructions - Options Interrupteurs À Drc →
- 16. Descriptions Des Interrupteurs À Drc - Interrupteur 4 →
- 17. Fixation Du Thermostat Au Support Mural - Verrouillage & Lim... →
- 18. Instructions Dutilisateur - Cadran De Réglage De Température →
- 19. Installationsanweisu... - Technische Daten →
- 20. Produktübersicht - Wichtiger Hinweis →
- 21. Befestigen Sie Den Thermostaten In Einer Höhe Von 1,5 M Über... →
- 22. Verdrahtung - Ventilator-luftkühlu... Bei 2-rohr-systemen →
- 23. Inbetriebnahme-instr... - Dil-schalteroptionen →
- 24. Dil-schalterbeschrei... - Schalter 4 →
- 25. Anbringen Des Thermostats An Der Wandplatte - Blockieren & B... →
- 26. D - Benutzeranweisung - Temperatureinstellsc... →
- 27. Instrucciones De Instalación - Especificaciones →
- 28. Generalidades Sobre El Producto - Instalación →
- 29. Montarlo A Una Altura De Aproximadamente 1,5 M Desde El Suel... →
- 30. Cableado - Aplicación Como Fan-coil De 2 Tuberías →
- 31. Instrucciones De Puesta En Marcha - Opciones De Los Interrup... →
- 32. Descripción De Los Interruptores Dil - Interruptor 4 →
- 33. Montaje Del Termostato En La Placa De Pared - Bloquear Y Lim... →
- 34. Cuadrante De Ajuste De - Botón →
- 35. Bemærk: Dette Produkt Må Kun Installeres Af En Uddannet Elek... →
- 36. Produktoversigt - Vejledning →
- 37. Montering Af Rørsensor - Vigtigt →
- 38. Ledningsføring - Ventilationskonvekto... Med 2 Rør →
- 39. Aktiveringsinstruktioner - Dil-kontaktindstillinger, Vist I ... →
- 40. Dil-kontaktbeskrivel... - Kontakt 4 →
- 41. Montering Af Termostaten På Vægpladen - Låsning Og Begrænsni... →
- 42. Temperaturindstillin... - Reset-knap →
- 43. Installatie - Technische Specificaties →
- 44. Productoverzicht - Belangrijke Opmerking →
- 45. Rondom De Thermostaat Dient Een Vrije Ruimte Van Minimaal 14... →
- 46. Aansluiting - Toepassing Van 2-pijps Fancoil →
- 47. Inbedrijfstelling - Functies Dip-schakelaars →
- 48. Beschrijvingen Van Dip-schakelaars - Schakelaar 4 →
- 49. Monteren Van De Thermostaat Op De Grondplaat - Blokkeren & B... →
- 50. Instelknop, Lees Instelling - Reset-knop →
- 51. Εγκατάσταση - Προδιαγραφή →
- 52. Γενική Εικόνα Του Προϊόντος - Σημαντική Σημείωση →
- 53. Τοποθέτηση Αισθητήρα Σωλήνα - Σημαντική Σημείωση →
- 54. Çλεκτρική Σύνδεση - Εφαρμογή Fan Coil 2 Σωλήνων →
- 55. Ïδηγία - Πριν Από Την Επανεγκατάσταση Του Θερμοστάτη Στον Πί... →
- 56. Περιγραφή Διακοπτών Dil - Διακόπτης 4 →
- 57. Εγκατάσταση Θερμοστάτη Σε Πίνακα Ελέγχου - Ασφάλιση Και Περι... →
- 58. Gr - Ïδηγίεò Χρήσηò - Πλήκτρο →
- 59. Instrukcja Instalacji - Specyfikacja →
- 60. Opis Urządzenia - Instalacja →
- 61. Miejsce Umieszczenia Czujnika Rurowego - Przumocuj Czujnik D... →
- 62. Instalacja Przewodów - Zastosowanie 2-rurowego Klimakonwekto... →
- 63. Instrukcja - Opcje Przełącznika Dil →
- 64. Opisy Przełączników Dil - Przełącznik 4 →
- 65. Montaż Termostatu Na Płycie Naściennej - Zamknięcie I Ograni... →
- 66. Instrukcja Użytkownika - Przycisk Resetowania (reset) →
- 67. Montavimo Instrukcijos - Specifikacija →
- 68. Gaminio Aprašymas - Montavimo Instrukcijos →
- 69. Pritvirtinkite Prietaisą Apie 1,5 M Aukštyje Nuo Grindų - Va... →
- 70. Laidai - Vamzdžių Ventiliatorinio Konvektoriaus Pritaikymas →
- 71. Paleidimas - Dil Perjungiklio Padėtys, Gamyklinės Reguliavim... →
- 72. Dil Jungiklių Aprašymai - Jungiklis →
- 73. Termostato Tvirtinimas Prie Sienos - Blokavimas Ir Ribojimas →
- 74. Lt - Informacija Vartotojui - Temperatūros Nustatymo Skalė →
- 75. Istruzioni Per Luso - Specificazioni →
- 76. Descrizione Prodotto - Installazione →
- 77. Installarlo Ad Unaltezza Di Circa 1,5 M Da Terra, Al Riparo ... →
- 78. Cablaggio - Applicazioni Con Fan-coil A 2 Tubi →
- 79. Messa In Servizio - Opzioni Interruttori Dil →
- 80. Descrizione Interruttori Dil - Interruttore 4 →
- 81. Montaggio Termostato Sulla Staffa A Parete - Bloccaggio E Es... →
- 82. Istruzioni Per Lutente - Pomello Di Regolazione Temperatura →
- 83. Page 83 →