tuya BHT-005 Wifi Heating Thermostat User Manual


Step 3 : Snap the thermostat screen
and the mounting plate together to
complete the installation.Power on
for testing.(Fig3)
Step 4 : Installation complete.(Fig4)。
Press “
” once more to confirm and exit.
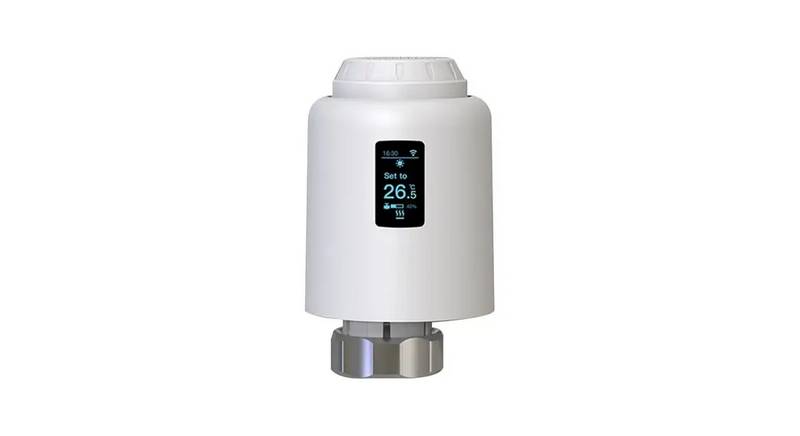
BHT-005 WIFI Heating Thermostat
Default settings for program schedule
GA: Water heating, 5A
GC: Water/Gas Boiler, 5A
N: modbus version;
GB: Electric floor Heating, 16A
W: wifi version
Precautions before installation
1. Be sure this product is suitable for your heating equipment before installation;
2. Be sure to keep the power off before installation or maintenance;
3. Follow the wiring diagram for wiring strictly;
4. Be sure that it is fastened and suitable when installing to the wall,
5. Do not pull the cable hard,it may damage the product;
MON.-FRI.
(①②③④⑤ shows on
SAT.
(⑥shows on scteen)
SUN.
Time
display
(⑦shows on scteen)
Example: BHT-005 GAW
scteen)
TIME
TEMP.
20
ON TIME
6:00~8:00
TEMP.
20
ON TIME
6:00~8:00
TEMP.
20
6. Bend it to an appropriate angle first, if hard plastic wire is used in installation,
Period 1
6:00~8:00
7. Only professionalist can install;
8. Please contact the after-sales service for any equipment failure,
please do not try to repair it yourself;
9. After installation, please read this manual to double check normal safety;
Period 2 8:00~11:30
Period 3 11:30~13:00
Period 4 13:30~17:00
Period 5 17:00~22:00
Period 6 22:00~6:00
15
8:00~11:30
11:30~13:00
13:30~17:00
17:00~22:00
22:00~6:00
20
8:00~11:30
11:30~13:00
13:30~17:00
17:00~22:00
22:00~6:00
20
5 A(water heating/
water boiler/gas boiler)
16 A(electric heating)
DTM6
15
20
20
Power
Supply
Current
Load
95~240 V AC,50~60 Hz
15
20
20
Fig3
Fig4
22
20
20
Temp.
Error
Sensor
±1℃
NTC3950,10K
15
15
15
Screen
LCD Negative display
5~45℃
Timing Error <1%
Power
CAUTION
7.Check the external sensor temp.
Press " " for 5 seconds, the screen will display the temperature
of external sensor. If the external sensor is not connected, "err" will
be displayed.
Wind Speed
WiFi Weather
Electrical Shock or Equipment Damage Hazard. Can shock
individuals or short equipment circuitry.
Electricity/Water/Boiler heating
Set Temp.
Range
<1.5W
consumption
Disconnect power supply before installation.
Humidity
Heating
Working
Ambient
Temp/
0~45℃,5~95% RH
(Non Condensing)
Installation
Box
European 60mm
Round Box
Thank you for choosing our thermostat. We are committed to bringing
together high-end technology, high-quality production technology,
safe and reliable materials to produce high-quality and inexpensive
products. The new sliding control thermostat helps you creating a
comfortable life.
Please read this manual for comprehensive product information. In the
same time, ensure that professionals install the thermostat and comply
with all local regulations.
ECO
RoomTemp.
Temp.Display
Slide
button
Setting the Functions and Options
GA
Humidity
When the power is off, press "
seconds to enter the advanced selection setting. Press "
the function, press " " or " " to adjust the corresponding
value. All advanced option settings will take effect automatically after
restarting the thermostat.
" and "
" at the same time for 5
SetTemp.
Lock
Heating On
Period
Shell
Material
Capactive Touch
Buttons
PC+ABS(Fireproof)
IP20
Buttons
" to select
N
3
L
4
NTC
Protection
Class
M
Week
5
6
GB
Clock
1
2
A(RED)
B(WHITE)
N
L
4
NTC
Code
Function
Settingandoptions
-9 to 9℃
Default
Thermostat *1
Manual*1
QC Passed* 1
Screw *2
LO AD
Time
Mode
Power
Down
M odbus
Temperature
compensation
External sensor (optional)* 1
1
2
-3
1
Clock
Up
Manual
5
6
L1
N1
1
2
3
G C
Deadzone Temp.
1-5℃
1.Display humidity, weather.
A(RED)
B(WHITE)
2.The weather data uploaded to thermostat 3-4 minutes after thermostat
is connected to the Internet.
BHT-005 is suitable for electric heating, water heating, wall-hung
boilers and boiler-temperature control systems.It can be used in smart controlling
hourses, shopping malls, and industrial places.
00:All buttons are locked
except power button.
01:All buttons arelocked.
N
L
NTC
mm
131.0
3
4
Button Locking
1
M odbus
DryContact
It would be updated every 30 mins.
20
5
6
Before use, please confirm the specific model of this product and the
corresponding heating equipment.Please read the wiring diagram
to identify the model or contact the merchant.
Please note:
Do not over-tighten the terminals in your
thermostat as damage may occur.
1
2
3
4
Operation
In: Internal Sensor
(to control the temp.)
Ou: External Sensor
(to control the temp.)
AL: Internal&External Sensor
(Internal sensor to control
the temp., external sensor
to limit the temp.)
A(RED)
B(WHITE)
GA for water heating, GB for electric heating,
1.Power On/Off: Press
2.Manual & programming mode:
Press to switct h manual mode
Temp. set:
In manual mode, press the "
After the screen light goes out, the thermostat starts to set the temperature.
4.
to control the thermostat on/off.
GC for water/gas boiler. External Sensor is optional.
Only the GB-electric heating series is equipped with
an external sensor line by default.
M odbus
Sensor typer
AL
On Appearance
, programming model
.
1. Piano style sounds like a Chopin's nocturnes;
2. Gradient-color-change-sliding touch;
3. Weather,humidity,and ultraviolet display;
4. PM 2.5 in APP
3
.
" or "
" to adjust the temperature.
Step 1: Use a screwdriver to pry
open the mounting plate along
the buckle position. After prying
open, connect the cable to the
screen and the power box without
removingthe cable.(Fig1)。
Step 2 : Make sure that the wires are
without electricity, connect the
thermostat with the wires according
to the wiring diagram, and then fix
the mounting plate on the cassette
with(Fig2)。
5-15℃
5
6
Min.Set Temp.
Max.Set Temp.
5
5. 2.5D arc chamfer;
6. Hidden LCD screen;
7. Unique design &enjoyable touch;
8. Ultra-thin embedded panel, perfectly fit all walls;
9. Suitable for European hidden box;
D
TM6
Time set:
83.0±3.0 mm
60.0±2.0 mm
15-45℃
35
23.9mm
13.6mm
The wifi version synchronizes the network time every hour after connecting
00:Display set Temp. and
Room Temp.
01:Only display set Temp.splay
to the Internet, and there is no need to manually set the time; Non-wifi
Temp.display
7
0
version-press "
or "
press "
" to select the minute, hour, week, and press the "
"
" to set Numerical value. After the adjustment is complete,
" to exit the time setting.
On Functionality
Low temp. protection
setting .
8
9
0-10℃
0
45
0
1. Modbus, WIFI version, etc., to meet all your needs;
2. Temperature control accuracy (±0.5℃);
3. Power-off protection to avoid loss of data settings;
4. Weekly 5+1+1days &6 period programmable settings
energy-saving, cost-saving, environment-freidnly;
5.Lock
Press and hold both " " and "
" for 5 seconds, the thermostat will enter
lock mode. You can set the full lock and half lock in the advanced options,
please refer to the description of the advanced options below.
High temp.protection
setting.
25-70℃
;
00:OFF
01:ON
Energy saving Mode
A
B
C
5. Support local grouping/sharing, centralize controlling hundreds of products;
6. Support Tmall, Amazon echo, Google Home;
6. 5+1+1 programming set:
Energy saving Temp.
.
0-30℃
20
0
WiFi version can be set in APP. Non-wifi version, press " " 4 times to
enter the programming mode setting. At this time, the screen displays (①②
③④⑤), the "min." of the time flashes, and the period 1 "
again to select and set the hour, temperature, and period. Press "
7. APP (ios/android) automatically obtains the local temperature and humidity,
PM2.5 and creates smart scenes.
8. It supports all regions and languages of the world and provides
comprehensive services.
Standby Brightness
3-99
". Press "
"
Fig2
Fig1
50.1mm
" or "
"
to adjust the corresponding value.。

| General | Details |
|---|---|
| Name | tuya BHT-005 Wifi Heating Thermostat User Manual |
| Make | Tuya |
| Language | English |
| Filetype | PDF (Download) |
| File size | 1.4 MB |


tuya M3 Series Thermostat User Guide

tuya MTS700N Wireless Thermostat User Manual

tuya Mi-750 WiFi Smart Thermostat Instruction Manual
tuya TRV603 Smart WiFi Radiator Thermostat Instruction Manual

tuya BHT-005 Wifi Heating Thermostat User Manual Overview
Summary of Contents
- Page 1: Step 3: Snap the thermostat screen and the mounting plate together to complete the installation. Power on for testing. Step 4: Installation complete. Default settings for program schedule include various heating types such as water heating, gas boiler, and electric floor heating. Precautions before installation: - Ensure the product is suitable for your heating equipment. - Keep the power off before installation or maintenance. - Follow the wiring diagram strictly. - Ensure proper fastening when installing to the wall. - Avoid pulling the cable hard to prevent damage. Only professionals should install the thermostat. Contact after-sales service for equipment failures. The thermostat is suitable for electric heating, water heating, wall-hung boilers, and boiler-temperature control systems. The wifi version synchronizes network time every hour after connecting. Energy-saving features include weekly programmable settings and temperature control accuracy. The thermostat supports local grouping/sharing and can be controlled via smart home systems like Tmall and Amazon Echo.
- Page 2: About WiFi AP Mode When the thermostat is off, press and hold the button until the thermostat screen flashes slowly. When first time using Wi-Fi thermostat, you must configure the Wi-Fi signal and settings on your smartphone or tablet. Step 1: Download your app and complete account registration according to the guidance of the app. After connecting to this hotspot, return to the smartlife app. Group multiple thermostats for management. Method 1: Scan the QR code to configure the network guide. Check if the terminals between LCD panel and Power Unit Box are loosen. Power is on but without display. Do temperature calibration in item 1 of high senior options. 24-months warranty since date of purchase.

Roth SL Car Air Conditioner Thermostat Instructions

Aprilaire S84N 1H1C Programmable Single Stage Universal Thermostat Owner’s Manual

COMPUTHERM Q20 Programmable Digital Room Thermostat Instruction Manual

GENERAL LIFE HT250S Digital Room Thermostat User Manual

Honeywell RTHL2510 Series Programmable Thermostat Owner’s Manual

LUX TX700U Universal Thermostat Instruction Manual

WATTS Tekmar Wi-Fi Thermostat Instruction Manual

WHITE-RODGERS 1F51N-619 Low Voltage Evaporative Cooler Thermostat Instruction Manual

FIBARO FGBHT-001 Radiator Thermostat User Guide

Danfoss GreenCon RC-T2/T4 Room Thermostat Installation Guide