Gigaset ONE X Thermostat User Guide
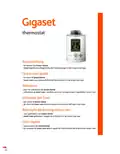


thermostat
Kurzanleitung
- für Nutzer von Smart Home
- smart care Nutzer folgen bitte den Anweisungen in der smart care App
Quick-start guide
- for users of Smart Home
- smart care users, please follow the instructions in the smart care app
Mémento
- pour les utilisateurs de Smart Home
-
utilisateurs de smart care : veuillez suivre les consignes dans l‘application smart care
Istruzioni per l‘uso
- per utenti di Smart Home
- gli utenti di smart care devono seguire le istruzioni dell’app smart care
Beknopte bedieningsinstructies
- voor gebruikers van Smart Home
- smart care-gebruikers volgen de instructies in de smart care-app
Guía rápida
- para usuarios de Smart Home
-
los usuarios de smart care deben seguir las instrucciones de la aplicación smart care

| General | Details |
|---|---|
| Name | Gigaset ONE X Thermostat User Guide |
| Make | Gigaset |
| Language | English |
| Filetype | PDF (Download) |
| File size | 0.1 MB |


Gigaset Thermostat Instruction Manual

Gigaset ONE X Thermostat User Guide Overview
Summary of Contents
- Page 1: Quick-start guide for users of Smart Home. Smart care users, please follow the instructions in the smart care app. Kurzanleitung für Nutzer von Smart Home. Smart care Nutzer folgen bitte den Anweisungen in der smart care App. Mémento pour les utilisateurs de Smart Home. Utilisateurs de smart care : veuillez suivre les consignes dans l‘application smart care. Istruzioni per l‘uso per utenti di Smart Home. Gli utenti di smart care devono seguire le istruzioni dell’app smart care. Beknopte bedieningsinstructies voor gebruikers van Smart Home. Smart care-gebruikers volgen de instructies in de smart care-app.
- Page 2: So installieren Sie thermostat Um thermostat in Betrieb zu nehmen, installieren Sie bitte die kostenlose Gigaset elements App und folgen den Schritten und Anweisungen. Führen Sie zuerst das Pairing Ihres Thermostats mit base durch, bevor Sie thermostat an gewünschtem Heizkörper montieren. thermostat muss sich zum Pairing in der Nähe von base befinden. Bitte beachten Sie dazu auch die beiliegenden Hinweise. Support ist verfügbar direkt aus der App. Mehr Informationen erhalten Sie auch auf www.gigaset.com.
- Page 3: thermostat must be near the base. Launch the Gigaset elements app and click on Elements; press add +; select thermostat and follow the instructions. Only attach thermostat to the radiator when prompted by the Gigaset elements app. Le thermostat doit se trouver tout près de votre base. Ne procédez au montage de thermostat sur le radiateur choisi que lorsque l'application Gigaset elements App vous y incite. thermostat deve essere in prossimità di base. Applicare thermostat al radiatore prescelto solo in seguito alla corrispondente istruzione di Gigaset elements app. thermostat moet zich in de buurt van base bevinden. Pas als de Gigaset elements app erom vraagt, sluit u thermostat op het gewenste verwarmingselement aan. No instale el dispositivo thermostat en el radiador deseado hasta que la app Gigaset elements no se lo solicite.
- Page 4: Key to display Information on mechanical functions Information on wireless connection and add functions Lights up when battery charge is less than 15% Lights up when child safety lock is activated Light remains on in combination with desired temperatures
- Page 5: Descrizione del display Toelichting bij display Explicación de la pantalla Informa sui processi meccanici Informa sul collegamento radio e sulle procedure di aggiunta Si illumina con un livello della batteria inferiore al 15% Si illumina in caso di protezione bambini inserita Si illumina in modo permanente in combinazione con le temperature nominali Informatie over mechanische functies Informatie over draadloze verbinding en functies toevoegen
- Page 6: Key to buttons Reduce desired temperature by 0.5° Increase desired temperature by 0.5° Reduce desired temperature in 0.5° steps Hold Press briefly Press and hold
- Page 7: Hold to increase desired temperature in 0.5° steps. Switch boost mode on or off. Simultaneously hold for 10 seconds to reinstate factory settings. Simultaneously hold for 3 seconds to activate or deactivate child safety lock.
- Page 8: Montage von thermostat Installation of thermostat Prüfen Sie zunächst von welchem Unternehmen Ihr Heizkörper ist, da Sie in Ausnahmefällen einen Adapter zur Montage benötigen. Eine Kompatibilitätsliste finden Sie in unserem FAQ zum Thermostaten. Heizkörperthermostat auf die höchste Stufe stellen, gewöhnlich handelt es sich um Stufe 5. Nun müssen Sie die Befestigung lösen, hier gibt es Unterschiede. Bei anderen Modellen benötigen Sie eine Wasserpumpenzange. Danach können Sie das Heizkörperthermostat lösen, teilweise müssen Sie es drehen. Schließlich schrauben Sie thermostat auf das Heizungsventil. Falls ein Adapter nötig ist, diesen zuvor über das Heizungsventil streifen.
- Page 9: Montage de thermostat Contrôlez d'abord de quelle société provient votre radiateur, car vous pouvez avoir besoin d'un adaptateur pour le montage. Vous trouverez une liste de compatibilité dans nos FAQ sur les thermostats. Réglez le thermostat du radiateur sur le niveau maximal, il s'agit généralement du niveau 5. Vous devez maintenant défaire la fixation ; pour cette opération, il peut y avoir des différences. Certains chauffages sont équipés d'une bague filetée ; dans ce cas, utilisez un tournevis adapté. Sur d'autres modèles, vous avez besoin d'une pince multi-prises. Vous pouvez ensuite détacher le thermostat du radiateur, vous devez éventuellement le tourner. Vissez ensuite le thermostat sur la vanne de chauffage. Si un adaptateur est nécessaire, l'installer préalablement sur la vanne de chauffage. Per prima cosa verificare chi è il produttore del radiatore poiché, in casi eccezionali, per il montaggio può essere necessario un adattatore. Un elenco dei prodotti compatibili è disponibile nella sezione FAQ dedicata ai termostati del nostro sito. Regolare il termostato per radiatore al livello massimo, solitamente è il livello 5.
- Page 10: Montage of thermostat Instalación de thermostat Controleer eerst het merk van de radiator, omdat je bij de montage in sommige gevallen een adapter nodig hebt. Op onze website, bij de veelgestelde vragen over de thermostat, vind je ook een compatibiliteitslijst. Stel de radiatorthermostaat in op het hoogste niveau, meestal is dit niveau 5. Verwijder nu de bevestiging. Sommige verwarmingssystemen hebben een schroefring, die kan worden losgedraaid met een geschikte schroevendraaier. Daarna kun je de radiatorthermostaat loskoppelen, in sommige gevallen moet je hem draaien. Schroef thermostat vervolgens op de afsluiter. Compruebe en primer lugar la compatibilidad con la llave y el radiador en el que va a usarlo, ya que en algunos casos necesitará algún tipo de adaptador. Ajuste el termostato del radiador al máximo nivel, normalmente este suele ser el nivel 5.
- Page 11: Contents of the package 1 sensor thermostat 2 AA LR6 batteries 3 adapters 1 screw 1 quick-start guide 1 safety leaflet

GE APPLIANCES RAK190V 2 Way Energy Management Thermostat Instruction Manual

Regulus TZT 63 Electronic Plug-In Thermostat User Guide

COLDBUSTER MCD5 Programmable Thermostat User Manual

Honeywell RTH2510 Digital 7-day Thermostat Owner’s Manual

nVent RAYCHEM RAYSTAT-EX-02 Mechanical Thermostat Installation Guide

HYSEN HY02B05RF Wireless Heating Thermostat User Manual

sinope TH1500WF Smart Double Pole Thermostat Installation Guide

heatmiser Slimline-B V3 Programmable Room Thermostat Owner’s Manual

Honeywell RTH7500 7-Day Programmable Thermostat Installation Guide

WHITE-RODGERS 1F90-71 5-Day 2-Day Electronic Digital Thermostat Instruction Manual