Home > ETHERMA > ETHERMA 3 set 2024 Smart Thermostat Instruction Manual

ETHERMA 3 set 2024 Smart Thermostat Instruction Manual

Installation and usage instructions  
ETHERMA eBASIC  
Room, combi floor thermostat  
w.etherma.com  
GeneralDetails
NameETHERMA 3 set 2024 Smart Thermostat Instruction Manual
MakeETHERMA
LanguageEnglish
FiletypePDF (Download)
File size0.29 MB
Download PDF
1 Star2 Stars3 Stars4 Stars5 Stars (1 votes, average: 5.00 out of 5)
Loading...

ETHERMA 3 set 2024 Smart Thermostat Instruction Manual
Get the free PDF manual for the ETHERMA 3 set 2024 Smart Thermostat Instruction Manual and access setup steps, usage instructions, and troubleshooting tips. 👉 View online or download now to keep your thermostat running smoothly!

ETHERMA 3 set 2024 Smart Thermostat Instruction Manual Overview

Summary of Contents

  • Page 1: Installation and usage instructions Room, combi floor thermostat
  • Page 2: Angaben zum Energieverbrauch Die Produktdaten entsprechen den EU-Verordnungen zur Richtlinie für umweltgerechte Gestaltung energieverbrauchsrelevanter Produkte (ErP). Information about energy consumption The product complies with the EU regulations on the Ecodesign Directive (2009/125/EC) for energy-related products (ErP). Informatie over energieverbruik Het product voldoet aan de EU-regelgeving betreffende de richtlijn inzake milieuvriendelijk ontwerp van energiegerelateerde producten (ErP). Informations sur la consommation d‘énergie Le produit est conforme à la réglementation de l‘UE sur la directive relative à la conception écologiquement rationnelle des produits liés à l‘énergie (ErP). Indicazioni sul consumo di energia I dati del prodotto sono conformi alle norme UE sulle direttive per la configurazione ecocompatibile dei prodotti relativi al consumo di energia (ErP).
  • Page 3: Dieses Handbuch beschreibt die wichtigsten Funktionen und technischen Daten des Thermostats eBASIC. Die Anweisungen helfen dem Anwender, das Thermostat zu bedienen und dem Elektriker bei der Installation und Konfiguration des Thermostats. Der Hersteller haftet nicht, wenn die nachstehenden Anweisungen nicht beachtet werden. Die Geräte dürfen nicht missbräuchlich, d. h. entgegen der vorgesehenen Verwendung, benutzt werden.
  • Page 4: Bluetooth version 4.2. Power supply: 230 V - 50/60 Hz. Maximum load: 16 A (ohmic). Temperature range: +5 °C / +35 °C. Temperature reduction: 230 V - 50/60 Hz. IP class: IP 21. Standard color: white. Built-in room sensor and external floor sensor NTC or wireless BLE sensor.
  • Page 5: Die Bluetooth Marke und -Logos sind Eigentum von Bluetooth SIG, Inc. und ihre Verwendung ist für Taelek Oy lizenziert. Apple, das Apple Logo, iPhone, iPad und iPod touch sind Marken von Apple Inc. Der App Store ist eine Dienstleistungsmarke von Apple Inc. Google Play und das Google Play-Logo sind Marken von Google Inc.
  • Page 6: Installation must be carried out by a qualified electrician in accordance with wiring and building regulations. Disconnect the power supply to the thermostat before installation. To remove the visible parts (A) and (B), pull out the knob (D) and remove the screw (C). The plastic covers can now be easily pulled off. Connect the wires to the terminals of the thermostat. Setback: N Heating (N): Floor sensor: Heating (L): External contact (if applicable)
  • Page 7: Positionieren Sie das Thermostat und befestigen Sie es mit 2 Schrauben in der Wandeinbaudose. Montieren Sie die Abdeckteile und befestigen Sie diese mit der Schraube. Drücken Sie abschließend den Drehknopf an der richtigen Position ein.
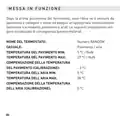
  • Page 8: Nach dem ersten Einschalten des Thermostats erkennt das Thermostat, ob ein Bodenfühler angeschlossen ist oder nicht und führt eine entsprechende Initialisierung durch. Die folgenden Einstellungen werden entsprechend initialisiert. Name des Thermostats: Modus: Boden / Luft Bodentemperatur min: 5 °C Bodentemperatur max: 27 °C Lufttemperatur min: 5 °C Lufttemperatur max: 28 °C
  • Page 9: PWM MIN and PWM MAX settings are indicated as 0% and 100%. User program activated eco-temp is set to 19 °C. Extern activated eco-temp is also set to 19 °C. Valve protection is indicated as off. Sensor type is specified as 10 k Ohm. LED intensity is set to 70%. Network key is mentioned. Weekly program is listed as empty. The eControl app can be used to check and change settings.
  • Page 10: Das Thermostat wird mit einem Drehknopf und einem optionalen Absenkungsschalter bedient. Die grundlegende Bedienung des Thermostats ist einfach: Schalten Sie das Gerät aus, indem Sie den Drehknopf in die Position OFF drehen. Schalten Sie das Gerät ein, indem Sie den Drehknopf in die Position ON drehen und stellen Sie die gewünschte Temperatur mit dem Drehknopf ein. Verwenden Sie den externen 230VAC-Absenkschalter, um die Eco-Temperatur zu aktivieren (standardmäßig 19 °C). LED-Anzeigeleuchten zeigen den Status an: rot ON => Heizung EIN. rot blinkend => Fehler. grün ON => Komforttemperatur erreicht. grün blinkend => Eco-Temperatur erreicht.
  • Page 11: Zusätzlich mit eControl App: - Rot blinkend => Bluetooth Verbindung - Grün blinkend => Bestätigung zum Speichern der Änderungen Erweiterte Nutzung: Sie können auf alle Thermostatdaten mit der kostenlosen eControl App zugreifen. Die App läuft auf Android- und iOS-Mobilgeräten. Mit der App lesen Sie protokollierte Temperaturen, ändern Einstellungen und definieren ein wöchentliches Benutzerprogramm. Die App kann auch E-Mail-Berichte erstellen. Das Thermostat zeigt die Verbindung mit dem Mobilgerät mit einer schnell blinkenden roten LED an.
  • Page 12: Das Thermostat verfügt über verschiedene Einstellungen, die mit der eControl App einfach angepasst werden können. Denken Sie daran, nach jeder Änderung zu speichern. Ein freier und beschreibender Name, der in der eControl App angezeigt wird. Das Thermostat kann die Bodentemperatur, die Lufttemperatur, die Lufttemperatur mit Bodenbegrenzung (dual) und das Heizverhältnis (PWM-Regelung) messen und einstellen. Im Bodenmodus geben die Min- und Max-Werte den aktiven Bereich des Reglers an. Im Dual-Modus hat diese Einstellung keinen Einfluss auf den Regler, aber das Thermostat hält die Bodentemperatur zwischen den Grenzwerten. Diese Funktion kann verwendet werden, um Holzböden zu schützen oder um einen warmen Boden in einem Raum mit Kamin zu gewährleisten. Hinweis: N/A in PWM und im Luftmodus.
  • Page 13: Bodentemperatur-Offset (Kalibrierung) Wenn die Temperaturmessung des Benutzers einen Unterschied zum Sollwert des Reglers hat, wird diese Einstellung zur Kalibrierung verwendet. Lufttemperatur min und max Diese Einstellung hat zwei Hauptfunktionen. Im Luft- und Dualmodus legt sie den aktiven Reglerbereich fest. Lufttemperatur-Offset (Kalibrierung) Wenn die Temperaturmessung des Benutzers einen Unterschied zum Regler-Sollwert hat, wird diese Einstellung zur Kalibrierung verwendet.
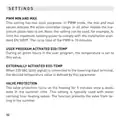
  • Page 14: PWM min und max Diese Einstellung hat zwei Hauptzwecke. Im PWM-Modus geben die Min- und Max-Werte den aktiven Reglerbereich an. In allen anderen Modi wird das maximale Impulsverhältnis sichergestellt. Benutzerprogramm aktiviert eco temp Während aller Grünstunden im Benutzerprogramm wird die Temperatur auf diesen Wert eingestellt. Extern aktivierte eco-temp Wenn 230 VAC (Pilotsignal) an die Absenkungseingangsklemme angeschlossen ist, wird der Temperatursollwert durch diesen Parameter definiert. Ventilschutz Der Ventilschutz schaltet die Heizung auch in der Sommerzeit einmal pro Woche für 5 Minuten ein. Diese Einstellung wird typischerweise bei Wasserträger-Bodenheizungsventilen verwendet.
  • Page 15: Fühlertyp Es können Bodenfühler von verschiedenen Herstellern verwendet werden. Unterstützte Typen sind 2k, 10k, 12,5k, 15k, 33k NTCs. LED-Helligkeit Helligkeit der LED-Anzeige. Anwenderprogramm-Modus AUTO schaltet das Anwenderprogramm ein, OFF schaltet es aus. Drahtloser Temperaturfühler Das Hinzufügen eines kabellosen BLE-Temperaturfühlers ermöglicht den besten Standort für die präzise Temperaturmessung. Um einen drahtlosen Fühler hinzuzufügen, müssen Sie ihn in der eControl App auswählen und die Sensoradresse in die Felder der Netzwerkschlüssel schreiben.
  • Page 16: Einstellungen Empfangen von drahtlosen Eco Steuerungen Ein Thermostat mit einem externen Absenkungsschalter kann mehrere andere Thermostate so steuern, dass sie in den Absenkungsmodus gehen. Diese Funktion erspart dem Benutzer die feste Verdrahtung des Home/Away-Schalters mit vielen Raumfühlern. Um eine Gruppe von Thermostaten zu bilden, müssen Sie die drahtlosen Eco-Steuerungen empfangen, aktivieren und einen frei wählbaren Gruppennamen in das Feld Netzwerkschlüssel schreiben. Netzwerkschlüssel und Bestätigen des Netzwerkschlüssels Der Netzwerkschlüssel wird verwendet, um den Funk-Temperaturfühler oder die Gruppe von Thermostaten zu identifizieren, die die Funk-Öko-Steuerungen empfangen sollen. Beide Felder müssen exakt den gleichen Textstring enthalten und Sie müssen die Einstellungen speichern. Für den Funkfühler können Sie den QR-Code verwenden, der auf der Rückseite des Geräts aufgedruckt ist. Verwenden Sie einfach die Kamerafunktion in der App, um den Code zu lesen, dann akzeptieren und speichern Sie ihn.
  • Page 17: Wochenplan erstellen in der eControl-App. Programmierung des Thermostats zur Senkung der Temperatur in ungenutzten Zeiträumen. Anzeige des Komfort-/Eco-Status mit einer roten/grünen LED. Erforderlichkeit einer korrekten Echtzeit im Thermostat für die Ausführung des Wochenplans. Deaktivierung des Wochenprogramms bei ungültiger Echtzeit mit Warnung durch blinkende LEDs. Aktualisierung der Echtzeit durch die eControl App bei Verbindung mit einem mobilen Gerät. Backup der Echtzeit des Thermostats für bis zu 2 Stunden Stromunterbrechung.
  • Page 18: Das Thermostat zeigt einen fehlerhaften Zustand durch Blinken der LEDs an. Der typischste Fall ist, dass die Echtzeit während einer zu langen Stromunterbrechung verfälscht wird. Dies wird automatisch behoben, indem eine Verbindung mit der eControl-App hergestellt wird. Mögliche Fehlercodes sind: Fehler des Bodenfühlers, Überhitzung, interner Fehler. Kalenderzeit ist nicht gültig. Sie können versuchen, den Fehler zu beheben, indem Sie den Strom ausschalten, um einen Soft-Reset durchzuführen. Ein Hard-Reset kann mit der eControl App erzeugt werden. Bei den Fehlern 1, 2, 3 ist die Heizung dauerhaft ausgeschaltet. Im Fehler 10 ist das Benutzerprogramm deaktiviert.
  • Page 19: Etherma eControl App Sie können die App für mobile Geräte (Android / iOS) verwenden, um die eingestellten Temperaturen zu lesen, Einstellungen vorzunehmen und ein Benutzer-Wochenprogramm zu erstellen. Folgen Sie dem Benutzerhandbuch in der ETHERMA eControl App.
  • Page 20: Page 20
  • Page 21: Bluetooth version 4.2 Power supply: 230 V - 50/60 Hz Maximum load: 16 A (ohmic) Temperature range: +5 °C / +35 °C External temperature lowering: 230 V - 50/60 Hz IP class: IP 21 Standard color: white Built-in room sensor and external floor sensor NTC or wireless BLE sensor
  • Page 22: The Bluetooth trademark and logos are owned by Bluetooth SIG, Inc. Their use is licensed to Taelek Oy. Other trademarks and trade names are the property of their respective owners. Apple, the Apple logo, iPhone, iPad, and iPod touch are trademarks of Apple Inc. registered in the U.S. and other countries. The App Store is a service mark of Apple Inc. Google Play and the Google Play logo are trademarks of Google Inc.
  • Page 23: Installation must be performed by a qualified electrician in compliance with wiring and building codes. Disconnect the power supply of the thermostat from the main network before installation. To loosen the visible parts, pull out the knob and remove the screw. You can now easily pull off the plastic covers. Connect the cables to the terminals of the thermostat.
  • Page 24: Now position the thermostat and fasten it in the wall installation box with 2 screws. Install the cover parts, fasten them with the screw and, finally, press the rotary knob in at the correct position.
  • Page 25: Commissioning After the thermostat is switched on for the first time, the thermostat detects whether a floor sensor is connected or not and performs an appropriate initialization. The following settings are initialized accordingly (floor/air). Name of the thermostat: Mode: Random number Floor / Air Floor temperature min: Floor temperature max: Floor temperature offset (calibration): Air temperature min: Air temperature max: Air temperature offset (calibration):
  • Page 26: PWM minimum is set to 0%. PWM maximum is set to 100%. User program activated eco-temp is displayed. Externally activated eco-temp is displayed. Valve protection status is indicated. Sensor type is 10 k Ohm. LED intensity is set to 70%. Network key is listed as empty. Weekly program settings are available. Use the eControl App to check and change settings.
  • Page 27: Basic operation The thermostat is operated with a rotary knob and an optional lowering switch. Switch off the device by turning the rotary knob to the OFF position. Switch on the device by turning the rotary knob to the ON position. Set the desired temperature with the rotary knob. Use the external 230VAC lowering switch to activate the Eco temperature (19 °C by default). LED indicator lights show its status: Red: ON Red flashing: Heating: ON Green: ON => Comfort temperature reached Green flashing => Eco temperature reached Both LEDs flash => Error
  • Page 28: Additionally with eControl App: - Red flashing indicates Bluetooth connection. - Green flashing confirms saving changes by turning the rotary knob to the OFF state. Extended use allows access to all thermostat data with the free eControl App on Android and iOS devices. The App enables reading logged temperatures, changing settings, and defining a weekly user program. The App can generate email reports. Follow the instructions in the eControl App for use. The thermostat indicates connection with the mobile device with a fast flashing red LED.
  • Page 29: The thermostat has various settings that can be easily adjusted with the eControl app. Remember to save after each change. A free and descriptive name is displayed in the eControl App. The thermostat can measure and set the floor temperature, air temperature, air temperature with a floor limitation, and a heating ratio. In floor mode, the min and max values indicate the active range of the controller. In dual mode, this setting does not affect the controller, but the thermostat keeps the floor temperature between the limits. This function can be used to protect wooden floors or to ensure a warm floor in a room with a fireplace. Note: N/A in PWM and in air mode.
  • Page 30: Floor temperature offset (calibration) is used for adjusting the user's temperature measurement to match the controller set point. The default setting is -3 °C to keep the rotary knob's range realistic. Air temperature min and max sets the active controller range in Air and Dual modes and limits maximum air temperature in other modes. Air temperature offset (calibration) is also used for adjusting the user's temperature measurement to match the controller set point.
  • Page 31: PWM min and max settings indicate the active controller range in PWM mode. In all other modes, the maximum pulse ratio is set by these values. The setting can limit the maximum heating power to comply with installation standards. The cycle time of the PWM is 10 minutes. User program activated eco-temp sets the temperature during all green hours. Externally activated eco-temp defines the desired temperature when a pilot signal is connected. Valve protection turns on the heating for 5 minutes once a week. This setting is used with water carrying floor heating valves. The function prevents the valve from failing in the summer.
  • Page 32: Settings section includes various configurations. Feeding type supports floor sensors from different manufacturers. Supported sensor types are 2k, 10k, 12.5k, 15k, and 33k NTCs. LED brightness controls the brightness of the LED display. User program mode can be switched on or off. Auto mode activates the user program, while off mode deactivates it. Wireless temperature sensor can be added for accurate temperature measurement. To add a wireless sensor, select it in the eControl App. The sensor address must be written in the network key fields.
  • Page 33: Settings Receiving wireless eco controls A thermostat with an external lowering switch can control several other thermostats to go into temperature lowering mode. To form a group of thermostats, you must receive and activate the wireless eco controls and write a freely selectable group name in the network key field. Network key and confirming the network key The network key is used to identify the radio temperature sensor or the group of thermostats that should receive the radio eco-controls. Both fields must contain exactly the same text string and you must save the settings. For the wireless sensor, you can use the QR code printed on the back of the device.
  • Page 34: You can create a 24/7 weekly schedule in the eControl App. The weekly schedule allows you to program the thermostat to lower the temperature during periods when the room is not in use. The Comfort/Eco status is indicated by a red/green LED. The execution of the weekly schedule requires a correct real time in the thermostat. In case of an invalid real time, the weekly program is deactivated and the user is warned by flashing LEDs. Real-time is updated by the eControl App every time the thermostat is connected to a mobile device. The real time of the thermostat has a backup for up to 2 hours of power interruption.
  • Page 35: Error modes indicate a faulty condition by flashing the LEDs. The most typical case is that the real time is distorted during a long power interruption. This issue can be automatically fixed by connecting to the eControl App. Possible error codes include floor sensor error, overheating, internal error, and invalid calendar time. You can attempt to fix the error by turning off the power for a soft reset or using the eControl App for a hard reset. In cases of errors 1, 2, and 3, the heating will be permanently switched off. For error 10, the user program is disabled.
  • Page 36: You can use the App for mobile devices (Android/iOS) to read the set temperatures, make settings and create a weekly user program. Follow the user manual in the ETHERMA eControl App.
  • Page 37: Page 37
  • Page 38: Bluetooth versie 4.2 Stroomvoorziening: 230 V - 50/60 Hz Maximale belasting: 16 A (ohms) Temperatuurbereik: + 5 °C / + 35 °C IP-klasse: IP 21 Standaard kleur: Wit Sensor: ingebouwde ruimtesensor en externe vloersensor NTC of draadloze BLE-sensor
  • Page 39: Het handelsmerk en de logo's van Bluetooth zijn eigendom van Bluetooth SIG, Inc. en het gebruik ervan is in licentie gegeven aan Taelek Oy. Andere handelsmerken en handelsnamen zijn eigendom van hun respectieve eigenaars. Apple, het Apple logo, iPhone, iPad en iPod touch zijn handelsmerken van Apple Inc., geregistreerd in de VS en andere landen. De App Store is een dienstmerk van Apple Inc. Google Play en het Google Play-logo zijn handelsmerken van Google Inc.
  • Page 40: De installatie moet worden uitgevoerd door een gekwalificeerde elektricien in overeenstemming met de bedradings- en bouwvoorschriften. Koppel de voeding van de thermostaat los van het elektriciteitsnet vóór de installatie. Trek om de zichtbare delen (A) en (B) los te maken de knop (D) naar buiten en verwijder de schroef (C). U kunt nu eenvoudig de plastic deksels eraf trekken. Sluit de kabels aan op de klemmen van de thermostaat. Extern contact (indien van toepassing). Stroomaansluiting (nulleider). Aansluiting verwarmingskabel (neutraal). Vloertemperatuursensor NTC. Aansluiting verwarmingskabel (fase).
  • Page 41: Plaats nu de thermostaat en bevestig hem met 2 schroeven in de muur. Monteer de afdekdelen, zet ze vast met de schroef en druk tenslotte de draaiknop in de juiste stand.
  • Page 42: In gebruikname Na de thermostaat voor de eerste keer wordt ingeschakeld, detecteert de thermostaat of er een vloersensor is aangesloten en voert een geschikte initialisatie uit. De volgende instellingen worden geïnitialiseerd: grond/lucht. Thermostaat naam: Modus: Bodem/lucht Bodemtemperatuur min: Bodemtemperatuur max: Lucht temperatuur min: Lucht temperatuur max: Lucht temperatuur offset (kalibratie):
  • Page 43: PWM minimum is 0%. PWM maximum is 100%. Eco-temp activated in user program. Externally activated eco-temp. Valve protection is off. Sensor type is 10 k Ohm. Weekly program settings can be checked and changed using the eControl app. LED intensity is set to 70%. Network key is not specified. Current status is empty.
  • Page 44: Basisbediening De thermostaat wordt bediend met een draaiknop en een optionele terugslagschakelaar. De basiswerking van de thermostaat is eenvoudig. Schakel het apparaat uit door de draaiknop in de stand OFF te draaien. Zet het toestel aan door de draaiknop op ON te draaien. Stel de gewenste temperatuur in met de draaiknop. Gebruik de externe 230VAC terugslagschakelaar om de Eco-temperatuur te activeren (standaard 19 °C). Led-lampjes geven de status aan. Rood betekent ON. Groen betekent dat de comforttemperatuur is bereikt. Groen knipperend geeft een storing aan.
  • Page 45: Speciaal met de eControl-app. Knipperend rood geeft een Bluetooth-verbinding aan. Groen knipperend bevestigt om de wijzigingen op te slaan. U heeft toegang tot alle thermostaatgegevens met de gratis eControl-app. De app werkt op mobiele Android- en iOS-apparaten. Gebruik de app om geregistreerde temperaturen af te lezen en instellingen te wijzigen. Stel een wekelijks gebruikersprogramma op met de app. De app kan ook e-mailrapporten genereren. Volg de instructies in de eControl-app. De thermostaat geeft de verbinding met het mobiele apparaat aan met een snel knipperende rode led.
  • Page 46: De thermostaat heeft verschillende instellingen die eenvoudig kunnen worden aangepast met de eControl-app. Verwarmingsmodus: De thermostaat kan de vloertemperatuur, de luchttemperatuur, de luchttemperatuur met vloerbegrenzing en de verwarmingsverhouding meten en instellen. Vloertemperatuur min. en max.: In de vloermodus geven de min- en max-waarden het actieve bereik van de regelaar aan. In de dubbele modus heeft deze instelling geen effect op de regelaar, maar zal de thermostaat de vloertemperatuur tussen de grenswaarden houden. Deze functie kan worden gebruikt om houten vloeren te beschermen of om een warme vloer te garanderen in een kamer met bijvoorbeeld een open haard. Opmerking: vergeet niet op te slaan na elke wijziging. Een vrije en beschrijvende naam die wordt weergegeven in de eControl-app.
  • Page 47: Vloertemperatuur offset (kalibratie) Als de temperatuurmeting van de gebruiker afwijkt van de nominale waarde van de regelaar, wordt deze instelling gebruikt voor de kalibratie. Luchttemperatuur min en max Deze instelling heeft twee hoofdfuncties. In de Air- en Dual-mode bepaalt het het actieve regelbereik. Luchttemperatuur offset (kalibratie) Als de temperatuurmeting van de gebruiker afwijkt van de nominale waarde van de regelaar, wordt deze instelling gebruikt voor de kalibratie.
  • Page 48: Installing PWM min en max This setting has two main objectives. In PWM mode, the min and max values indicate the active control range. In all other modes, the maximum pulse ratio is set. Note: the setting can be used to limit the maximum heating power to comply with installation standard EN 50599. The cycle time of the PWM is 10 minutes. User program activated eco-temp During all green hours in the user program, the temperature is set to this value. Extern activated eco-temp When 230 VAC (pilot signal) is connected to the set-back terminal, the nominal temperature value is determined by this parameter. Valve protection The valve protection also activates the heating once a week for 5 minutes during the summer. This setting is usually used with floor heating valves of water carriers. The function prevents the valve from failing in the summer.
  • Page 49: Installing sensors can involve various manufacturers. Supported types include 2k, 10k, 12.5k, 15k, and 33k NTCs. Brightness of the LED display can be adjusted. User programming mode can be activated with AUTO and deactivated with OFF. Adding a wireless BLE temperature probe allows for optimal placement for accurate temperature measurement. To add a wireless sensor, select it in the eControl app and enter the sensor address in the network key fields.
  • Page 50: Installing wireless eco-control A thermostat with an external set-back switch can set different other thermostats in the set-back mode. This function saves the user the wiring from the home/away switch to multiple room sensors. To form a group of thermostats, you must receive and activate the wireless eco-controllers and write a freely chosen group name in the network key field. Network key and confirming the network key The network key is used to identify the wireless temperature sensor or the group of thermostats that the wireless eco-controllers must receive. Both fields must contain exactly the same text string, and you must save the settings. For the wireless sensor, you can use the QR code printed on the back of the device. Just use the camera function in the app to read the code, accept it, and save it.
  • Page 51: U kunt een 24/7 weekschema maken in de eControl-app. Met de weekplanning kunt u de thermostaat programmeren om de temperatuur te verlagen tijdens perioden waarin de kamer niet wordt gebruikt. De Comfort-/Eco-status wordt aangegeven door een rood/groene led. De uitvoering van de weekplanning vereist een correcte reële tijd in de thermostaat. In geval van een ongeldige reële tijd wordt het weekprogramma gedeactiveerd en wordt de gebruiker gewaarschuwd door knipperende leds. Real-time wordt bijgewerkt door de eControl-app, telkens wanneer de thermostaat verbonden is met een mobiel apparaat. De real-time van de thermostaat heeft een back-up voor maximaal 2 uur stroomonderbreking.
  • Page 52: De thermostaat geeft een storing aan door de leds te laten knipperen. Het meest typische geval is dat de reële tijd wordt verstoord tijdens een te lange stroomonderbreking. Dit wordt automatisch verholpen door verbinding te maken met de eControl-app. Mogelijke foutcodes zijn: storing in de vloersensor, oververhitting, interne fout, kalendertijd is niet geldig. U kunt proberen de fout te verhelpen door de stroom uit te schakelen om een zachte reset uit te voeren of door een harde reset uit te voeren met de eControl-app. Bij fout 1, 2, 3 is de verwarming permanent uitgeschakeld. Bij fout 10 is het gebruikersprogramma gedeactiveerd.
  • Page 53: You can use the mobile app (Android/iOS) to read the set temperatures, make settings, and create a user weekly program. Follow the user manual in the ETHERMA eControl App.
  • Page 54: Page 54
  • Page 55: Bluetooth version 4.2. Alimentation électrique : 230 V - 50/60 Hz. Charge maximale : 16 A (ohmique). Plage de température : + 5 °C / + 35 °C. Classe IP : IP 21. Couleur standard : blanc. Capteur ambiant intégré et capteur de sol externe NTC ou capteur BLE sans fil.
  • Page 56: La marque et les logos Bluetooth sont la propriété de Bluetooth SIG, Inc. Taelek Oy dispose d'une licence d'utilisation. Les autres marques et noms commerciaux sont la propriété de leurs détenteurs respectifs. Apple, le logo Apple, iPhone, iPad et iPod touch sont des marques d'Apple Inc. déposées aux États-Unis et dans d'autres pays. L'App Store est une marque de service d'Apple Inc. Google Play et le logo Google Play sont des marques commerciales de Google Inc.
  • Page 57: Installation doit être effectuée par un électricien qualifié, conformément à la réglementation en matière de câblage et de construction. Débranchez l'alimentation du thermostat du secteur avant l'installation. Pour desserrer les parties visibles, tirez sur le bouton et retirez la vis. Vous pouvez maintenant retirer facilement les couvercles en plastique. Connectez les câbles aux bornes du thermostat. Contact externe (le cas échéant) pour la connexion électrique (conducteur neutre). Connexion du câble de chauffage (neutre). Capteur de température du sol NTC. Connexion du câble de chauffage (phase). Connexion électrique (phase).
  • Page 58: Positionnez maintenant le thermostat et fixez-le avec 2 vis dans le boîtier mural. Montez les pièces du couvercle, fixez-les avec la vis et enfin, poussez le bouton rotatif à la bonne position.
  • Page 59: Après la première mise sous tension du thermostat, celui-ci détecte si un capteur de sol est connecté ou non et effectue une initialisation appropriée. Les paramètres suivants sont initialisés en conséquence. Nom du thermostat : Mode de numérotation RANDOM Sol / Air Mode : Température min du sol : Température max du sol : Décalage de la température du sol (étalonnage) : Température min de l'air : Température max de l'air : Décalage de la température de l'air (étalonnage) :
  • Page 60: MLI MIN : 0 % MLI MAX : 100 % Température éco du programme utilisateur : 19 °C Température éco de l'extérieur : 19 °C Protection des soupapes : OFF Type de capteur : 10 k Ohm Intensité de la lumière : 70 % Clé de réseau : Vide Programme hebdomadaire : OFF Utilisez l'application eControl pour vérifier et modifier les paramètres.
  • Page 61: Le thermostat est commandé par un bouton rotatif et un interrupteur de réduction en option. Le fonctionnement de base du thermostat est simple. Éteignez l'appareil en tournant le bouton rotatif sur la position OFF. Mettez l'appareil en marche en tournant le bouton rotatif sur la position ON. Réglez la température désirée avec le bouton rotatif. Utilisez le commutateur externe 230VAC pour activer la température éco (par défaut 19 °C). Des voyants lumineux indiquent le statut. Rouge ON indique que la température de confort est atteinte. Rouge clignotant signifie que le chauffage est ON. Vert ON indique que la température éco est atteinte.
  • Page 62: En outre, avec l'application eControl : Rouge clignotant indique la connexion Bluetooth. Vert clignotant confirme l'enregistrement des modifications. Vous pouvez accéder à toutes les données du thermostat avec l'application eControl. L'application fonctionne sur les appareils mobiles Android et iOS. Utilisez l'application pour lire les températures enregistrées et modifier les paramètres. Vous pouvez définir un programme utilisateur hebdomadaire avec l'application. L'application peut également générer des rapports par courriel. Suivez les instructions de l'application eControl. Le thermostat indique la connexion avec l'appareil portable par un voyant rouge clignotant.
  • Page 63: Le thermostat dispose de différents paramètres qui peuvent être facilement ajustés avec l'application eControl. Un nom libre et descriptif s'affiche dans l'application eControl. Le thermostat peut mesurer et régler la température du sol, la température de l'air, la température de l'air avec limitation du sol et le rapport de chauffage. En mode sol, les valeurs min et max indiquent la plage active du contrôleur. En mode double, le réglage n'a aucun effet sur le contrôleur, mais le thermostat maintiendra la température du plancher entre les limites. Cette fonction peut être utilisée pour protéger les sols en bois ou garantir un sol chaud dans une pièce avec une cheminée. Remarque : N/A en mode MLI et air.
  • Page 64: Décalage de la température du sol (étalonnage) Si le relevé de température de l'utilisateur présente une différence par rapport à la valeur voulue du régulateur, ce paramètre est utilisé pour l'étalonnage. La sonde de sol dans la construction du plancher est beaucoup plus chaude que les températures réelles mesurées dans la pièce. Le réglage par défaut est fixé à -3 °C afin que la plage de réglage du bouton rotatif se situe dans la fourchette réaliste de 18 °C à 24 °C. Température min et max de l'air Ce paramètre a deux fonctions principales. En modes air et double, il détermine la plage active du contrôleur. Dans tous les autres modes, elle peut être utilisée comme limite pour la température maximale de l'air. Décalage de la température de l'air (étalonnage) Si le relevé de température de l'utilisateur présente une différence par rapport à la valeur voulue du régulateur, ce paramètre est utilisé pour l'étalonnage.
  • Page 65: Paramètres MLI min et max Ce paramètre a deux objectifs principaux. En mode MLI, les valeurs min et max indiquent la plage active du régulateur. Dans tous les autres modes, c'est le rapport d'impulsion maximal qui est visé. Ce réglage peut être utilisé pour limiter la puissance thermique maximale afin de respecter la norme d'installation EN 50599. La durée du cycle du MLI est de 10 minutes. Température éco du programme utilisateur Pendant toutes les heures vertes du programme utilisateur, la température est réglée sur cette valeur. Température éco de l'extérieur Lorsque le commutateur externe 230 VCA (signal pilote) est connecté à la borne d'entrée de réduction, la valeur à atteindre est définie par ce paramètre. Protection des soupapes La protection des soupapes met également le chauffage en marche une fois par semaine pendant 5 minutes pendant l'été. Ce réglage est généralement utilisé pour les soupapes d'un chauffage par le sol hydraulique. Cette fonction empêche la vanne de tomber en panne en été.
  • Page 66: Type de capteur : Des capteurs au sol de différents fabricants peuvent être utilisés. Les types pris en charge : CTN 2k, 10k, 12.5k, 15k, 33k. Luminosité LED : Luminosité de l'affichage LED. Mode programme utilisateur : AUTO active le programme utilisateur, OFF le désactive. Capteur de température sans fil : L'ajout d'un capteur de température BLE sans fil permet d'obtenir le meilleur emplacement pour une mesure précise de la température. Pour ajouter un capteur sans fil, vous devez le sélectionner dans l'application eControl et inscrire l'adresse du capteur dans les champs de la clé réseau.
  • Page 67: Réception des commandes éco sans fil Un thermostat doté d'un interrupteur de réduction externe peut commander à plusieurs autres thermostats de passer en mode réduction. Cette fonction évite à l'utilisateur de devoir câbler l'interrupteur Home/Away à de nombreux capteurs ambiants. Pour former un groupe de thermostats, vous devez connecter et activer les commandes éco sans fil et inscrire un nom de groupe librement sélectionnable dans le champ clé réseau. Clé de réseau et confirmation de la clé de réseau La clé de réseau est utilisée pour identifier le capteur de température sans fil ou le groupe de thermostats qui doivent recevoir les commandes éco sans fil. Les deux champs doivent contenir exactement la même chaîne de texte et vous devez enregistrer les paramètres. Pour le capteur sans fil, vous pouvez utiliser le code QR imprimé au dos de l'appareil. Il suffit d'utiliser la fonction appareil photo de l'application pour lire le code, puis de l'accepter et de l'enregistrer.
  • Page 68: Programme hebdomadaire Vous pouvez créer un programme hebdomadaire 24/7 dans l'application eControl. Le programme hebdomadaire vous permet de programmer le thermostat pour qu'il abaisse la température pendant les périodes où la pièce n'est pas utilisée. L'état confort/éco est indiqué par un voyant rouge/vert. L'exécution du programme hebdomadaire nécessite un temps réel correct dans le thermostat. En cas de temps réel invalide, le programme hebdomadaire est désactivé et l'utilisateur est averti par des voyants clignotants. Le temps réel est mis à jour par l'application eControl chaque fois que le thermostat est connecté à un appareil mobile. Le temps réel du thermostat dispose d'une sauvegarde pouvant aller jusqu'à 2 heures en cas de coupure de courant.
  • Page 69: Modes d'erreur Le thermostat indique une condition défectueuse en faisant clignoter les voyants. Le cas le plus typique est que le temps réel est déformé lors d'une interruption de courant trop longue. Ce problème est automatiquement résolu en se connectant à l'application eControl. Les codes d'erreur possibles sont erreur du capteur de terre, surchauffe, erreur interne. L'heure du calendrier n'est pas valide. Vous pouvez essayer de corriger l'erreur en coupant l'alimentation pour effectuer une réinitialisation douce. En cas d'erreurs 1, 2, 3, le chauffage est coupé en permanence. En cas d'erreur 10, le programme utilisateur est désactivé.
  • Page 70: Connection à l'application Etherma Vous pouvez utiliser l'application pour appareils mobiles (Android / iOS) pour lire les températures voulues, effectuer des réglages et créer un programme utilisateur hebdomadaire. Suivez le manuel d'utilisation de l'application Etherma eControl.
  • Page 71: Page 71
  • Page 72: Bluetooth version 4.2 Tensione di alimentazione: 230 V - 50/60 Hz Carico massimo: 16 A (ohmico) Gamma di temperatura: + 5 °C / + 35 °C Classe IP: IP 21 Colore standard: bianco Sensore: sensore ambientale incorporato e sensore esterno a pavimento NTC o sensore BLE senza fili
  • Page 73: Il marchio e il logo Bluetooth sono proprietà di Bluetooth SIG, Inc. e il loro uso è concesso in licenza a Taelek Oy. Gli altri marchi e nomi commerciali sono proprietà dei loro rispettivi titolari. Apple, il logo Apple, iPhone, iPad e iPod touch sono marchi di Apple Inc. registrati negli Stati Uniti e in altri paesi. L'App Store è un marchio di servizio di Apple Inc. Google Play e il logo Google Play sono marchi di Google Inc.
  • Page 74: L'installazione deve essere eseguita da un elettricista qualificato, nel rispetto delle prescrizioni riguardanti il cablaggio e i lavori edili. Prima dell'installazione, scollegare dalla rete elettrica l'alimentazione del termostato. Per allentare le parti visibili, estrarre la manopola e rimuovere la vite. Ora si possono togliere facilmente le coperture di plastica. Collegare i cavi ai morsetti del termostato. Contatto esterno (se applicabile). Collegamento elettrico (conduttore neutro). Collegamento del cavo di riscaldamento (Neutro). Sensore di temperatura da pavimento NTC. Collegamento del cavo di riscaldamento (fase).
  • Page 75: Posizionare ora il termostato e fissarlo con 2 viti nella scatola di montaggio a muro. Montare le parti di copertura, fissarle con la vite e infine spingere la manopola nella posizione corretta.
  • Page 76: Dopo la prima accensione del termostato, esso rileva se il sensore da pavimento è collegato o meno ed esegue un'appropriata inizializzazione. Le seguenti impostazioni vengono inizializzate di conseguenza. Nome del termostato: Numero RANDOM. Pavimento / aria. Temperatura del pavimento min. Temperatura del pavimento max. Compensazione della temperatura del pavimento (calibrazione). Temperatura dell'aria min. Temperatura dell'aria max. Compensazione della temperatura dell'aria (calibrazione).
  • Page 77: ECO-TEMP attivato dal programma utente: 19 °C ECO-TEMP attivato esternamente: Protezione della valvola: Tipo di sensore: 19 °C Disattivato Intensità del LED: Chiave di rete: Programma settimanale: Disattivato Usare l'app eControl per controllare e modificare le impostazioni.
  • Page 78: Funzionamento di base Il termostato viene azionato con una manopola girevole e un interruttore di riduzione opzionale. Spegnere il dispositivo girando la manopola sulla posizione OFF. Accendere l'apparecchio girando la manopola sulla posizione ON; impostare con la manopola la temperatura desiderata. Utilizzare l'interruttore di riduzione esterno 230 V CA per attivare la temperatura Eco (impostazione standard 19 °C). Le spie LED mostrano lo stato: Rosso ON (acceso). Rosso lampeggiante => Riscaldamento ON (acceso). Verde ON (acceso) => Raggiunta la temperatura Eco. Verde lampeggiante => Riscaldamento ON (acceso). Entrambi i LED lampeggiano => Errore.
  • Page 79: Inoltre con l'app eControl è possibile accedere a tutti i dati del termostato. L'app funziona su dispositivi mobili Android e iOS. Con l'app si leggono le temperature registrate e si cambiano le impostazioni. Si può definire un programma utente settimanale. L'applicazione può anche generare rapporti informativi via e-mail. Il termostato indica la connessione con il dispositivo mobile tramite un LED rosso a lampeggio veloce. Rosso lampeggiante indica connessione Bluetooth. Verde lampeggiante indica di confermare per salvare le modifiche. È necessario girare brevemente la manopola sullo stato OFF per confermare. Utilizzo esteso dell'app eControl.
  • Page 80: Il termostato dispone di varie impostazioni, che possono essere facilmente regolate con l'app eControl. Un nome libero e descrittivo che viene visualizzato nell'app eControl. Il termostato può misurare e impostare la temperatura del pavimento, la temperatura dell'aria, la temperatura dell'aria con limitazione del pavimento e il rapporto di riscaldamento. Questa impostazione ha due funzioni principali. In modalità pavimento, i valori min e max indicano la gamma attiva del regolatore. In modalità duale questa impostazione non ha effetto sul regolatore, ma il termostato mantiene la temperatura del pavimento entro i valori limite. Questa funzione può essere utilizzata per proteggere i pavimenti in legno oppure per garantire un pavimento caldo in una stanza con un camino. Nota: N/A in PWM e in modalità aria.
  • Page 81: Compensazione della temperatura del pavimento (calibrazione) Se la misurazione della temperatura dell'utente ha una differenza rispetto al valore di riferimento del regolatore, questa impostazione viene utilizzata per la calibrazione. Il sensore da pavimento nella struttura del pavimento è molto più caldo delle temperature effettive misurate nella stanza. L'impostazione predefinita è a -3 °C, affinché il campo di regolazione della manopola girevole sia compreso nella gamma realistica di 18 °C - 24 °C. Temperatura dell'aria min e max Questa impostazione ha due funzioni principali. Nelle modalità aria e duale determina la gamma attiva del regolatore. In tutte le altre modalità può essere usata come limite per la temperatura massima dell'aria. Compensazione della temperatura dell'aria (calibrazione) Se la misurazione della temperatura dell'utente ha una differenza rispetto al valore di riferimento del regolatore, questa impostazione viene utilizzata per la calibrazione.
  • Page 82: Impostazioni PWM min e max indicano la gamma attiva del regolatore. In modalità PWM, viene assicurato il rapporto massimo di impulso. L'impostazione può essere usata per limitare la potenza termica massima. Il tempo di ciclo del PWM è pari a 10 minuti. Durante le ore verdi del programma utente, la temperatura viene impostata su un valore specifico. Il valore di riferimento per la temperatura può essere definito da un parametro esterno. La protezione della valvola accende il riscaldamento una volta alla settimana. Questa impostazione è tipicamente usata con valvole ausiliarie di riscaldamento a pavimento. La funzione evita che la valvola si guasti in estate.
  • Page 83: Tipo di sensore Si possono usare sensori da pavimento di diversi produttori. I tipi supportati sono 2 k, 10 k, 12,5 k, 15 k, 33 k NTC. Luminosità LED Luminosità degli indicatori a LED. Modalità del programma utente AUTO attiva il programma utente, OFF lo disattiva. Sensore di temperatura senza fili L'aggiunta di un sensore di temperatura senza fili BLE permette il posizionamento migliore per una misurazione precisa della temperatura. Per aggiungere un sensore senza fili, bisogna selezionarlo nell'app eControl e scrivere l'indirizzo del sensore nei campi della chiave di rete.
  • Page 84: Ricezione dei controlli eco senza fili Un termostato con un interruttore esterno di riduzione può controllare diversi altri termostati. Questa funzione evita all'utente la necessità di collegare stabilmente con fili l'interruttore Home/Away a molti sensori ambientali. Per creare un gruppo di termostati, è necessario ricevere e attivare i controlli eco senza fili. Chiave di rete e conferma della chiave di rete La chiave di rete è usata per identificare il radiosensore di temperatura o il gruppo di termostati. Entrambi i campi devono contenere esattamente la stessa stringa di testo e le impostazioni devono essere salvate. Per il radiosensore si può utilizzare il codice QR stampato sul retro del dispositivo. Basta usare la funzione fotocamera dell'app per leggere il codice, poi accettarlo e salvarlo.
  • Page 85: Nell'app eControl è possibile impostare un programma settimanale 24/7. Con il programma settimanale si può programmare il termostato in modo che la temperatura venga abbassata durante i periodi di tempo in cui la stanza non viene usata. Lo stato Comfort/Eco è indicato da un LED rosso/verde. L'esecuzione del programma settimanale richiede un tempo reale corretto nel termostato. In caso di tempo reale non valido, il programma settimanale viene disattivato e l'utente viene avvertito da LED lampeggianti. Il tempo reale viene aggiornato dall'app eControl ogni volta che il termostato è collegato a un dispositivo mobile. Il tempo reale del termostato ha un'autonomia fino a 2 ore in caso di interruzione della corrente elettrica.
  • Page 86: Il termostato indica una condizione difettosa tramite il lampeggio dei LED. Il caso più tipico è che il tempo reale si sia alterato durante un'interruzione di corrente troppo lunga. Questo problema si risolve automaticamente con un collegamento all'app eControl. I possibili codici di errore sono: errore del sensore da pavimento, surriscaldamento, errore interno. Il tempo di calendario non è valido. Si può tentare di risolvere l'errore interrompendo l'alimentazione elettrica per eseguire un ripristino morbido. Oppure creando un ripristino forte con l'app eControl. Con gli errori 1, 2, 3 il riscaldamento è spento permanentemente. Nell'errore 10 il programma utente è disattivato.
  • Page 87: È possibile utilizzare l'applicazione per dispositivi mobili (Android / iOS) per leggere le temperature impostate, effettuare impostazioni e creare un programma settimanale dell'utente. Seguire il manuale di istruzioni nell'App ETHERMA eControl.
  • Page 88: Page 88