
SUNTOUCH SunStat 1140-01 R4 Relay Thermostat User Manual
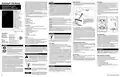


in a residential installation. This equipment generates uses
and can radiate radio frequency energy and, if not installed
and used in accordance with the instructions, may cause
harmful interference to radio communications. However,
there is no guarantee that interference will not occur in a
particular installation. If this equipment does cause harmful
interference to radio or television reception, which can be
determined by turning the equipment off and on, the user
is encouraged to try to correct the interference by one of
the following measures:
Installation
Bottom Plate Work
Power Wiring
•
Drill or chisel hole for routing the power lead conduit at
the bottom plate as indicated. This hole should be directly
below the electrical box.
• Connect the ground wire from the power supply to the
ground wire from the floor heating power lead
• If the electrical box is metal, use a short length of wire
to connect the ground wires to the bonding screw
SunStat® R4 Relay
Installation must be performed by qualified persons, in
accordance with local codes, ANSI/NFPA 70 (NEC Article
424) and CEC Part 1 Section 62 where applicable. Prior
to installation, please consult the local codes in order
to understand what is acceptable. To the extent this
information is not consistent with local codes, the local
codes should be followed. Regardless, electrical wiring is
required from a circuit breaker or other electrical circuit to
the control. It is recommended that an electrician perform
these installation steps. Please be aware local codes may
require this product to be installed by an electrician.
Installation and
Operation Manual
•
Connect the floor heating power lead conductors to the
LOAD 1 and LOAD 2 terminals
•
For 120 VAC connections, connect the power supply
black (L) wire to the L terminal and the white (N) wire
to the N terminal
Power lead
conduit
Features:
• Extends the area
controlled by a
SunStat® ConnectPlus™
thermostat
• Built-in GFCI
• Reorient or relocate the receiving antenna.
•
For 240 VAC connections, connect one of the power
supply wires to the L1 terminal and the other to the L2
terminal
•
•
Increase the separation between the equipment and receiver.
Consult the dealer or an experienced radio/TV technician
for help.
Power
lead
•
Connect the equipment into an outlet on a circuit different
from that to which the receiver is connected.
• Status indicators
• Wired and wireless
connections to
The following cautions must be observed:
Box Contents
• SunStat® R4 Relay
• Screwdriver
NEVER put the system into full operation until the tile or
flooring installer verifies all cement materials are fully cured
(typically two to four weeks after installation).
For retrofit installations, cut
out drywall and chisel out the
bottom plate to route wire to
control.
thermostat
• Up to 10 wired R4
Relays per thermostat
• Up to 6 wireless R4
Relays per thermostat
• Wireless R4 Relays
report energy usage to
thermostat
• Installation manual
• Machine screws (2), 6-32
ALWAYS use insulated copper wires rated for 90°C (194°F)
and 600 V minimum. Do not use aluminum.
ALWAYS wire all circuits as Class 1, electric light & power
circuits.
Items Needed
• Electrical box (must be UL listed and proper size)
- Vertical 1-gang box
ALWAYS mount the thermostat to a grounded electrical box.
ALWAYS seek help if a problem arises. If ever in doubt
about the correct installation procedure, or if the product
appears to be damaged, the factory must be contacted
before proceeding with the installation.
Floor Heating Mat or Cable Power Lead Installation
• The shielded power lead can be installed with or without
electrical conduit (recommended for added protection
against nails or screws), depending on code requirements.
• 3 Year warranty
• Conduit, flexible or rigid (if required, must be UL listed
and proper size)
• Electrical wiring cable (UL listed)
- Minimum 14 AWG to 12 A
- 12 AWG to 15 A
Model# 1140-01, 500980
•
Remove one of the knock-outs in the electrical box to
route the power lead. If electrical conduit is not required
by code, install a wire collar to secure the power leads
where they enter the box. If conduit is required by code,
install 1" (minimum) conduit from the bottom plate up to the
electrical box. For multiple power leads (multiple cables),
install 3" conduit.
Specifications:
• Nail plate
• Hot glue gun and hot glue
Low Voltage Wiring
Power supply
120/240 VAC, 60 Hz, 3 W
To prevent the risk of personal injury and/or
death, make sure power is not applied to the
product until it is fully installed and ready for
final testing. All work must be done with power
turned off to the circuit being worked on.
ConnectPlus and additional R4 Relay connections are
made to the terminal block by inserting the wires into
the openings and tightening the screws. Three holes are
provided for wire access from the back. Wires must be
routed in the channel to the right of the terminal block so
that the display front can be re-attached. Any low voltage
wiring that passes through the inside of the electrical box
must be rated at least 90°C 300 V.
Maximum load
Maximum power
15 A, resistive
Location
1800 W at 120 VAC
3600 W at 240 VAC
• Indoor location only
•
Secure a steel nail plate over the cutout in the bottom
plate to protect the wires against baseboard nails later.
• Do not install where there is electrical interference from
equipment, appliances, or other sources
• Install away from all water sources such as sinks and at
least 4 ft (1.2 m) away from showers and bathtubs
• Consider easy access for wiring
GFCI
Class A (5 mA trip)
To reduce the risk of electric shock, do not connect to a
circuit operating at more than 150 V to ground.
Approvals
UL 943, UL/CSA 60730, UL 991
Ambient conditions 32°F to 86°F (0°C to 30°C)
< 90% RH non-condensing
Communication Rough-in Wiring
• ConnectPlus—connect to RELAY and COM terminals,
matching connections on the ConnectPlus
Power Supply
Pull power supply wiring to the control location.
• Leave about 6 to 8" (15 to 20 cm) of wire for connections.
The ConnectPlus can connect wirelessly to the R4 Relay
(see Operation > Wireless Pairing). If a wired connection
is desired, follow these steps.
•
R4 Relay—connect to RELAY and COM terminals,
matching connections on the other R4 Relay
•
Pull 18 AWG to 24 AWG 2-conductor wire from the
ConnectPlus location to the R4 Relay location
• This wiring should be size 12 or 14 AWG, in compliance
with local code requirements.
The R4 Relay is compatible with the SunStat® ConnectPlus
thermostat. The R4 Relay is only compatible wireless with
the SunStat ConnectPlus. Other models Gen III (Connect,
Command, Core) will need to be wired. Do not connect
to older model SunStat thermostats or relays.
Read this manual BEFORE using this
equipment.
• The wire may be up to 100 ft (30 m) long
•
A qualified person should run a dedicated circuit from
the main circuit breaker panel to the control location. If a
dedicated circuit is not possible, it is acceptable to tap
into an existing circuit. However, there must be enough
capacity to handle the load (amps) of the floor heating
system being installed, and any appliance likely to be
used on the circuit such as a hair dryer or vacuum cleaner.
Failure to read and follow all safety and
use information can result in death,
serious personal injury, property damage,
or damage to the equipment.
•
For additional R4 Relays, pull additional wire between R4
Relay locations
Make sure the wire connections are secure by gently
tugging on them. Otherwise, arcing could occur, causing
dangerous overheating and a possible fire hazard.
• Strip the wire ends to 1⁄8" long
Keep this manual for future reference.
Important Safety Information
R4 Relay Wiring
Before connecting the wires to the back of the relay, detach
the display front from the base.
Finish ConnectPlus™ Installation
• Ensure all connections are secure
This is a safety-alert symbol. The safety-alert
symbol is shown alone or used with a signal word
(DANGER, WARNING, or CAUTION), a pictorial
and/or a safety message to identify hazards.
•
•
Avoid circuits that have ballasted lighting, motors, exhaust
fans, or hot tub pumps to reduce the likelihood of interference.
The antenna used for this radio must be properly installed
and maintained and must provide a separation distance
of at least 7.9 inches (20 cm) from all persons.
• Carefully press the wires into the electrical box
• Do not use the thermostat to push the wires
While holding the base section in one hand, with the other
pull gently up holding the sides of the thermostat towards the
bottom (near RESET button), pivoting away from the base.
The circuit breaker should be rated 20 amps for total circuit
loads up to 15 amps. A 15-amp circuit breaker may be
used for total circuit loads up to 12 amps.
This device complies with Part 15 of the FCC Rules and
with Industry Canada license-exempt RSS standard(s).
Operation is subject to the following two conditions: (1)
this device may not cause harmful interference, and (2) this
device must accept any interference received, including
interference that may cause undesired operation.
When you see this symbol alone or with a signal word on
your equipment or in this manual, be alert to the potential
for death or serious personal injury.
•
Secure the thermostat base to the electrical box with
the screws included
• Do not overtighten
•
A GFCI (ground-fault circuit interrupter) or AFCI (arc-fault
circuit interrupter) type circuit breaker may be used, but
is not necessary.
• Re-attach the display front
- Line up the top edge with the base
This pictorial alerts you to electricity,
electrocution, and shock hazards.
-
Rotate the bottom towards the base and snap it into
position
Changes or modifications not expressly approved by the
party responsible for compliance could void the user’s
authority to operate the equipment.
Make sure 120 VAC is supplied to 120 VAC cables and
240 VAC is supplied to 240 VAC mat or wire. Otherwise,
dangerous overheating and a fire hazard could result.
Do not exceed 15-amps on this control.
This symbol identifies hazards which,
if not avoided, could result in death or
serious injury.
This equipment has been tested and found to comply
with the limits for a Class B digital device, pursuant to
Part 15 of the FCC Rules. These limits are designed to
provide reasonable protection against harmful interference
This symbol identifies practices, actions, or
failure to act, which could result in property
damage or damage to the equipment.
See over for operation details


| General | Details |
|---|---|
| Name | SUNTOUCH SunStat 1140-01 R4 Relay Thermostat User Manual |
| Make | SunTouch |
| Language | English |
| Filetype | PDF (Download) |
| File size | 0.2 MB |
 (1 votes, average: 5.00 out of 5)
 Loading...

SunTouch 113901 SunStat ConnectPlus Thermostat User Manual

SunTouch 500950-SB CommandPlus Touchscreen Programmable Smart Thermostat Instruction Manual

SunTouch SunStat 1140-01 R4 Relay Manual: Questions and Answers
How do I install the SunTouch SunStat 1140-01 R4 Relay in my floor heating system?
Mount the relay to a grounded UL-listed electrical box, route power and communication wiring through conduit, connect power leads to terminals, and secure the thermostat base with included screws.
- Drill or chisel a hole in the bottom plate directly below the electrical box for routing the power lead conduit.
- Remove a knock-out from the electrical box and install 1" minimum conduit from bottom plate to box, or 3" conduit for multiple power leads.
- Secure a steel nail plate over the cutout in the bottom plate to protect wires.
- Connect ground wire from power supply to ground wire from floor heating power lead, and to bonding screw if box is metal.
- Pull 18 to 24 AWG 2-conductor communication wire from ConnectPlus or other R4 Relay to RELAY and COM terminals on this relay. User Manual, p. 1
Can the SunTouch SunStat 1140-01 R4 Relay be installed on a circuit with other appliances?
Yes, if a dedicated circuit isn't available, you may tap into an existing circuit provided it has enough capacity for the floor heating load plus appliances like hair dryers or vacuum cleaners. Avoid circuits with ballasted lighting, motors, exhaust fans, or hot tub pumps. User Manual, p. 1
More SunTouch thermostat manuals

SALUS CONTROLS HTR-RF Smart Home Dial Thermostat User Guide

Honeywell Y460A2003 Creative Series Thermostat Installation Guide
Arcoaire TSTATIIEWF-01 Ion Gray Smart Thermostat Owner’s Manual

Network Thermostat NetX X7 Series Thermostat Instruction Manual

emerald AC Link Smart Thermostat Owner’s Manual

emos P5606OT Programmable Electronic Indoor Thermostat User Manual

EBECO EB-25 Regulator Thermostat Instruction Manual

BEOK CONTROLS TGT70 WIFI Fan Coil Thermostat Owner’s Manual

GENERAL HT250 Digital Room Thermostat User Manual

momit Bevel Smart Thermostat Installation Guide