Home > ideal HEATING > ideal HEATING Halo Combi RF Wireless Boiler Thermostat User Guide

ideal HEATING Halo Combi RF Wireless Boiler Thermostat User Guide

e
GeneralDetails
Nameideal HEATING Halo Combi RF Wireless Boiler Thermostat User Guide
Makeideal HEATING
LanguageEnglish
FiletypePDF (Download)
File size0.35 MB
Download PDF
1 Star2 Stars3 Stars4 Stars5 Stars (1 votes, average: 5.00 out of 5)
Loading...
ideal HEATING HALO LITE Room Thermostat User Guide
ideal HEATING Halo Lite RF Combi Wi-Fi Wireless Boiler Thermostat Instructions

ideal HEATING Halo Combi RF Wireless Boiler Thermostat User Guide
Get the free PDF manual for the ideal HEATING Halo Combi RF Wireless Boiler Thermostat User Guide and access setup steps, usage instructions, and troubleshooting tips. 👉 View online or download now to keep your thermostat running smoothly!

ideal HEATING Halo Combi RF Wireless Boiler Thermostat User Guide Overview
Summary of Contents

  • Page 1: Page 1
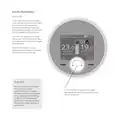
  • Page 2: Welcome to your new Ideal Halo control. This thermostat will help you to control both your heating temperature and the times that your heating is on. Halo is a battery powered, wireless control that uses a protocol called Zigbee to communicate with the Smart Interface that plugs into the boiler. Halo Combi Wi-Fi is a wireless heating control that is connected to the internet. You can download the Halo app on Google Play or the Apple app store. This user guide is applicable to both the Halo Combi RF and Halo Combi Wi-Fi control. Halo Combi RF is a non-connected control (control is via the Halo Combi unit only). The flame symbol is present if the heating is on. The temperature scale in the centre will be orange and red when the heating is on. If you have purchased a Halo Combi RF (non-connected control) you can upgrade this to an internet heating control by downloading the Halo app and following the steps in the app to connect your Halo control. You will be required to pay a connection fee to upgrade to app controlled heating.
  • Page 3: Main features Mode selection You can choose to run your Halo in Auto, Manual or Off mode. Auto: runs your heating to pre-set scheduled times and temperatures. Manual: you control the temperature by manually turning the dial, there are no set schedules. Off: your heating will be set to a low temperature (default 5°C) for frost protection. Move between Auto, Manual and Off modes using the right hand side button. Use the dial to scroll between the different modes and then push the dial or press the right hand button to confirm your selection. Your Halo is designed to provide the perfect balance of comfort and efficiency. It has a feature called Enhanced Load Compensation which balances the temperature in your radiators. By controlling the temperature in your radiators your system is working in the most efficient way for you.
  • Page 4: Main features If you are running a schedule with pre-set times and you want to maintain the current target temperature until 10:00pm, simply press the dial. Push the dial to extend the current heating setting. A pop-up menu will appear for you to select how long you would like to extend the temperature. Turn the dial to select how long you would like to extend your heating for. You could use this feature if you want to keep your heating on for longer than is scheduled. The home screen will now display the override icon above the current temperature. Maybe you’re not going to work today and you want your heating to stay on all morning.
  • Page 5: Main features If you are running a schedule with pre-set times and want to adjust the temperature temporarily, simply turn the dial to your desired temperature. The new temperature will be active until the next scheduled change. The home screen will display the override icon above the current temperature. You could use this feature to boost your heating to a higher temperature for a period of time. Turn the dial to adjust the target temperature temporarily.
  • Page 6: Main features include the ability to turn the dial to move between different days and view the schedule. To edit a day, push the dial or right-hand button when the day is highlighted in light blue. Your Halo will come with a pre-set schedule that includes specific heating times and temperatures. You can alter the schedule by entering the “timed heating schedule” section in the main menu. Push the dial to edit a heating time or temperature when it is highlighted in light blue. You can add an additional heating period by scrolling and pushing on the “Add new heating event” bar, with a maximum of six heating events per day. The copy day feature allows you to copy the schedule from one day to other days. Schedules help to balance comfort and energy efficiency, heating your home to suit your lifestyle. Alter the start and end times of the heating period and the temperature by scrolling and pushing the dial to edit. Push the dial or the right-hand button to save your changes. You can set your weekend schedules differently from your weekday schedules if your routine changes.
  • Page 7: Halo Smart Interface will be installed in the aperture in the front of your Ideal boiler. It will wirelessly communicate with your Halo control and, in the case of an internet connected Halo, your home Wi-Fi. The LED indications can be useful in diagnosing any technical issues that may arise. The Halo Smart Interface has a Failsafe/Override feature which can be used to switch your boiler on if wireless communication is lost. Connectivity LED refers to the connection to the home Wi-Fi network if the Halo is an internet connected control. Boiler LED refers to the activity of the boiler and will be green when the boiler is active. Power LED refers to the power to the Halo Smart Interface. Override button can be used to switch the boiler on if communication fails. Zigbee LED refers to the wireless connection between the Halo control and the Halo Smart Interface. Override LED lights up if override is active.
  • Page 8: Additional features include a holiday mode to temporarily turn off heating while away. The support page provides information for installers or technical experts about the Halo, including software version and wireless signal strength. Child lock can be activated by pressing and holding the left and right buttons simultaneously. The date and time can be adjusted in the menu if they are incorrect. Advanced settings allow installers or technical experts to make adjustments and find information about the Halo. A fault symbol will appear on the home screen if there is a fault with the system. Temperature indicators include high (above 40°C), low (below 0°C), and target temperature settings. Battery status and Zigbee communication indicators are available for monitoring. Optimized start and stop features are active during specific heating conditions. Frost protection is activated to prevent freezing conditions.
  • Page 9: Changing the batteries in your Halo control is necessary when the red, empty battery symbol appears. You will see the battery symbol on the base of the unit, whether it is desk or wall mounted. Use the finger grabs to gently pull the Halo away from the rear housing. Remove all the old batteries and replace them with 4 new AA alkaline batteries. Check the correct battery orientation before positioning the Halo back onto the rear housing. Gently push into place until you feel a positive click. The Halo will go through a short synchronization process while reconnecting with your Halo Smart Interface. The Halo will then return to the home screen after synchronization. A message will indicate that synchronization to the smart interface is in progress.
  • Page 10: Trouble shooting Not communicating with Halo Smart Interface If the fault icon appears in the home screen, it means there is a control or boiler fault. Press the left hand key to view the fault and recommendations. Wireless connection to smart interface lost. If the issue persists, call Ideal customer support. Lost pairing between Halo and Halo Smart Interface. In Failsafe mode, the schedule will still operate, but the output temperature of the boiler will be reduced. You can manually switch your boiler on and off using the Override button on the Smart Interface. When communication is restored, both Failsafe and Override modes are disabled. To re-pair, refer to section E in the Halo Combi installation instructions.
  • Page 11: Warranty information includes a 2-year Ideal Guarantee subject to specific terms and conditions. The guarantee covers mechanical or electrical breakdowns due to defective workmanship or materials. It does not cover defects caused by incorrect installation or costs incurred during delays in fixing reported faults. The guarantee commences from the installation date, or from the date of manufacture without proof of purchase. Installation must be registered within 30 days to activate the guarantee. The guarantee is in addition to consumer rights provided by law. Contact information is provided for reporting mechanical or electrical breakdowns. The product contains free and open source software, with details available in the license document. Normal working times for customer support are specified. The guarantee does not apply to defects caused by deliberate actions, accidents, misuse, or third-party interference.
  • Page 12: Hereby, Ideal Boilers Ltd declares that this device (model 222140 & 222142) is in compliance with Directive 2014/53/EU. The full text of the EU declaration of conformity is available at the following internet address. For more information and FAQs visit the Ideal Heating website. RF frequency: 2405 –2480MHz. Max. RF output power: 10dBm.