
DOOR D4004 Wireless Thermostat User Guide
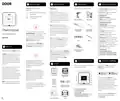


Before You Begin
Before You Begin
Required Items
Get to Know Your Device
B
B
D
E
Please note the following user
The following items may be required:
Please note:
6) Connection status (white if connected,
red if disconnected)
guide icons:
Note 1. The Thermostat requires a C
(Common) wire. It will not function without
a C wire. If the thermostat location does
not have a C wire, a new C wire or a C wire
adapter must be installed. Please contact
us for additional information and technical
support on this topic.
7) ECO (Energy Conservation Operation)
Leaf appears if in ECO mode
Very important information, please
read carefully
8) Cooling set point
Good to know, helpful tips
for installation
9) Temperature up button
10) Status (“Cooling" if in cooling mode,
“Heating" if in heating mode)
Drill with Drill Bits
Multimeter
11) Temperature down button
12) Heating set point
Note 2. This Thermostat works with
13) Schedule status (“RUN" if running on
a schedule, “HOLD" if not running on
a schedule)
common single-stage 24 volt systems such
as forced air, hydronic, heat pump, oil, gas,
and electric. It will not work with millivolt
Medium Phillips
Screwdriver
Small Slotted
Screwdriver
Thermostat
Quick Start Guide 2024
Door.com
14) Fan status (“AUTO" if fan will run on
demand, “ON" if the fan is on)
This device connects to the internet via
DOOR Field Station, and it does not connect
directly to your WiFi or local network.
In order for remote access to the device
from the app, and for full functionality, a
DOOR Field Station is required.
120/240 volt systems such as baseboard
electric heat.
15) Fan button (press to switch the fan
between AUTO and ON mode)
16) Mode button (press to switch between
system modes: AUTO, HEAT, COOL, OFF)
17) Mode status (“AUTO" if cooling or heatin
automatically, “HEAT" if only heating is
running, “COOL" if only cooling is running)
18) Menu button (press to access the
Thermostat's menu system)
Note 3. Your Thermostat connects to the
internet via the Field Station, and it does
not connect directly to your WiFi or local
network. In order for remote access
to the device from the app, and for full
functionality, a DOOR Field Station
is required.
Level
Pencil
This guide assumes the DOOR App has
been installed on your smartphone and
a Field Station is installed and online.
Welcome!
A
20) Menu indicator
Alternative Mounting
Hardware
Thank you for choosing DOOR products!
Note 4. This guide assumes the DOOR App
has been installed on your smartphone, and
a DOOR Field Station is installed and online
(or your location, apartment, condo,
etcetera, is already served by a DOOR
wireless network).
22) Current humidity level (%)
22) Guest Sensor 1 Temperature (SEN1)
23) Guest Sensor 2 Temperature (SEN2)
At DOOR we're reinventing how we live.
Through the foundation of access control
business, we serve the Honest Day’s
Worker—the builder, property manager,
contractor, driver, and in-home service
provider—that keeps the world running
smoothly.
This installation manual assumes the
Thermostat is replacing an existing
thermostat. For new installations please
disregard references to the existing
thermostat.
Get to Know Your Device
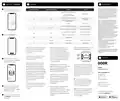
Add Device To DOOR A
E
F
In the Kit
C
If you are new to DOOR, please insta
DOOR App on your phone, if you hav
not already.
Please take a moment to familiarize yourself
with your new Thermostat.
These individuals are the cornerstone
of vital services such as housing,
CAUTION: To prevent personal injury
and damage to property, always remove
power to the thermostat by turning off the
HVAC equipment at the circuit breaker
panel, prior to performing any steps
related to connecting or changing the
thermostat wiring!
transportation, cleaning, dog walking,
and more. They deserve access to
technology and products that empower
them to provide top-notch experiences to
their customers while maximizing the
1
2
3
4
5
6
7
8
Thermostat
Mounting Plate
(“Back Plate")
23
22
21
9
72°F
SEN1
Open the app and tap Sign up for an
account. You will be required to pro
username and a password. Follow th
instructions, to set up a new accoun
78°F
SEN2
10
11
LOCAL
xxxxxx
xxxxxx
xxxxxx
xxxxxx
xxxxxx
xxxxxx
xxxxxx
xxxxxx
DOOR is proud to stand by and innovate
&
12
If you do not feel comfortable working
with electricity or installing the thermostat,
we recommend contacting an installer
for assistance.
for our Honest Day’s Worker every day!
20
19
18
17
16
15
14
13
Wall Screws (4) &
Drywall Anchors (4)
Log in to the app using your new use
and password. If you already have an
account, please ensure you log in using
that one.
Wire Labels
1) Current day of the week
2) Current time of day
3) Current Date
W1
W2
Y1
Y2
C
AUX
G
R
Ensure you install the Field Station within
the app before proceeding to install
the Thermostat.
4) Master Sensor Temperature (Local)
5) Fahrenheit/Celsius indicator
Quick Start Guide
C wire


| General | Details |
|---|---|
| Name | DOOR D4004 Wireless Thermostat User Guide |
| Make | DOOR |
| Language | English |
| Filetype | PDF (Download) |
| File size | 0.5 MB |
 (1 votes, average: 5.00 out of 5)
 Loading...

D4004 Manual: Questions and Answers
How do I install the D4004 thermostat to my HVAC system?
Remove power at the circuit breaker before connecting wiring. The thermostat requires a C (Common) wire to function; if your location lacks one, install a new C wire or adapter.
- Turn off HVAC equipment at the circuit breaker panel.
- Ensure a C wire is present. If not, install a new C wire or C wire adapter.
- Mount the back plate to the wall using the provided wall screws and drywall anchors.
- Connect the system wiring to the corresponding terminals on the back plate.
- Attach the thermostat to the mounted back plate.
- Restore power and open the DOOR App to add the device. User Guide, p. 1
What voltage systems does the D4004 work with?
24 volt single-stage systems only. It will not work with 120/240 volt systems such as baseboard electric heat. User Guide, p. 1
How do I switch the D4004 fan between AUTO and ON mode?
Press the Fan button on the display to toggle between AUTO and ON mode. User Guide, p. 1
Can the D4004 connect directly to my home WiFi network, or does it require additional equipment?
The D4004 connects to the internet via a DOOR Field Station, not directly to WiFi or a local network. A Field Station must be installed and online for remote app access and full functionality. User Guide, p. 1

King K901-B Wifi Programmable Thermostat Instruction Manual

Robertshaw RTC500 WIFI Thermostat Instruction Manual

EPH CONTROLS HRT Room Thermostat User Guide

PNi CT36PRO Smart Thermostat Instruction Manual

BEOK TGP53 Wifi Thermostat User Guide

Engo EFAN-230 Zigbee Smart Thermostat Owner’s Manual

EcoNet UETST800SYS Smart Thermostat User Guide

EcoNet RETST800SYS Smart Thermostat User Guide

PURGEAR STC-8080H Digital Thermostat User Guide

Aprilaire S86WMUPR Programmable Wi-Fi Multi Stage Universal Thermostat Installation Guide