Goldair GEPH213 EcoPanel Heater with Thermostat Instruction Manual


This page is intentionally left blank.
| General | Details |
|---|---|
| Name | Goldair GEPH213 EcoPanel Heater with Thermostat Instruction Manual |
| Make | GOLDAIR |
| Language | English |
| Filetype | PDF (Download) |
| File size | 0.19 MB |
 (1 votes, average: 5.00 out of 5)

Goldair GEPH213 EcoPanel Heater with Thermostat Instruction Manual Overview
Summary of Contents
- Page 1: Page 1
- Page 2: General care and safety guide Your safety is important to us. Please ensure you take note of the instructions and warnings outlined in this manual. Caution: In order to avoid a hazard due to inadvertent resetting of the thermal cut-out, this appliance must not be supplied through an external switching device. This appliance is not intended for use by persons with reduced physical, sensory or mental capabilities unless they are supervised. Children should be supervised to ensure that they do not play with the appliance. If the supply cord is damaged, it must be replaced by the manufacturer or qualified persons to avoid a hazard. You must not cover this heater. Covering this heater presents a fire risk. Do not use this heater in small rooms occupied by persons not capable of leaving the room on their own without supervision. To reduce the risk of fire, keep flammable materials a minimum distance of 1 metre from the air outlet. The heater must not be located immediately below a socket outlet. This appliance is intended for household use only and not for commercial or industrial use.
- Page 3: General care and safety guide Never use the appliance to dry clothes. Always unplug the appliance when not in use. Do not connect the appliance to mains supply until completely assembled and adjusted. Ensure hands are dry before handling the plug or main unit. Do not operate with the cord set coiled up as heat build-up is likely. Carry out regular checks of the supply cord to ensure no damage is evident. Do not operate this appliance with a damaged cord or plug. It is recommended that this heater is plugged directly into the wall socket. Do not remove the plug from the power socket until the appliance has been switched off. Do not place the appliance close to a radiant heat source.
- Page 4: Components include a heater, drill bits, mounting plugs, screws, and screw caps. The heater is provided as one unit. There are two drill bits: one 7mm for plasterboard or wooden walls and one 8mm for masonry walls. Four mounting plugs are included. Four screws are provided along with four screw caps.
- Page 5: Wall mounting & position instructions Always choose a safe location for the heater, keeping in mind the safety precautions outlined below. The heater needs to be mounted so that the power switch is in the top right hand corner. Do not run the power cord behind the heater. Your Goldair EcoPanel Heater should be installed with at least 300mm clearance from the floor and any other surrounding parts including other appliances, side walls, ceilings, shelves and soft furnishings. Wall mounted heaters are only to be mounted on walls that comply with current AS/NZS specifications & building regulations. Make sure the appliance is unplugged and power switches are off.
- Page 6: Wall mounting & position instructions The heater must be mounted on the wall with the power switch in the top right hand position. Do not run power cord behind the heater. Your Goldair EcoPanel Heater should be installed with at least 300mm clearance from the floor and any other surrounding parts. Mark the positions of the four holes to be drilled on the wall. Ensure there is a 300mm clearance on all sides of the heater. Install the panel heater onto the four rail fittings matching the four holes on the heater. Screw the four screw bolts into the plastic rail fittings. Put the caps onto the end of the screw bolts. It is recommended to use some normal glue to stick the caps onto the bolts steadily. To remove the unit from the wall, simply remove the bolt caps, unscrew the bolts with a screwdriver and take the heater down.
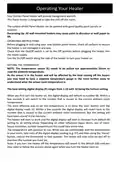
- Page 7: Operating your heater Always choose a safe location for the heater, keeping in mind the safety precautions outlined. Ensure all packaging has been removed from the unit before use. In order to avoid overheating or fire, do not cover the heater. Keep all objects at least 1 metre from the front and 300mm from the sides of the appliance. Do not use this heater with a programmer, separate timer, remote-control system or any other device that switches the heater on automatically. Never leave this heater unattended while in use. Wall mounted heaters are only to be mounted on walls that comply with current AS/NZS specifications and building regulations. Once the heater is in a safe operating position and all switches are in the off position, insert the power plug into the mains outlet. Ensure the power cord is not tight because if pulled it may partially pull the plug from the socket.
- Page 8: Operating your heater provides background warmth. This panel heater is designed to take the chill off the room. The surface of this panel heater can be painted with good quality paint. Check all surfaces to ensure the heater is not damaged before use. Ensure the On/Off switch is set to the Off position before plugging in. Use the On/Off switch to turn the heater on. The temperature sensor needs to be pulled out approximately 35mm to read the ambient temperature. The heat setting digital display ranges from 1-10, with 10 being the hottest setting. When first turned on, the digital display defaults to number 06. Take note of the digital display reading when comfortable, and adjust the thermostat accordingly.
- Page 9: Operating your heater Safety devices This appliance has two protection devices: resettable thermal link and thermal fuse. The resettable thermal link will automatically disconnect the power at a pre-set overheat temperature and will reset after cooling down. The thermal fuse disconnects the appliance permanently in case of overheating. The light in the power switch will remain on even after the safety devices have activated. Caution: The heater generates heat during use, and proper precautions must be taken to prevent burns, scalds, fires, or other damage. Care and cleaning The heater requires regular cleaning to ensure trouble-free operation. Unplug the heater from the mains supply before cleaning and allow it to cool down completely. Remove deposits of dust or fluff in the appliance regularly to prevent overheating. Use a damp cloth to wipe the exterior of the heater and ensure it is dry before plugging back in. Proof of purchase To receive warranty, retain receipt as proof of purchase. Technical specification Model No: GEPH213, Supply: 240VAC 50Hz, Wattage: 425W.
- Page 10: Three year warranty Your product is warranted against faults and manufacture when used in normal domestic use for a period of three years. In non-domestic use, Goldair limits the voluntary warranty to three months. Goldair undertakes to repair or replace this product at no charge if found to be defective due to a manufacturing fault during the warranty period. This warranty excludes damage caused by misuse, neglect, shipping accident, incorrect installation, or work carried out by anyone other than a qualified electrical service technician. Please keep your receipt as this will help verify your warranty. The benefits given to you by this warranty are in addition to other rights and remedies available to you under law. In Australia, our goods come with guarantees that cannot be excluded under the Australian Consumer Law. In New Zealand, this warranty is additional to the conditions and guarantees of the Consumers Guarantee Act (1993).

Stelpro Uniwatt UTE202NP NON PROGRAMMABLE ELECTRONIC THERMOSTAT

HERSCHEL 12860 T-BT Battery Powered Wireless Thermostat Instruction Manual

GEYER GS-THWF Wifi Water Heating Thermostat Owner’s Manual

GTS TR8100V WiFi Pairing Thermostat Instruction Manual

Honeywell Home PRO TH1000E1 Programmable Thermostat Installation Guide

GENERAL SENNA 300 Smart Room Thermostat User Manual

HEATIT 54 304 59 DIN Smart Thermostat Installation Guide

vtech T961NN50 Universal Wired Thermostat User Guide

GENERAL LIFE 270 Wireless Room Thermostat User Manual

Honeywell T8775 Digital Round Thermostat Instructions